Apple and Rosehip Jelly

If you were listening in to BBC Radio Leicester this afternoon, here’s the recipe I mentioned for Apple and Rosehip Jelly. My mother-in-law Joan used to make a crab apple jelly similar to this one. Bags of fruit would be tied to the kitchen cupboard doors to drip overnight. Fruit jams and jellies would make a very tasty winter treat, spread on warm buttered toast, or on cakes and scones. This recipe is adapted from a Women’s Institute recipe dating back to 1943. The WI members became famous for making jams and jellies as part of their war effort. Rosehip syrup was a particularly valuable source of vitamin C for children. When my brothers and I were young in the 1960s and 70s, we had a spoon of syrup and a spoon of malt before setting off for school. We also had a spoon of caster oil, which wasn’t quite as welcome!

Ingredients:

makes about 6 jam jars

2kg eating apples

1 kg rosehips

Approx 2.3kg caster sugar -depending on amount of liquid produced.

1 sachet of pectin

Method:

Put a tea plate in the freezer for checking the setting point later.

Wash and core the apples. No need to peel them.

Place apples in a preserving pan and add enough cold water to just cover them.

Simmer until soft.

Roughly chop the rosehips. I used a food processor.

Add rosehips to the apples and cook for a further 15 minutes.

Spoon the pulp into a muslin or jelly bag suspended over a bowl. Don’t allow the bag to touch the bowl.

Start to spoon out the juice straight away so that the bowl doesn’t overspill. Leave the bag overnight to drip.

Measure out the liquid.

For every 600ml add 500g sugar. Return the liquid to the preserving pan.

Heat gently to dissolve the sugar.

Bring to the boil and boil rapidly until the setting point has been reached.

Check using the tea plate and a teaspoon of the jelly. A setting point is reached when the jelly wrinkles when pushed by your finger.

Ladle into clean sterilised jam jars and add labels.

Rosehips should be gathered at the end of October when ripe, but before being damaged by frosts. They are classed as a ‘superfood’ due to their antioxidant properties.

I whizzed the rosehips in a food processor, or you could roughly chop them by hand.

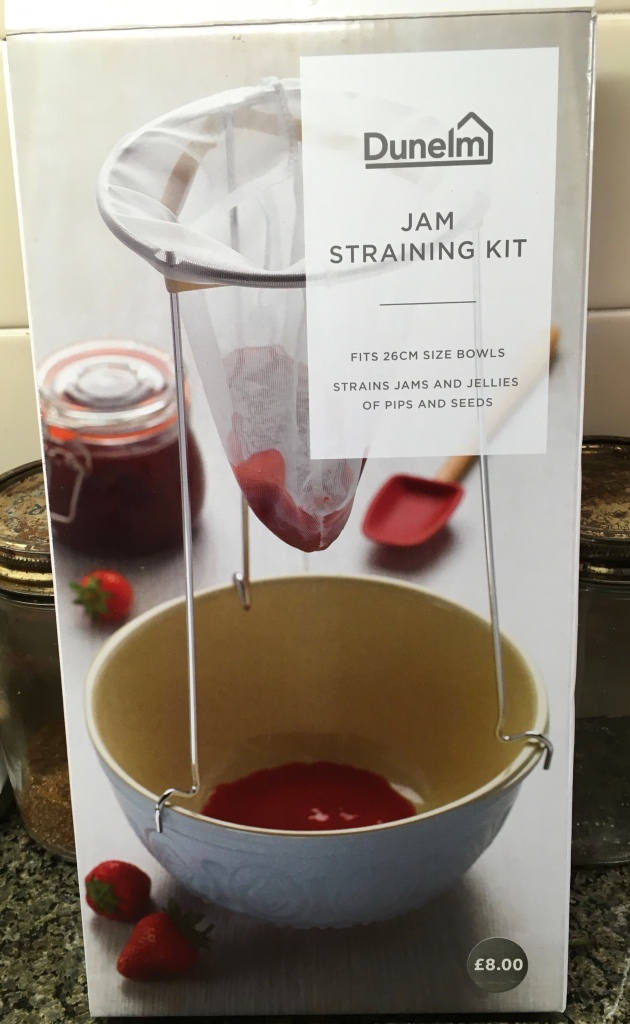
This is the jam and jelly straining kit I bought from Dunelm. The metal frame unscrews for winter storage. The bag is adequate for this amount of pulp. I set it up over a Pyrex pudding bowl, but I did start to scoop out the juice as soon as it started filtering through as I was worried the bowl might overflow overnight. The netting bag is washable and reusable, but you can also buy replacements.

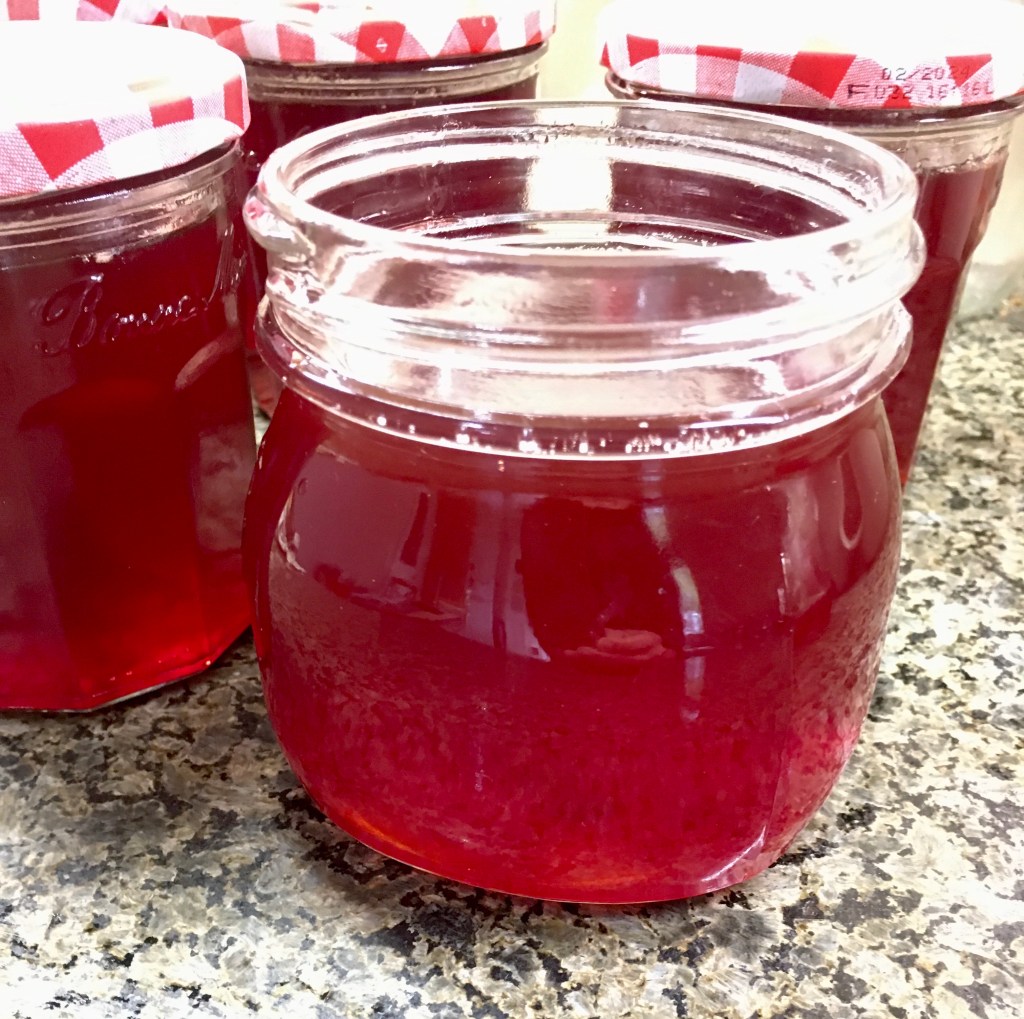
And this is the finished apple and rosehip jelly. It doesn’t taste much of apples, but does taste of roses and summer! Absolutely delicious!

You can listen in to gardening on the radio at 3.10pm every Wednesday. Just ask your smart speaker to tune in to BBC radio Leicester. Or you can listen again on the i-player.

Today we also talked about starting paperwhite narcissi for Christmas.

Here’s some I grew for a January flower wreath using a jam jar covered in moss attached to a willow heart frame. We are having to find all sort of ways to get round not using plastic florists’ foam. My hidden jam jar works really well.

We also talked about growing amaryllis for Christmas presents.

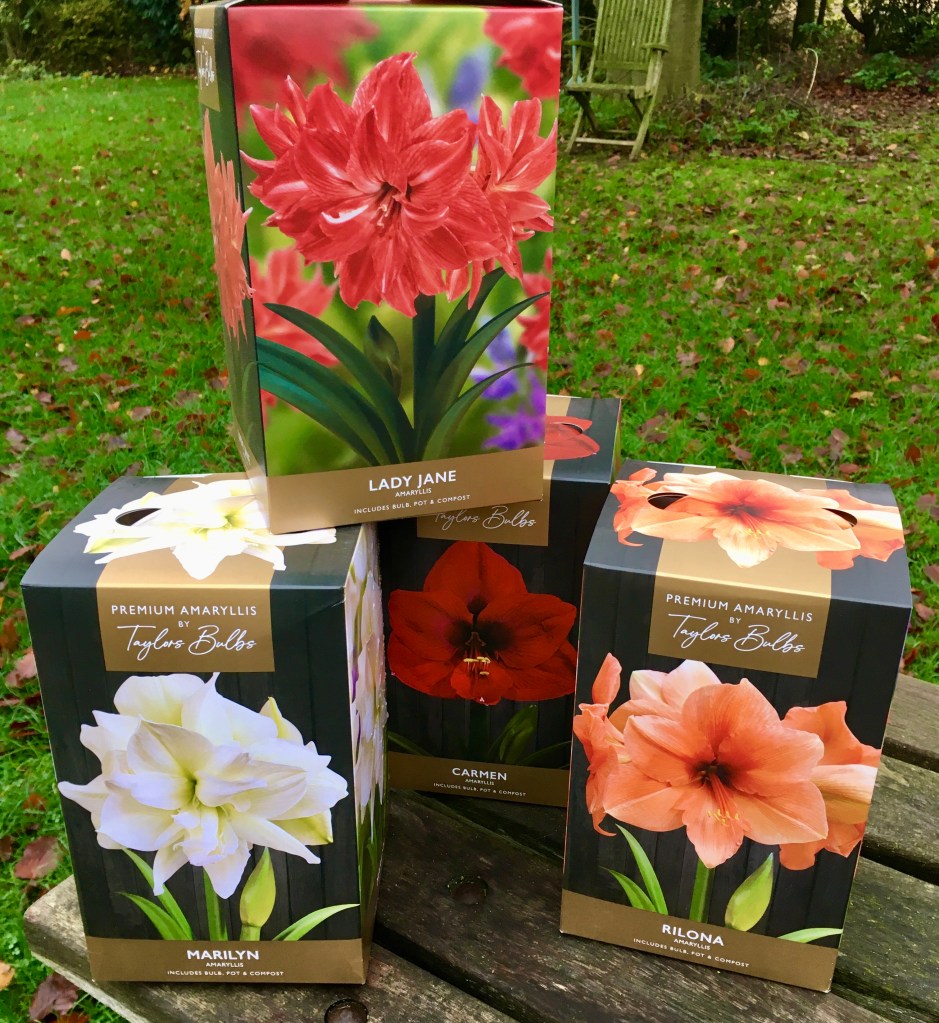
Here’s some I grew last winter. I can highly recommend Taylors Bulbs as the size and quality is first class. Bulbs should flower within 6-8 weeks from planting and make a lovely home-grown present.

Ben Jackson and I talked about picking the last dahlias. This one is Eveline from Mr Fothergill’s.

This one is David Howard. I’ll be leaving mine in the ground again this year, covered in a foot of of dried leaves and a cloche to keep them as dry as possible and to protect them from the frost. If you have wet heavy clay soil, it’s best to dig them up and put them in a frost free place such as a garden shed or garage. Thanks for listening in and reading the blog. Have you decided what you are doing about your dahlias yet? We’ve had three night frosts this week, so I’m covering mine already.

Recipes from Garden News Magazine this week

Updating you on my potato-growing plans:

Seed potatoes arrived promptly through the post in a paper sack from Potato House.
These are the varieties I selected. Some for containers and some for the open ground.
The potatoes were in a good condition, fresh, solid, with no mould, and an ideal size for chitting.
I set them out in a seed tray with paper strips between the varieties and labels at one end.

Seed potatoes have been placed in a bright, cool, frost free place to chit. Chitting just means to start them into growth. Small shoots will grow from the eyes, which have been placed upwards. When the shoots are 2cm the potatoes will be planted in containers on top of 20cm of compost. As the leaves grow, handfuls of compost will be added to cover them, until the leaves pop out of the top of the containers. I’ll water sparingly until the containers are half full of compost – by which time the potatoes will be growing strongly. Too much water in the early stages causes the potatoes to rot. When the leaves emerge out of the top, watering will be stepped up to make the tubers grow.

I’ll be harvesting these in about 100 days for earlies, and 120 days for main crop potatoes.

There’s nothing like the taste of newly-harvested potatoes, fresh from the garden. It’s a money-saving project, but also grown for the flavour. Only a few varieties are usually offered in the shops, and yet there are hundreds of varieties to choose from to grow.
Some potatoes I grew last year, showing the shoots starting to grow. Usually three shoots are allowed to develop. The rest are rubbed off so they produce larger -sized potatoes.
Leek and potato pies.

Here’s the link for the recipe: https://bramblegarden.com/2019/01/17/leek-and-potato-pies-veg-from-the-garden/

Potato and cashew nut savoury bakes
Love these two-tone white and pink potatoes.
Charlotte potatoes, just washed and ready to steam. No need to scrape new potatoes. The skin contains lots of vitamins and minerals.


I love the colours of Violetta and Shetland Black.
Before Christmas, I bought some ready-to-eat potatoes from Potato House UK as a try-before-you-grow scheme. It was fabulous to try different varieties before committing time and space to growing them at home.

I wrote about it here: https://bramblegarden.com/2022/12/14/try-before-you-grow-potatoes/

What plans have you got for growing potatoes this summer? It’s exciting to think about spring and summer harvests after such a long, cold grey winter isn’t it.

Potato House have kindly given me a code to offer to readers of bramblegarden. This is an offer independent from my blog, and Potato House will be responsible for all discussions regarding orders.

Amy from Potato House writes: Here is a 10% code for your readers for seed potatoes for orders over £15

BRAMBLE
T&C 10% Voucher valid till 31/4/23 for SEED orders over £15, includes all 6 tuber, 1 kg nets. Excludes 10kg, 25kg sacks, gift cards, patio sets, grow bags and our To Eat range. Coupon cannot be used in conjunction with other coupons. One discount per email. Usual discounts still apply. Usual web T&C apply.

Summer Lemon Biscuits Recipe

If you were listening in to the radio for Garden Hour, these are the biscuits I took in for the team. I made the lemon and white chocolate version yesterday. Today I made them with dark chocolate. Delicious!

Recipes featured here use produce from my garden. I’m always looking for ways to use up my citrus fruit from the greenhouse. This is a favourite recipe. It only takes ten minutes to make. Perfect if friends turn up unexpected and you want to give them a quick home-made treat.

Ingredients

180g biscuits ( I’ve used home-made Scottish shortbread, but you can use any biscuits. Custard creams are delicious, as are chocolate bourbons.)

3 tbsp lemon curd. Home-made (recipe below) is totally delicious, but any will do.

100g best quality dark chocolate, or white chocolate.

Few bits of fine lemon peel for decoration

Recipe

Crush the biscuits in a food processor, or in a plastic bag, bashing them with a rolling pin.

Add the lemon curd and mix to combine.

Use a melon baller or a 7.5ml measuring scoop to form balls. Press them slightly while in the scoop so they hold together.

Tap out on to a tray covered with foil. Place in a fridge.

Melt the chocolate in a Pyrex bowl suspended over a pan of boiling water. Ensure the water doesn’t get into the chocolate mixture. Or melt in a microwave in several 10 second bursts. Take care not to over cook.

Drizzle the chocolate over the biscuits in long lines. Add some fine lemon peel to decorate. Return to the fridge to set.

Will keep in the fridge for 3 days. But they won’t last that long. They are truly delicious!

Lemon Curd Recipe

Makes 1.15kg

Ingredients

6-8 large lemons (unwaxed, organic, or home-grown)

225g butter

575g caster sugar

5 large eggs

Recipe

Grate the zest from the lemons on the finest setting. Squeeze the juice and strain into a jug. You will need 300ml of juice.

Cut the butter into small pieces and put into a glass bowl along with the sugar, zest and juice. Set over a pan of hot water and stir until the sugar has dissolved. The bottom of the bowl must not touch the water which must simmer and not boil.

Lightly beat the eggs in a bowl but don’t whisk them. Strain the eggs through a sieve into the lemon mixture. Simmer on a low heat, sitting continuously until the mixture thickens. Will take about 20 minutes. Do not allow to boil or it will curdle.

Pour into warmed sterilised jars. (pop the washed jars in an oven for 10 minutes until sterilised).

Place wax disk over the lemon curd ( wax -side down). Smooth down the disk to remove any air.

Cover with dampened cellophane circles, label and store in the fridge.

Makes a lovely filling for cakes and scones.

Can also be orange, lime or grapefruit curd.

Enjoy!