Rhubarb is one of my favourite crops from the garden. It takes virtually no maintenance, comes up every year without any fuss and provides food from early spring to summer, for a one off payment for the plant.
To be honest, my rhubarb plant didn’t cost a penny. It was a division from my father-in-law’s garden. I’ve had it for at least 10 years, and he grew it in his garden from the moment he bought the house in the late 1950s. I love money-saving crops and ones that are easy to grow.
My rhubarb is growing in a semi-shaded spot under a hawthorn hedge. The secret to its success is the compost bins sited right next to it. All the nutrient-rich liquid feed seeps out from the bottom of the compost bins straight into my rhubarb patch. Rhubarb is a hungry plant and usually growers plant it on top of a pile of manure. I’ve not used manure here for many years as it brings in so many weed seeds. But my plants are healthy and thriving thanks to my home-made compost and liquid feed.
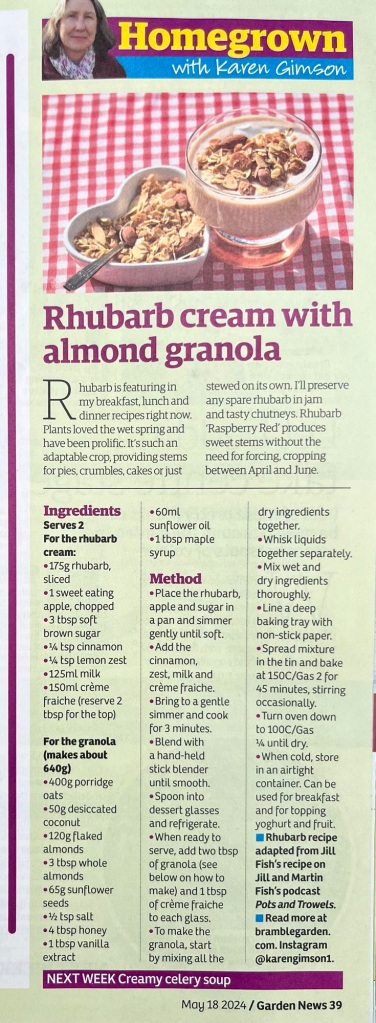
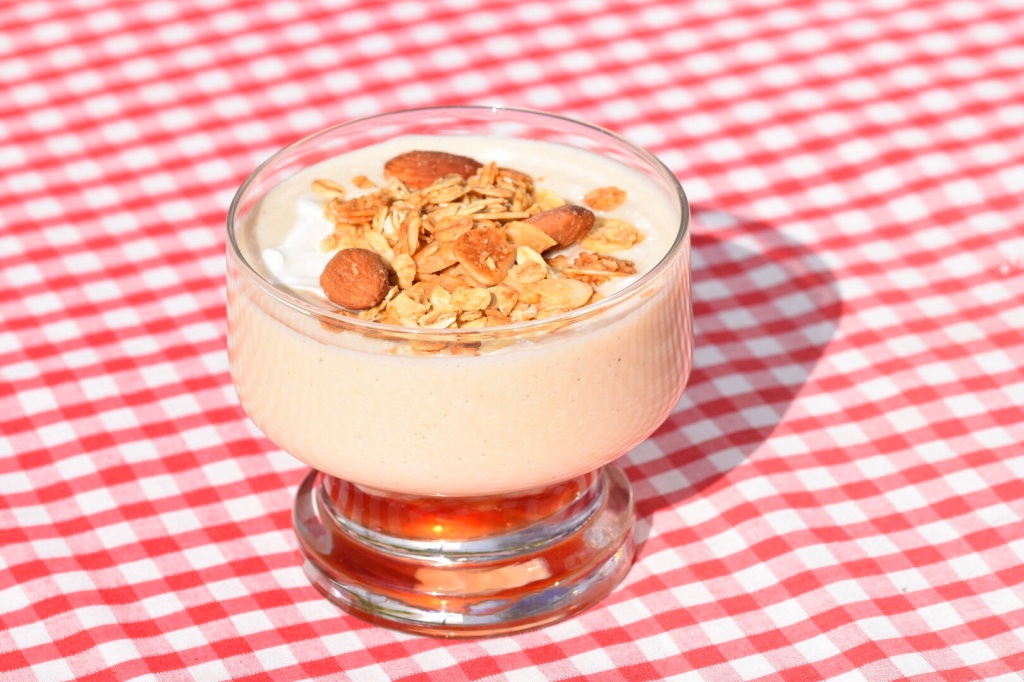
Let me know if you try out my recipe. The granola is especially useful as it can be used as a breakfast cereal, or sprinkled over fruit and cream or yoghurt, or even ice cream to add crunch, flavour and nutrition. The idea for the rhubarb cream came from Jill Fish, as mentioned in the magazine. Jill’s recipe used only rhubarb, but I had used most of my available crop and just had a small amount, so added an apple, and it worked perfectly!
Many thanks for reading my blog. Have a great gardening weekend!
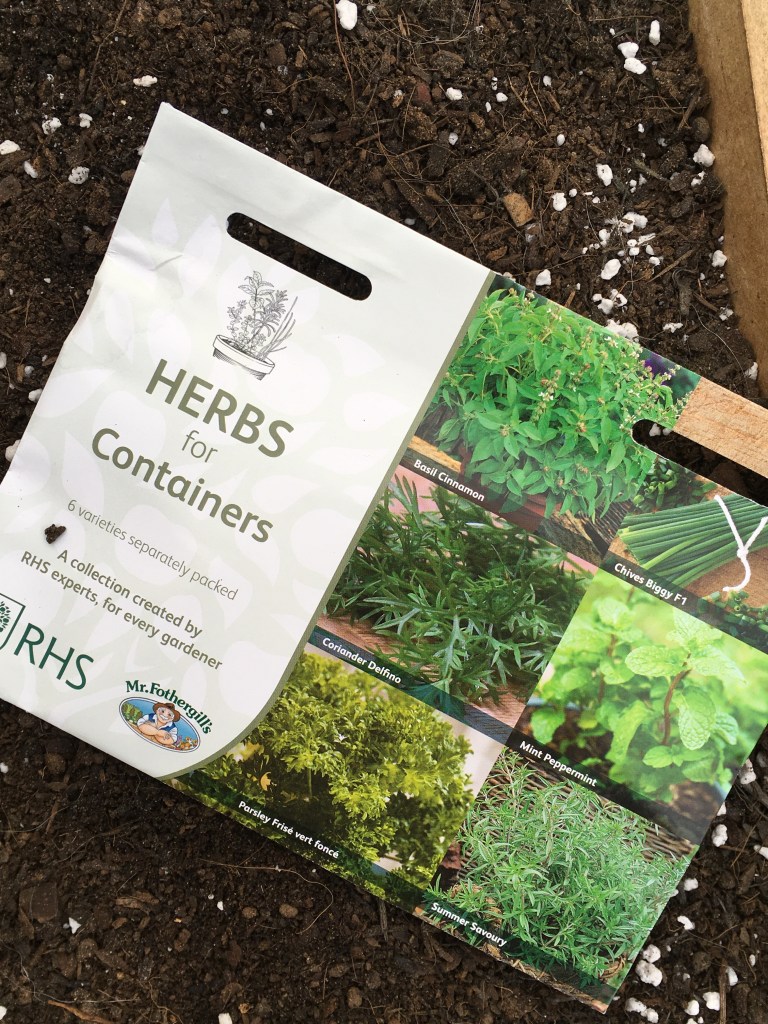
I like these multi-packs of seeds as they save money. As well as growing the chives and parsley, I can highly recommend the cinnamon basil which smells and tastes divine. Are you growing herbs from seed this spring? It’s an economical way to grow them and you don’t have to sow the whole packet at once. I often save half a packet for the next year.
These windowsill seed and box kits are recommended. I wrote about them here:
Let me know if you have a go at making these bread rolls. They are such a lovely accompaniment to spring vegetable soup. I’m making cream of celery soup today, using celery grown over winter in the unheated poly tunnel. Tastes nothing like the bland celery you buy from the shops. It’s so sweet and crunchy!
This week’s Garden News Magazine recipe using fruit grown in my garden. Strawberries don’t thaw out well after freezing. They tend to go soft. But frozen fruit is perfect for adding to pies, cakes and puddings. In this instance, I’ve added strawberries to some jam and filled a light sponge cake. Then I’ve added lashings of whipped double cream. I must admit, I had no complaints from the family! 😃
I slice and freeze strawberries in flat plastic trays before bagging them up and using them over the winter. Shop-bought strawberries seem to have no taste, but sun-ripened home-grown fruit is delicious- and free!
You can buy strawberry plants now from the garden centres or online. You can also buy bare-rooted stock which has been cold-treated to produce fruit this year. Strawberries need winter cold to prompt them to flower and fruit, so don’t put them in a greenhouse or other protected space indoors over winter. But you can bring them indoors now to get an earlier crop, if you grow them in containers.
I’ve had the best success growing them in window boxes and lifting them into the greenhouse in early spring. Growing in containers helps defeat the slugs which tend to be a nuisance in wet weather. And also it’s easier to cover them in fine netting to protect from birds. Take care not to use coarse netting, which catches birds’ feet. It can be difficult and distressing trying to untangle a delicate bird from netting. I tend to use fleece now, or micro mesh insect proof netting which has no holes to trap feet.
You’ll notice I mention David Hurrion’s new book. A review is to follow. Very highly recommended. It’s the only guide you’ll ever need for growing anything in raised beds. A very well-written and comprehensive book. Another Dorling Kindersley success story. DK spots all the best writers and is giving us a field day with new titles this year. And David Hurrion is a very well respected horticulturists, teacher and writer. Someone I have no hesitation in recommending for his book and also courses. I note he will be coming to Barnsdale Gardens this year to teach pruning techniques and caring for fruit trees and soft fruit (16 November) and gardening for beginners and plant propagation (3rd August).
Thank you for reading my blog. You are amongst 1,000 readers a week! I’m very grateful for all your support. Come back and read more reviews, and for recipes, and photos of what I’m growing here at bramblegarden. Please also sign up for notifications for future posts.
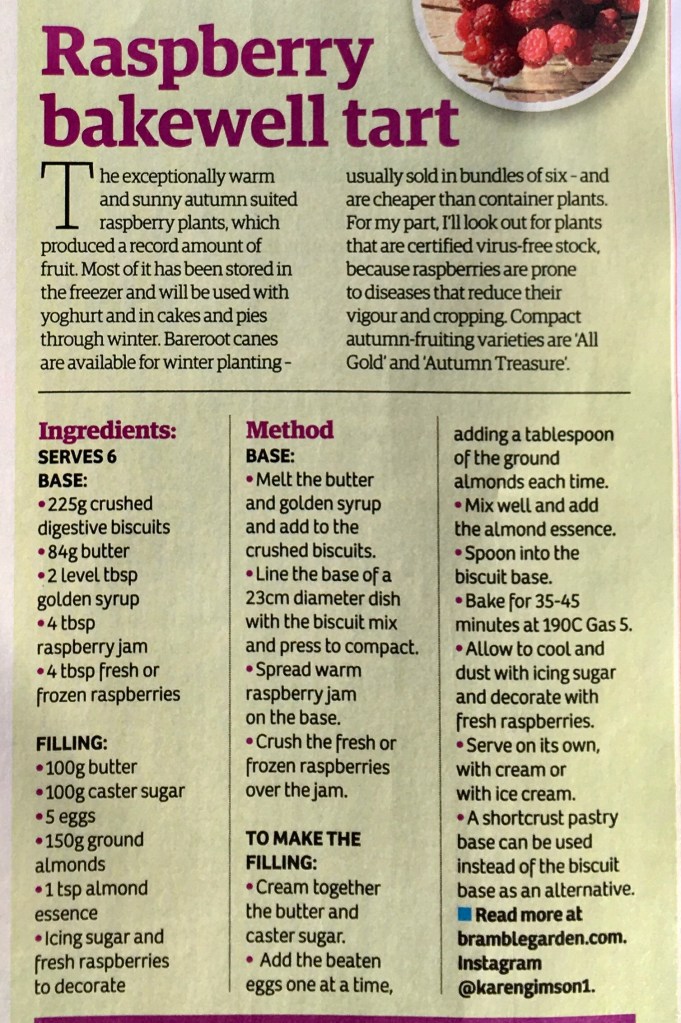
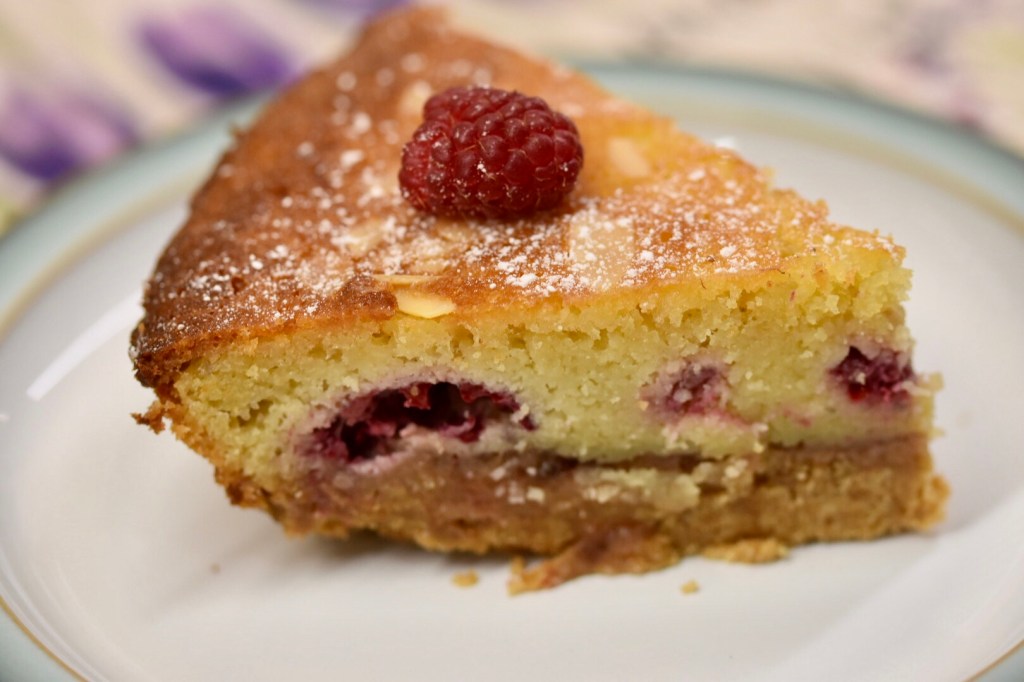
This delicious recipe came from a friend. I’ve been making this dish for 30 years. It’s a family favourite because it’s so quick and easy to make. No messing about rolling out pastry. The biscuit mix gives a lovely crunchy base to the fresh raspberries. The topping is the usual ground almond cake mix. And it freezes well too! So I always have a few slices to give to friends and family when they visit. Happy Gardening- and cooking everyone!
Plenty of raspberries filling the freezer this autumn.
Freeze in portions so you only have to defrost what you need. Autumn Bliss
If you were listening in to BBC Radio Leicester this afternoon, here’s the recipe I mentioned for Apple and Rosehip Jelly. My mother-in-law Joan used to make a crab apple jelly similar to this one. Bags of fruit would be tied to the kitchen cupboard doors to drip overnight. Fruit jams and jellies would make a very tasty winter treat, spread on warm buttered toast, or on cakes and scones. This recipe is adapted from a Women’s Institute recipe dating back to 1943. The WI members became famous for making jams and jellies as part of their war effort. Rosehip syrup was a particularly valuable source of vitamin C for children. When my brothers and I were young in the 1960s and 70s, we had a spoon of syrup and a spoon of malt before setting off for school. We also had a spoon of caster oil, which wasn’t quite as welcome!
Ingredients:
makes about 6 jam jars
2kg eating apples
1 kg rosehips
Approx 2.3kg caster sugar -depending on amount of liquid produced.
1 sachet of pectin
Method:
Put a tea plate in the freezer for checking the setting point later.
Wash and core the apples. No need to peel them.
Place apples in a preserving pan and add enough cold water to just cover them.
Simmer until soft.
Roughly chop the rosehips. I used a food processor.
Add rosehips to the apples and cook for a further 15 minutes.
Spoon the pulp into a muslin or jelly bag suspended over a bowl. Don’t allow the bag to touch the bowl.
Start to spoon out the juice straight away so that the bowl doesn’t overspill. Leave the bag overnight to drip.
Measure out the liquid.
For every 600ml add 500g sugar. Return the liquid to the preserving pan.
Heat gently to dissolve the sugar.
Bring to the boil and boil rapidly until the setting point has been reached.
Check using the tea plate and a teaspoon of the jelly. A setting point is reached when the jelly wrinkles when pushed by your finger.
Ladle into clean sterilised jam jars and add labels.
Rosehips should be gathered at the end of October when ripe, but before being damaged by frosts. They are classed as a ‘superfood’ due to their antioxidant properties.
I whizzed the rosehips in a food processor, or you could roughly chop them by hand.
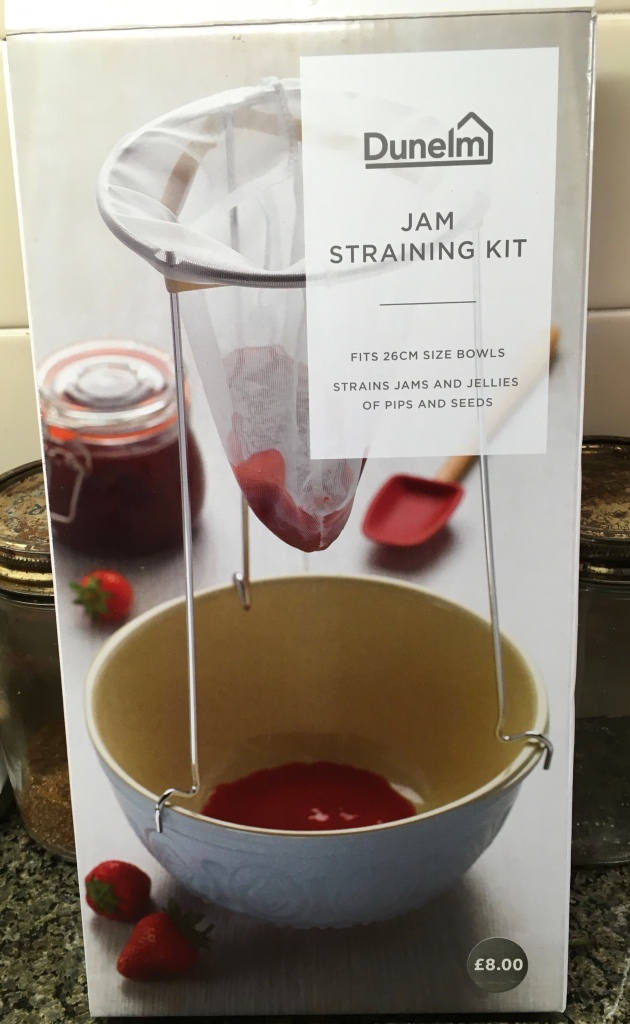
This is the jam and jelly straining kit I bought from Dunelm. The metal frame unscrews for winter storage. The bag is adequate for this amount of pulp. I set it up over a Pyrex pudding bowl, but I did start to scoop out the juice as soon as it started filtering through as I was worried the bowl might overflow overnight. The netting bag is washable and reusable, but you can also buy replacements.
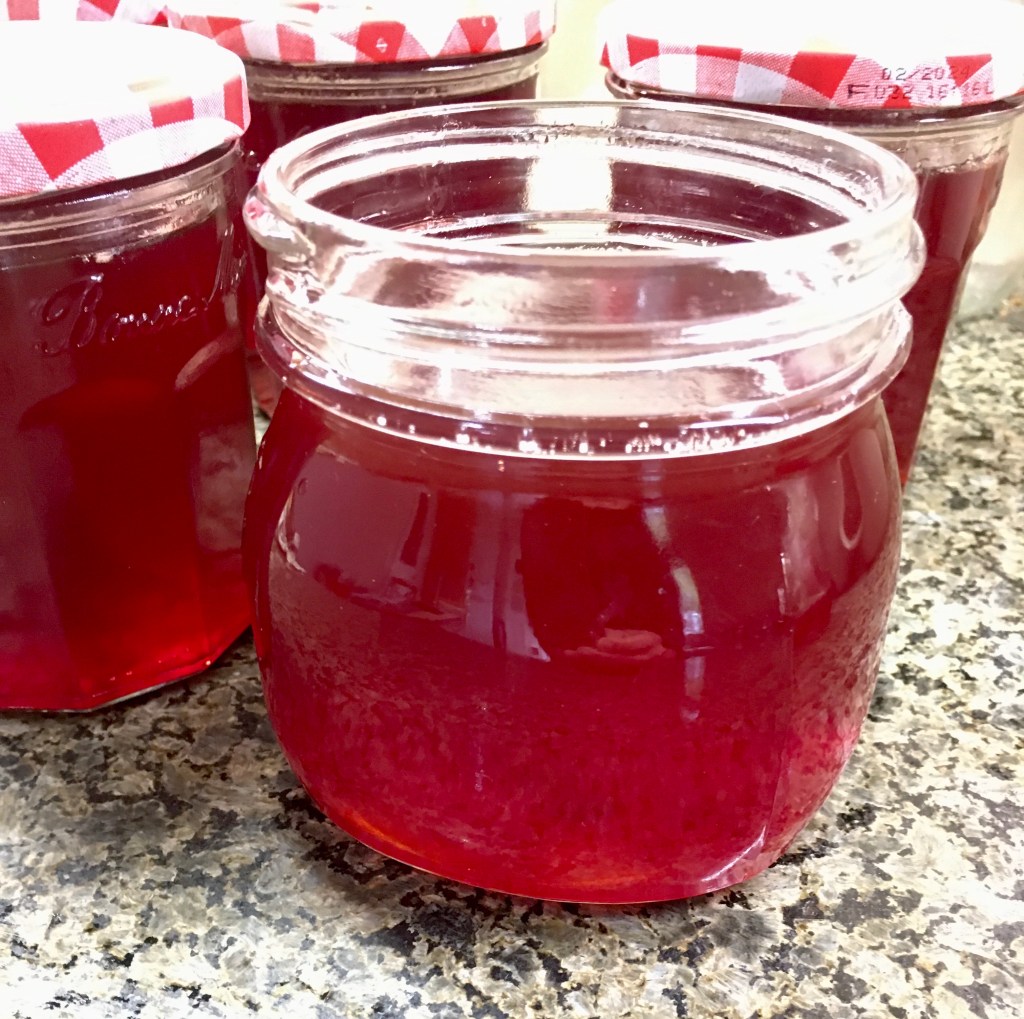
And this is the finished apple and rosehip jelly. It doesn’t taste much of apples, but does taste of roses and summer! Absolutely delicious!
You can listen in to gardening on the radio at 3.10pm every Wednesday. Just ask your smart speaker to tune in to BBC radio Leicester. Or you can listen again on the i-player.
Today we also talked about starting paperwhite narcissi for Christmas.
Here’s some I grew for a January flower wreath using a jam jar covered in moss attached to a willow heart frame. We are having to find all sort of ways to get round not using plastic florists’ foam. My hidden jam jar works really well.
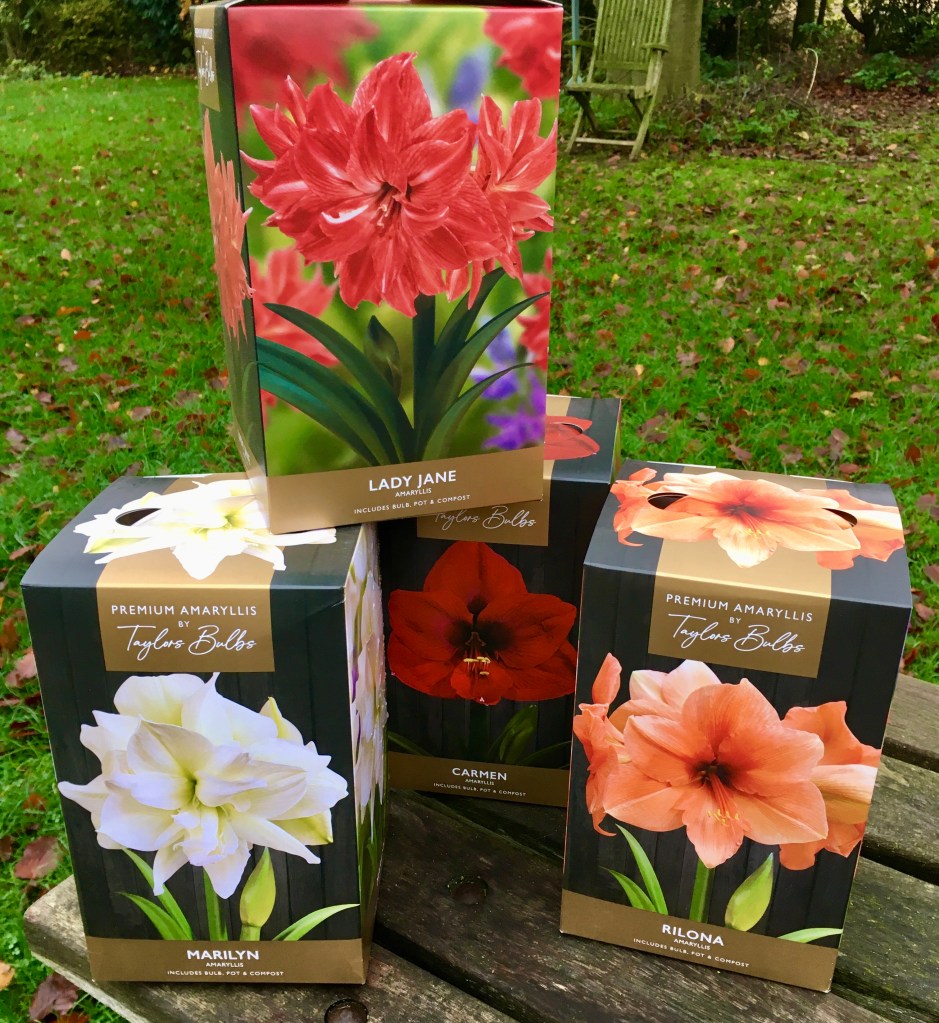
We also talked about growing amaryllis for Christmas presents.
Here’s some I grew last winter. I can highly recommend Taylors Bulbs as the size and quality is first class. Bulbs should flower within 6-8 weeks from planting and make a lovely home-grown present.
Ben Jackson and I talked about picking the last dahlias. This one is Eveline from Mr Fothergill’s.
This one is David Howard. I’ll be leaving mine in the ground again this year, covered in a foot of of dried leaves and a cloche to keep them as dry as possible and to protect them from the frost. If you have wet heavy clay soil, it’s best to dig them up and put them in a frost free place such as a garden shed or garage. Thanks for listening in and reading the blog. Have you decided what you are doing about your dahlias yet? We’ve had three night frosts this week, so I’m covering mine already.
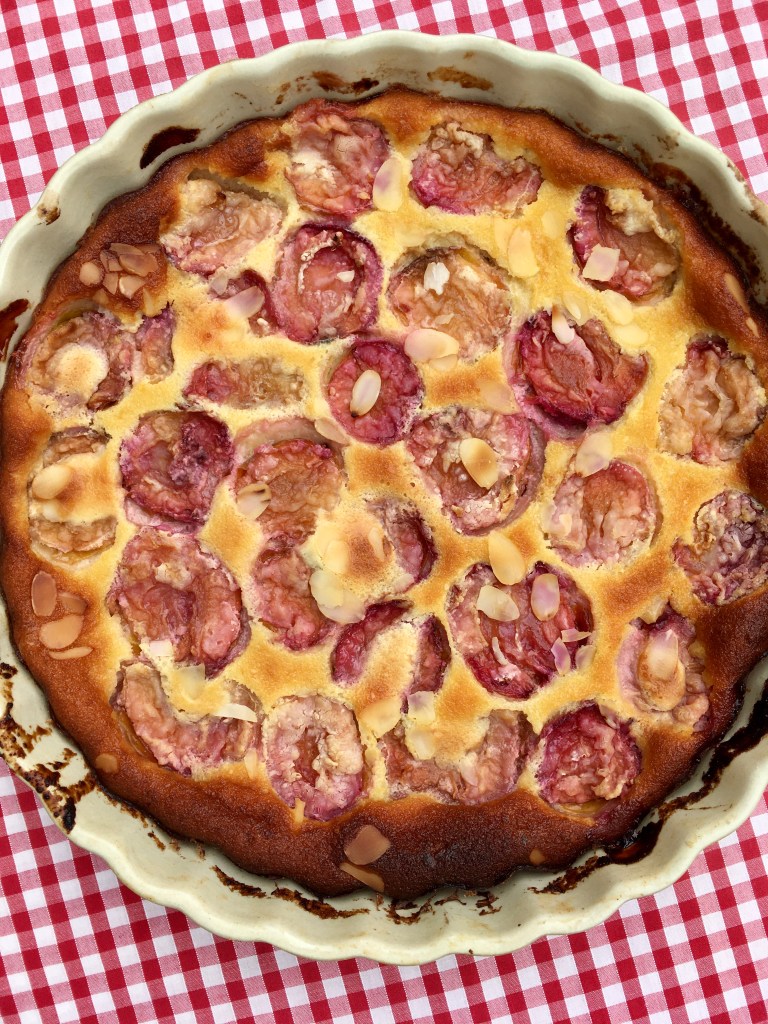
Plums have been prolific again this year. I’ve filled four draws of the freezer so far!
If you’re looking for a recipe to use up your plums I can highly recommend this one! It’s so quick and easy to rustle up. No pastry to roll out, you just whip up the milk and creme fraiche mixture, pour it into a large dish, and pop the halved plums on top! Such a simple recipe to follow and the taste is quite amazing.
This makes about 6-8 portions, but it can be cut up and frozen as individual slices. One minute in the microwave, and the slices are ready to eat!
My tree is a Victoria Plum. Jubilee is thought to be an improvement, and there’s also Marjorie Seedling which crops later in the season.
After I’ve harvested the plums, I do some tidying up and pruning. If you’ve never done any pruning this can seem like a daunting task. However I simplify it by starting off cutting out any broken twigs and branches. Plum trees bear a heavy crop and the wood is brittle, so there are often a lot of damaged stems.
Next I cut back anything that’s rubbing or crossing as these stems will rub together in the winter and cause wounds where infection will get in.
After that, I cut out any stems that are heading towards the centre of the tree, as a good air flow helps to prevent mouldy fruit and fungal diseases.
Finally, I shorten any really long stems, as I want to keep the tree compact – I’ve got to the age where I’m not keen on going up ladders! So I keep the tree at a manageable size.
Hope these tips have been helpful. Do think about planting a plum tree over the winter. Bare root trees are cheap and easy to plant. And after planting you’ll have years of produce to make jam, crumble, plum cakes and clafoutis!
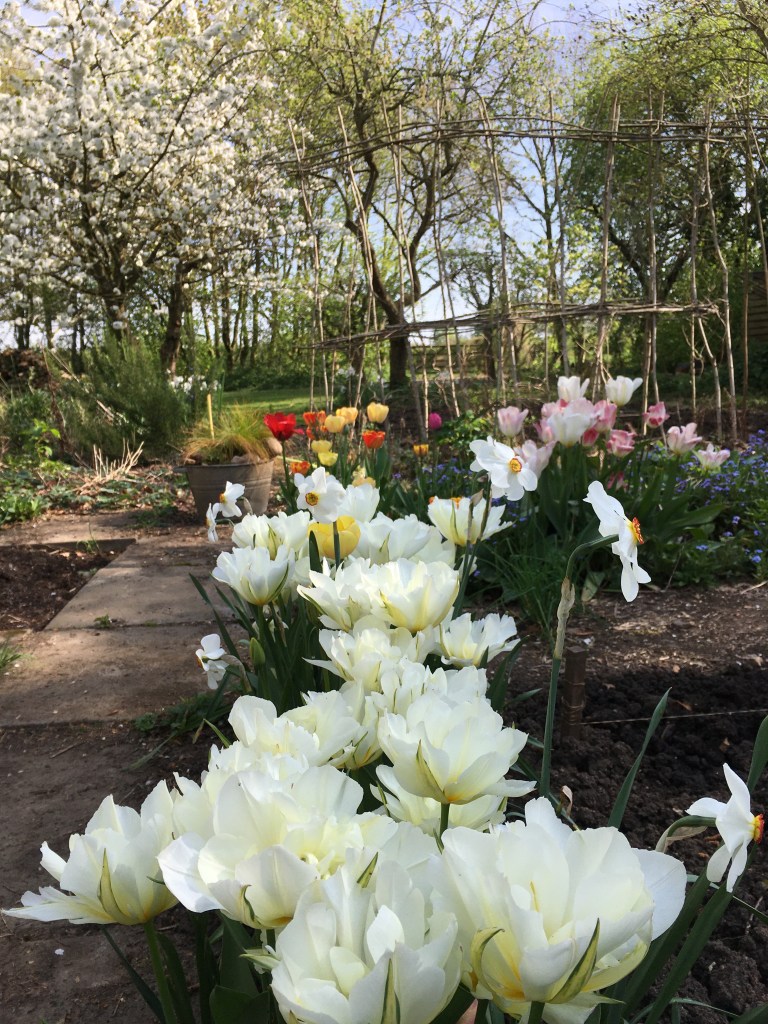
Photos of my orchard in spring. Tulip Exotic Emperor in the cut flower bed in front.
If you are listening in to Ben Jackson on BBC Radio Leicester on Wednesdays at 3.10pm, you’ll hear us pruning Ben’s apple trees. I often go over and do some gardening with him and we record a ten minute tip for the radio. Just simple ideas to help and encourage new gardeners and give some fresh ideas to experienced gardeners too.
Thanks for reading my blogs and leaving a comment in the box below. You are among 400 people who read bramblegarden every day! I’m so pleased to see you all here!
Here’s a link to a list I wrote on Plum Jam and also Plum crumble cakes.
This week’s recipe from Garden News Magazine. So lovely to have sunny weather at the weekend to sit outdoors and eat with the family. Food seems to taste better in the sunshine.
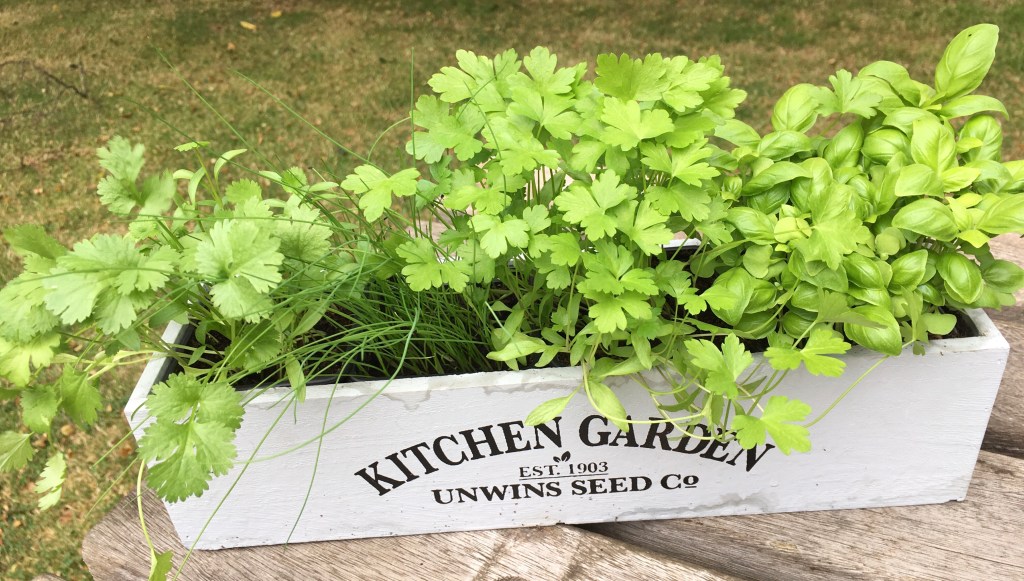
Herbs are grown in shallow terracotta pans and window boxes. These are still in the greenhouse, but will go outdoors the first week of June when all the cold winds should have disappeared.
Here’s a mini-windowbox full of basil, parsley, chives and coriander. The kit comes with small packets of seeds and just enough compost for four individual pots.
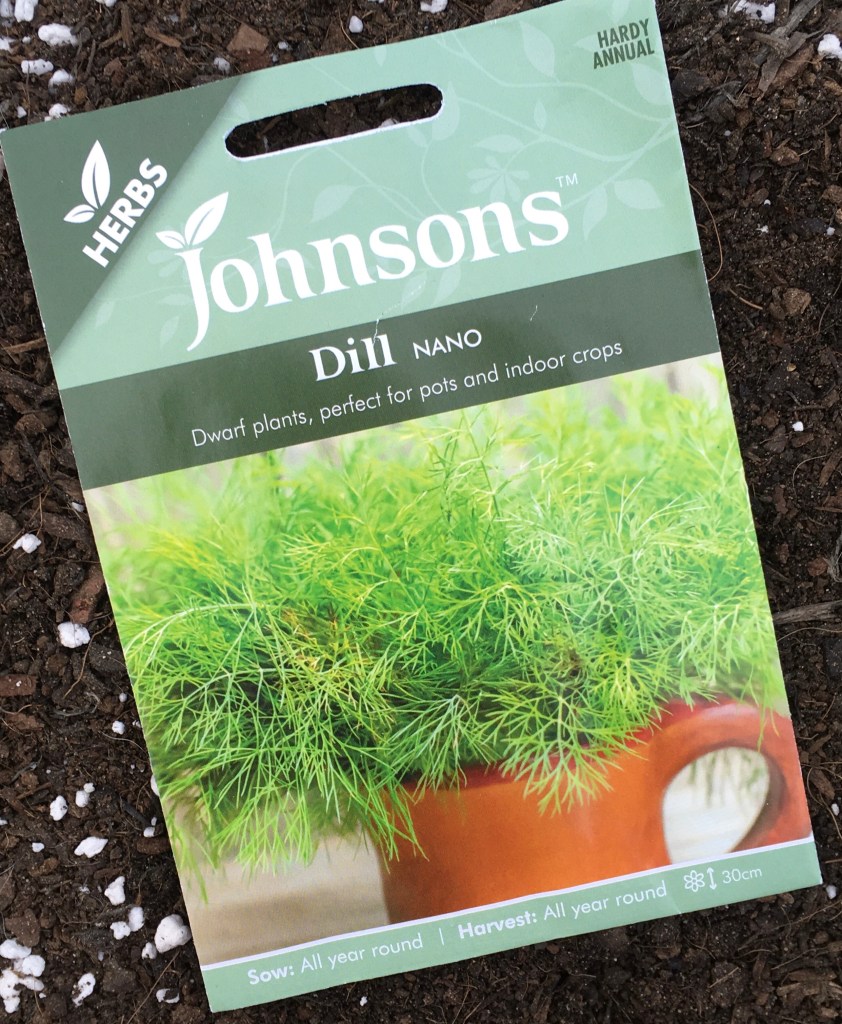
I recommend Johnson’s seeds for herbs. Dwarf dill can be grown in containers.
I also recommend Jekka’s Herbs produced by Johnson’s Seeds.
A very useful book to dip into, especially if you’d like to try different herbs.
Hope you are having a good gardening week. It’s been a cold spring so far and very wet. We are behind with most vegetables, but the spring flowers have enjoyed the cool conditions and lasted longer than usual. Bluebells are just starting to fade, but bright blue geraniums have started to flower to take their place and all the wild flowers, ragged robin, pink campion and oxeye daisies are starting to bloom. Thank you for reading the blog and, if you have time, leave a comment in the box below, letting me know what herbs you are growing for your summer cooking. I’m very grateful to have the opportunity to write for Garden News Magazine. Each week I share a different recipe featuring something harvested from the garden. Sometimes I only have a handful of herbs, or a dish of berries. It doesn’t have to be a huge amount, just whatever I can find to put into my cooking.
For listeners of today’s BBC Radio Leicester gardening. Here’s what I was talking about today. This advice comes from Glenn Facer, who has worked in the gardens at Chatsworth House for 33 years. Glenn has been growing fruit and vegetables in the kitchen garden for 14 years and grows produce for the Duke and Duchess of Devonshire. Glenn supplies the family in the main house and also the restaurants, cafes and hotels on the estate.
Glenn Facer working at Chatsworth
Glenn says: “I force the rhubarb by lifting small clumps off the rows out on the beds from November until about the end of march, leaving the roots on top of the ground to be frosted for a few days. This aids the forcing process.
Rhubarb dug out ready to be forced Forced rhubarb has sweet and tasty, pale stems
In dustbins, I place a layer of compost in the bottom and place the clumps on top, filling round with more compost but not covering the crown. Then lightly water and replace the lid to exclude light.
The dustbins are placed in a heated glasshouse for a quicker crop, but can be placed in a cold greenhouse or shed. They are usually ready to harvest in about 3 to 4 weeks time.
I usually dispose of the crowns after forcing, as they are worn out and would take a while to crop again.
The varieties I use are Victoria , Timperley Early and Champagne.”
Forced rhubarb from the Chatsworth gardens. photos Glenn Facer
Recipes we talked about on the radio. These were published in the Garden News Magazine in 2022. I write a column each week focussing on what I’m growing and how I’m using the produce in the kitchen.
Smoothy recipe:
1/2 cup cooked, cooled rhubarb
1 teaspoon sugar ( optional) or maple syrup or honey
1.5 cups plain yoghurt
1/2 teaspoon vanilla extract
1/4 teaspoon fresh grated ginger
Or pinch of dried ginger
Add icecream to serve (optional)
Cut the rhubarb into 2cm pieces. Wash and place in a saucepan with just the water clinging to the stems. Cook until soft. Add the sugar or sugar substitutes if using. Cool. Add the other ingredients and whizz in a food processor. Adjust the taste/ consistency by adding milk/cream/ or a scoop of vanilla ice cream according to taste.
I’ve often thought it would be a great idea to try out different varieties before committing to ordering and growing seed potatoes. Well now you can do just that. Potato House are selling ready-to-eat varieties of heritage, coloured, rare and organic spuds!
I ordered five varieties, Arran Victory, Blue Annelise, Heidi Red, Pink Fir Apple and one simply called ‘Chips’ for cooking chips and wedges.
The coloured potatoes really appealed to me, as it’s not easy to buy them locally. I like the idea of keeping heritage varieties going, and it’s lovely to try something new. Potatoes arrived promptly after ordering. I was delighted with the quality. The potatoes are a good size and beautiful condition.
‘Chips’
Amy from Potato House says
“We are renowned for our colourful range of seed potatoes. These look and taste amazing. The best thing about growing your own produce is experimenting with colours that are not readily available in supermarkets.
We grow the purples, pinks and the in-between with multi-coloured skin for you to experiment with in your gardens and allotments.
In some varieties it is only the skin which is coloured and in some, the colour goes beyond the skin for vibrant additions to any plate. Think blue mash, purple chips and red crisps!
Unusual colours on your plate is a talking point – whether it is toddlers or friends round for a meal – everyone is impressed. The toddlers get told that the blue mash has superpowers and the adults will check if blue potatoes have superpowers!
Nutritional values are the same although there are some studies which indicate that a range of food colours is better for you.
Growing and cooking coloured potatoes takes no extra skill. You grow according to the maturity and then cook according to the potato type. So if you have a second early, smooth, blue seed potato such as Salad Blue, it will grow like any other second early taking about 14 weeks to mature and then will be delicious as a mash!
Try some home made chips and crisps – a lot easier than you would think!
Some of these varieties have been around for a long time – your grandparents would have had some, and others have been bred more recently giving protection against diseases.
Our range of seed potatoes comes in 6-tuber nets and 1kg nets (as well as larger sizes) and discounts start when you buy only 5 nets of any combination. Our range of ready-to-eat potatoes comes in 5k, 10kg, and 15kg bags. Both are delivered direct to you from our farm.
We do, of course, have white skin and flesh seed potatoes too. We’re here to help you decide so let us know if you have any questions.” https://www.potatohouse.co.uk/
Pink Fir AppleSome tasty purple potatoes I grew this summer. They kept their colour during cooking.
I’m using some of my potatoes for Christmas, but I’m also looking through my cookery books to decide what else to make with them. I probably won’t be able to resist buying all of them as seed potatoes too. To have beautiful varieties like these coming out of the veg plot next year is a very cheerful prospect indeed.
Are any of you looking through catalogues and on-line deciding what varieties to grow right now? What potatoes would you recommend, and have any of you tried the more unusual red, blue and black varieties? Thanks for reading my blog. Happy gardening! And happy cooking too!
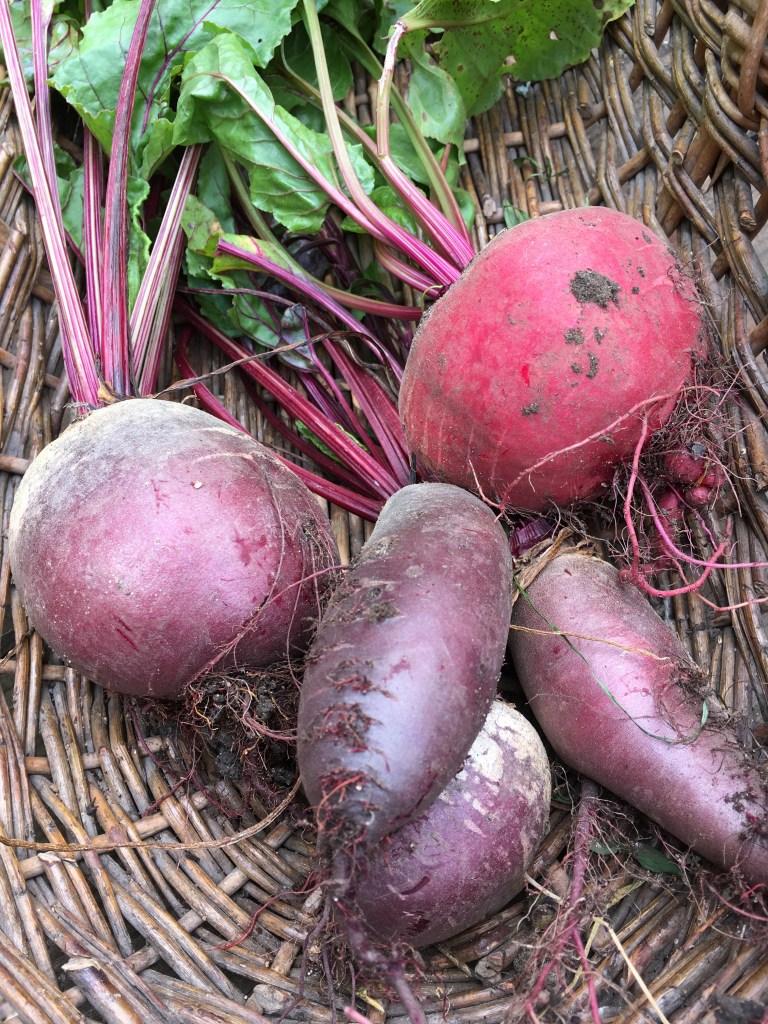
Beetroot was one of the few vegetables that did well this summer. Climbing beans were a disaster. Flowers failed to set and immature beans dropped off the plants. Very disappointing to see. But beetroot didn’t seem to mind the heat and drought. I write a weekly column for Garden News Magazine all about the fruit and vegetables I’ve harvested in the garden and what I’m making with them. It’s a fun project and I really look forward to my cooking and recipe-writing sessions. Sometimes the recipes come from my Mum who is a fabulous cook. Sometimes I delve into a lovely archive of recipes shared by my late mother-in-law Joan. Many happy memories swirl around as I make her famous flapjack and fruit cake recipes. Joan never came to visit without having a cake in her shopping bag. And we always looked forward to seeing what she’d got in her cake tin in the pantry at home. Some of the recipes are just ones I’ve devised for feeding my family of four (although the girls are grown up now and have homes of their own). Nothing too fancy or with too many ingredients. In fact, most recipes can be made with a few basic store-cupboard ingredients and what vegetables you might have in the veg basket or fridge. They don’t take hours to make either. I’ve always been frantically busy, so recipes have to be quick and easy. I’ve had some lovely letters and e mails from Garden News readers thanking me for the recipes which they say are simple to follow and tasty without taking too long to cook.
Here’s a recent column featuring deliciously moist beetroot and chocolate muffins. Have a go at making them and let me know how you get on. I freeze batches of beetroot in quantities required for these cakes, so I always have the ingredients to hand.
You can freeze the little cakes and they thaw out within minutes.
These photos were taken in the back-of-the house glass porch, the only sunny place at the time, and my pressed glass cake stand is balanced on top of an upturned laundry wicker basket! No one will know….
Beetroot from the garden I grow a pinch of seed every 10-15cm and I let the beetroot grow in clusters. I carefully harvest the largest beetroot when needed, but leave the smaller ones to carry on growing. When I was searching my i-pad archives for photos of beetroot, the computer offered these hyacinths. Just shows you, machines and computers still aren’t as clever as humans….yet! It made me laugh. I hope it makes you smile too. Enjoy your gardening week.
For the avoidance of doubt, please don’t eat hyacinths! They are poisonous.
Early Crocus Tommasinianus and Galanthus nivalis in the front woodland garden
Ukraine is constantly in my thoughts. I will not say much, as I’m sure you have arrived here for gardens, flowers, peace and tranquility – much needed in current times. But rest assured, although I am small and insignificant I am doing all I can in the background to support the people of Ukraine in any way I can. It’s easy to think that we are powerless, but often if many people come together then their efforts can be great. Think of one small thing you could do today to make a difference. We are not helpless- and we are not without hope.
Meanwhile, here’s some photos of my garden today for anyone who needs the restorative power of plants. Here’s Galanthus Madeline at the foot of the willow and hazel trees.
Wild primroses poking through the leafmould path. The scent is honey-like and delicate. The very essence of spring.
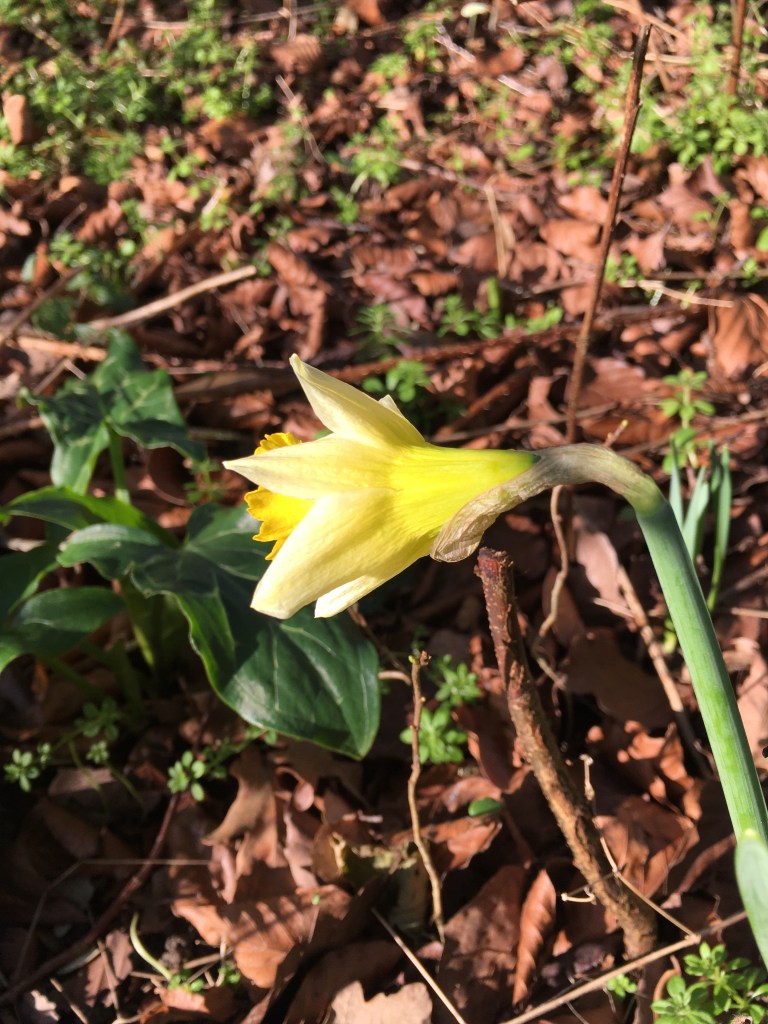
Wild daffodils are just emerging too. This one is Narcissus pseudonarcissus. There are drifts of the Welsh wild flower, the Tenby daffodil, in honour of my Welsh grandmother. But the little lobularis daffodil is the first to open.
The winter aconites are just going over now. The are making a nice swathe of colour in the woodland corner at the end of the pergola.
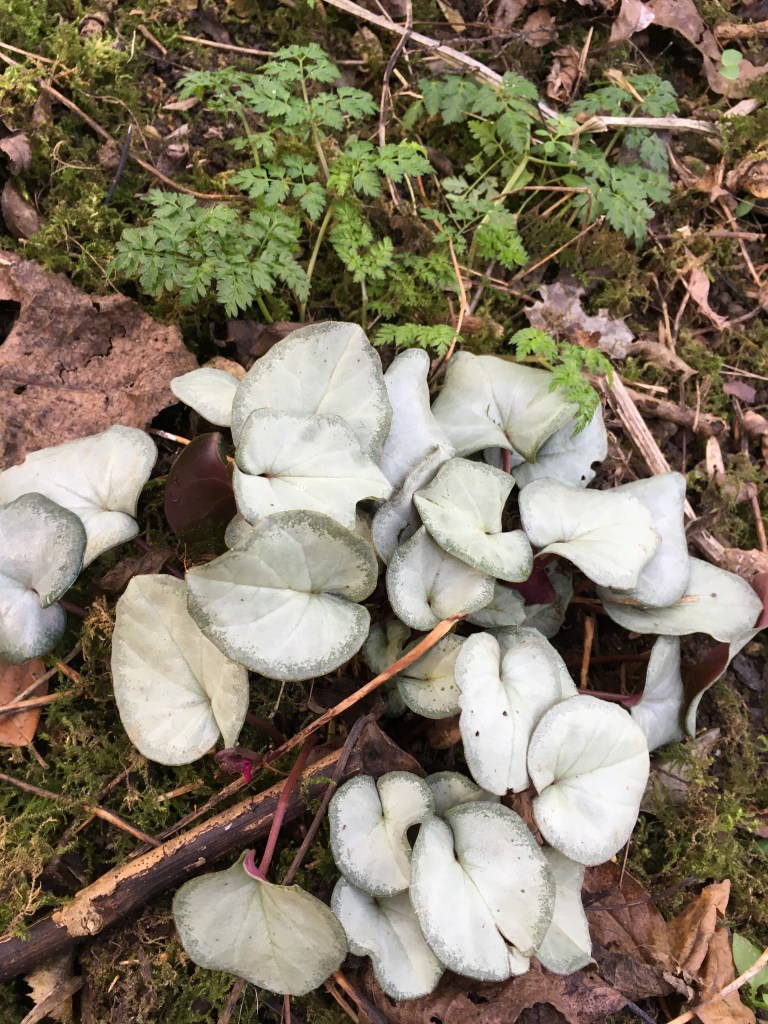
Cyclamen Coum flowers are popping up all over the garden- not necessarily where I planted them. Apparently the seeds have a sticky substance much-loved by ants which then carry the seed far and wide. They must have carried them off into the back fields as there’s a thriving collection of plants on the other side of the fence.
Some of the cyclamen have come up with these bright silvery-leaves. These are worth growing for the foliage alone. Both white and purple flowers are emerging from the leaves.
There’s also Cyclamen persicum flowering in the greenhouse. These have been making a display since last October; really good value long-lasting plants. They are not hardy in my garden, coming from the Eastern Mediterranean region. But they thrive in a greenhouse or cool room, just watering them when they droop – and not before.
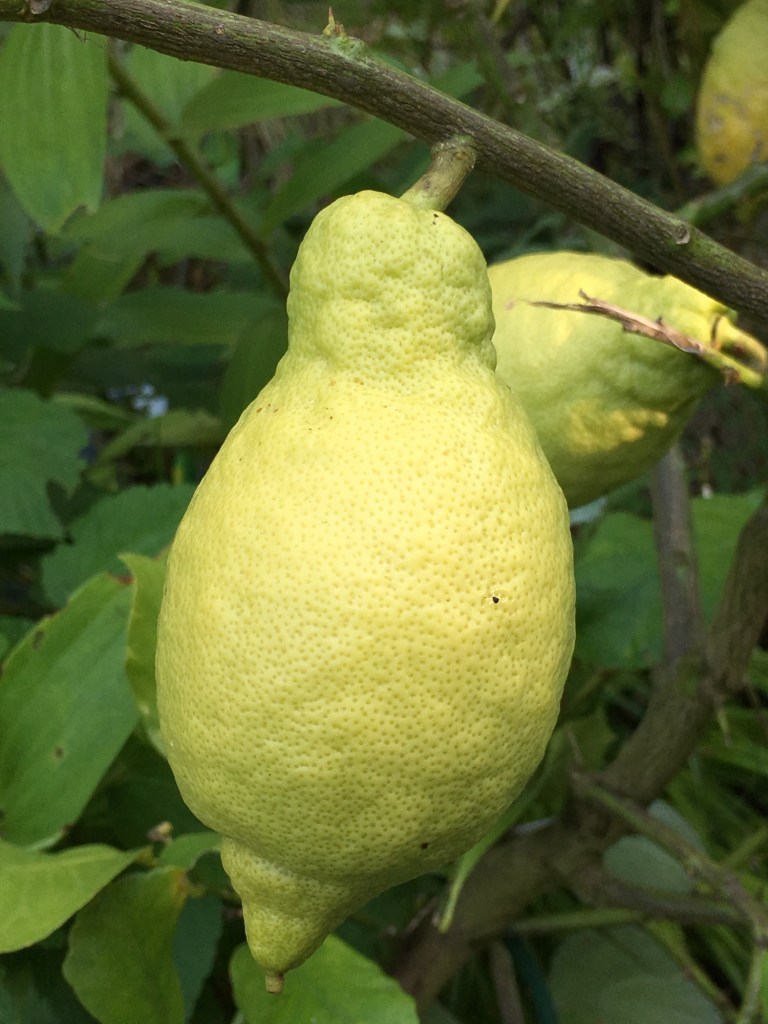
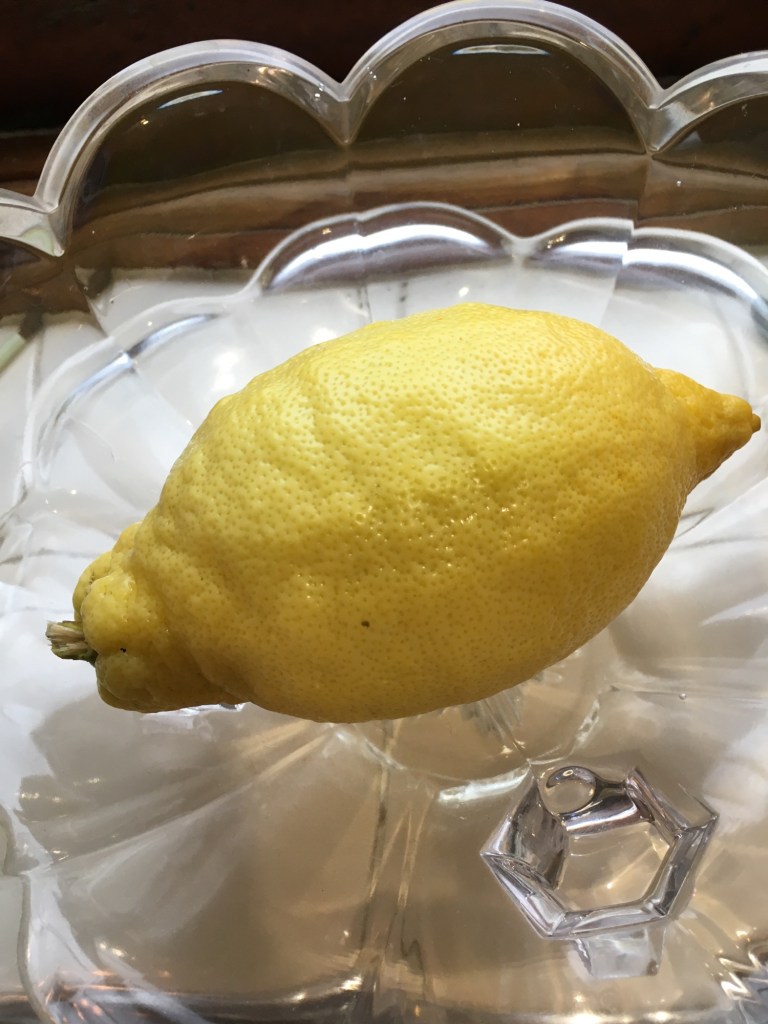
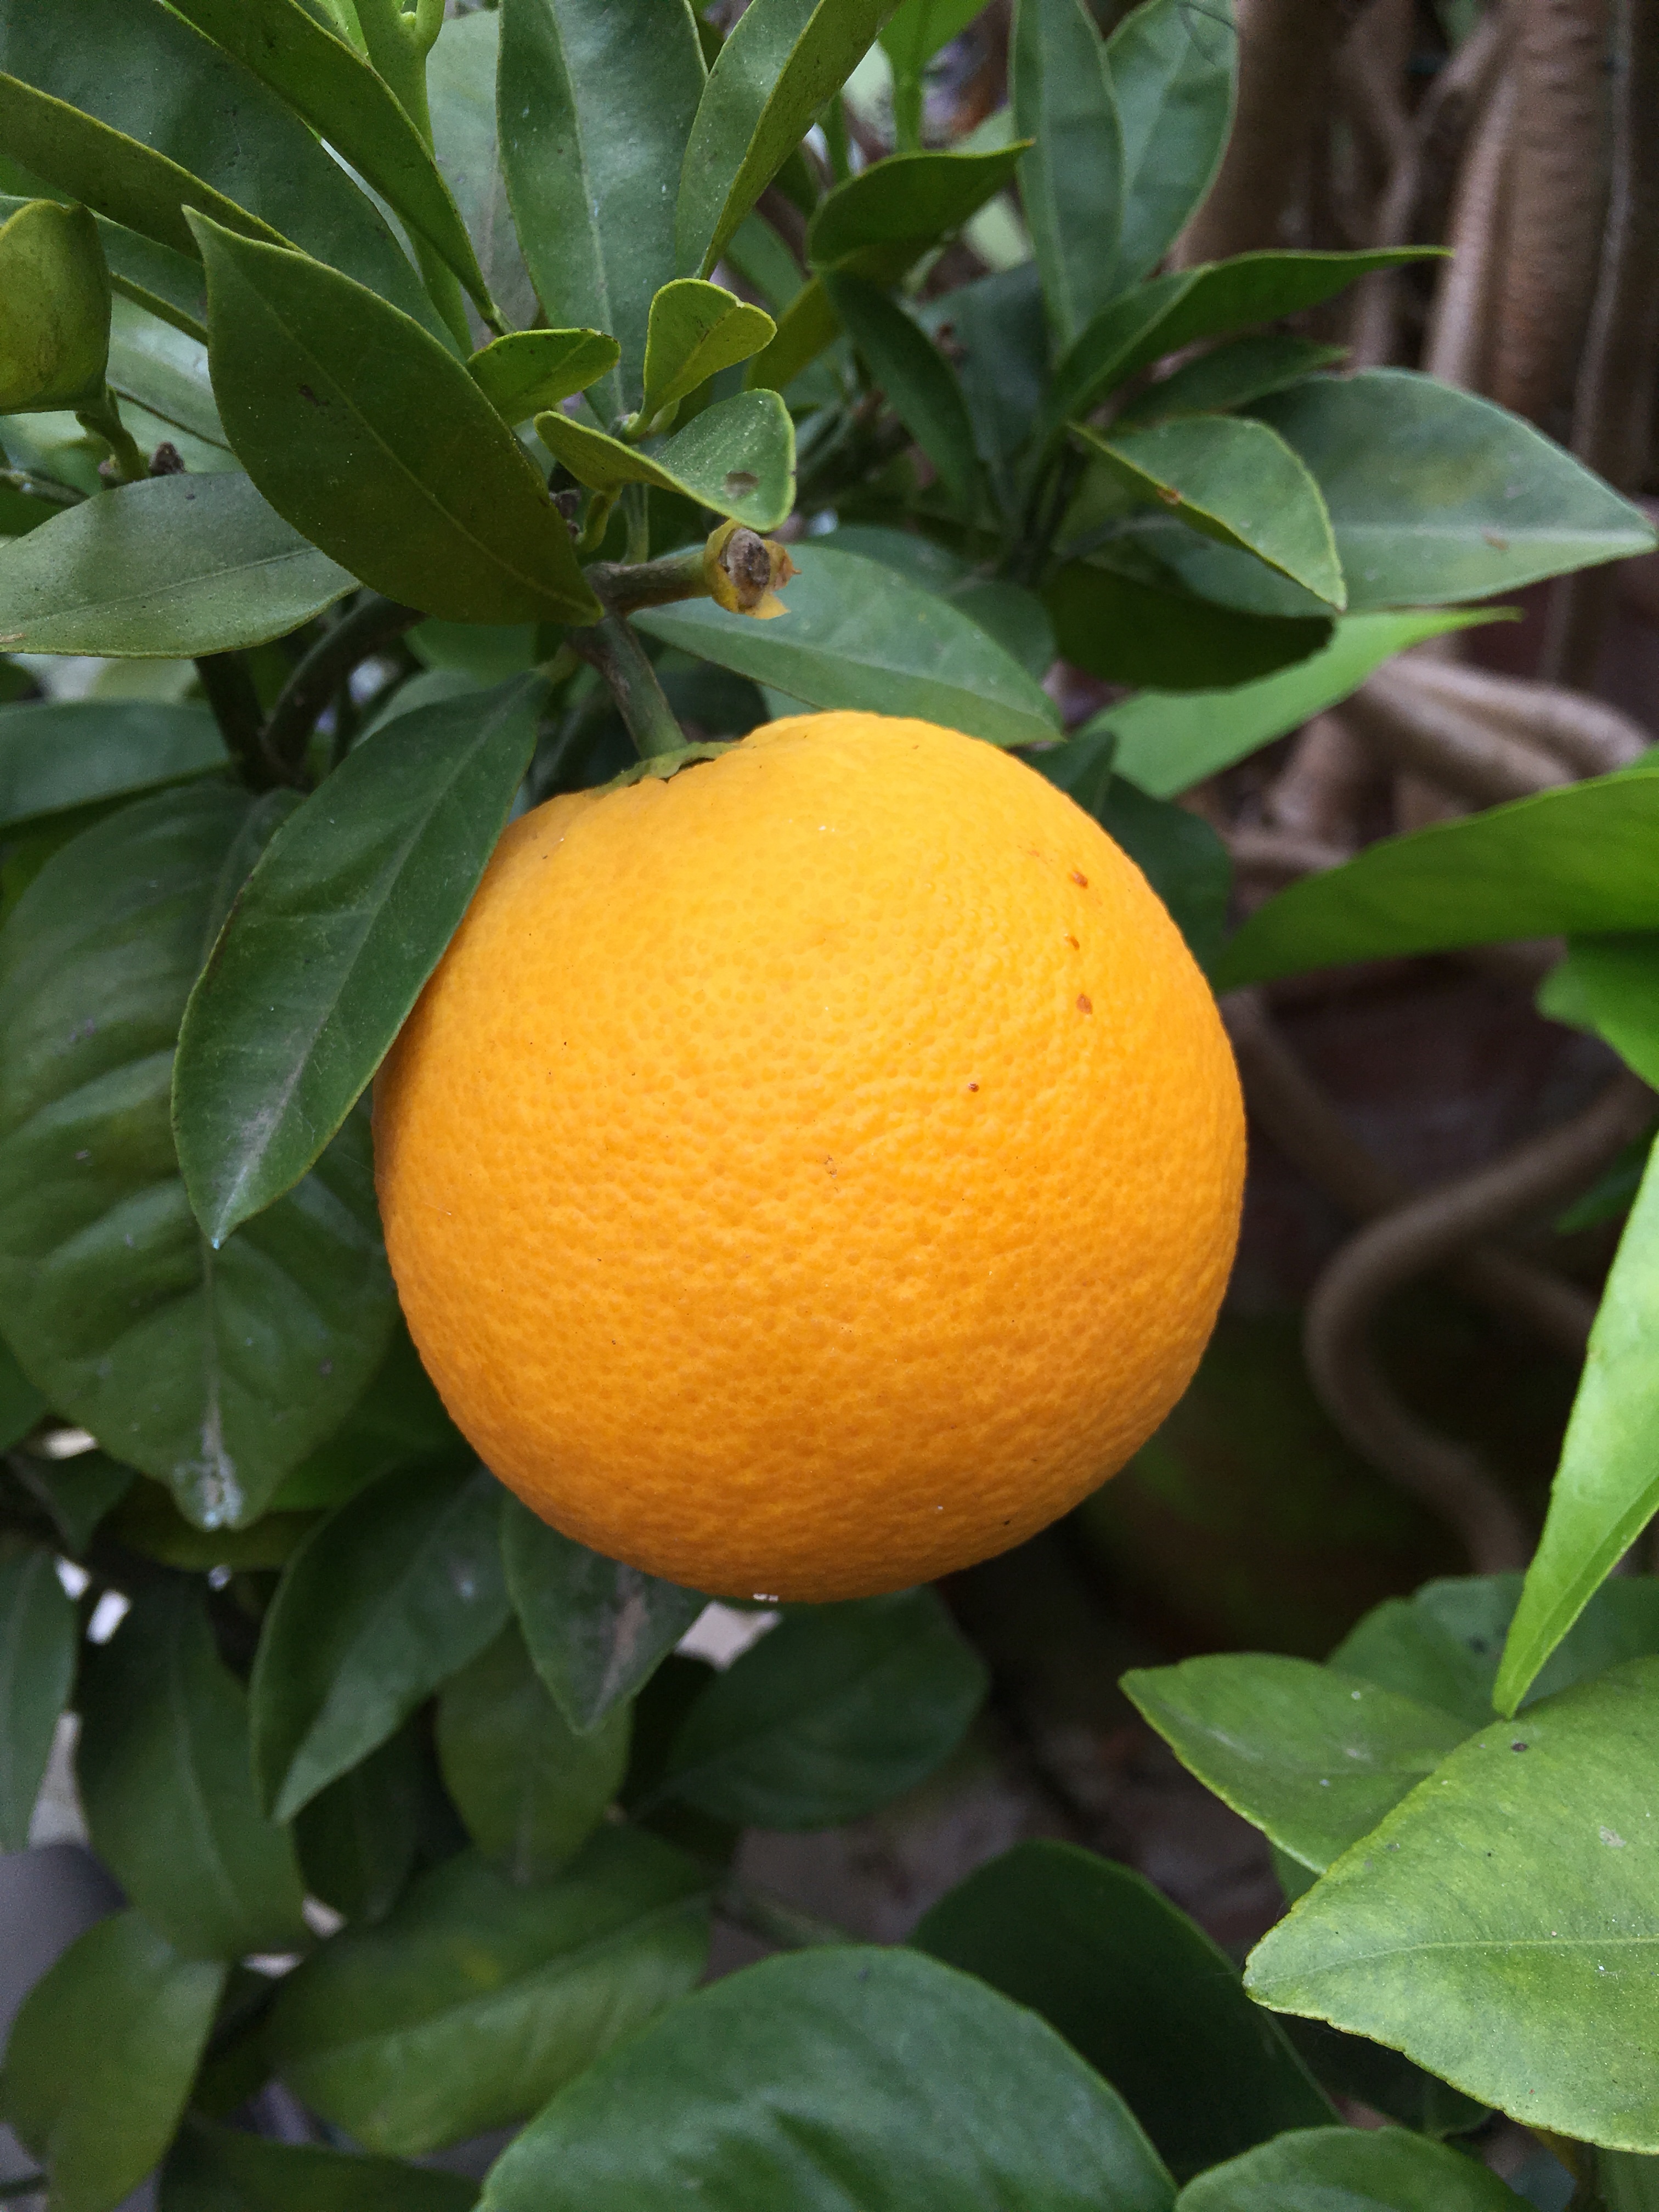
While we are in the greenhouse, I’ll show you the citrus trees which have produced the best ever crop of lemons and oranges here. We have had a relatively mild winter and the plants have been kept at 4C in the heated greenhouse. To be honest, the heater has hardly been on. A well insulated cedar-wood greenhouse keeps plants cosy. I’m just starting to water them again and top dressing with fresh compost. They are too big now to be repotted, but topdressing with new compost and adding liquid fertiliser in the watering can will perk them up and bring them into flower again.
And this is what I made with the orange zest; citrus shortbread. The recipe will be in Garden News Magazine next week, and I’ll copy and paste the article here for anyone who would like it. It’s part of my new ‘family favourites’ column for the magazine. Quick recipes anyone can make. There won’t be long lists of ingredients and fancy products you have to search high and low for. It’s mostly about simple ingredients and home grown produce, and all the recipes that have been passed down to me from my mother and my grandparents and friends.
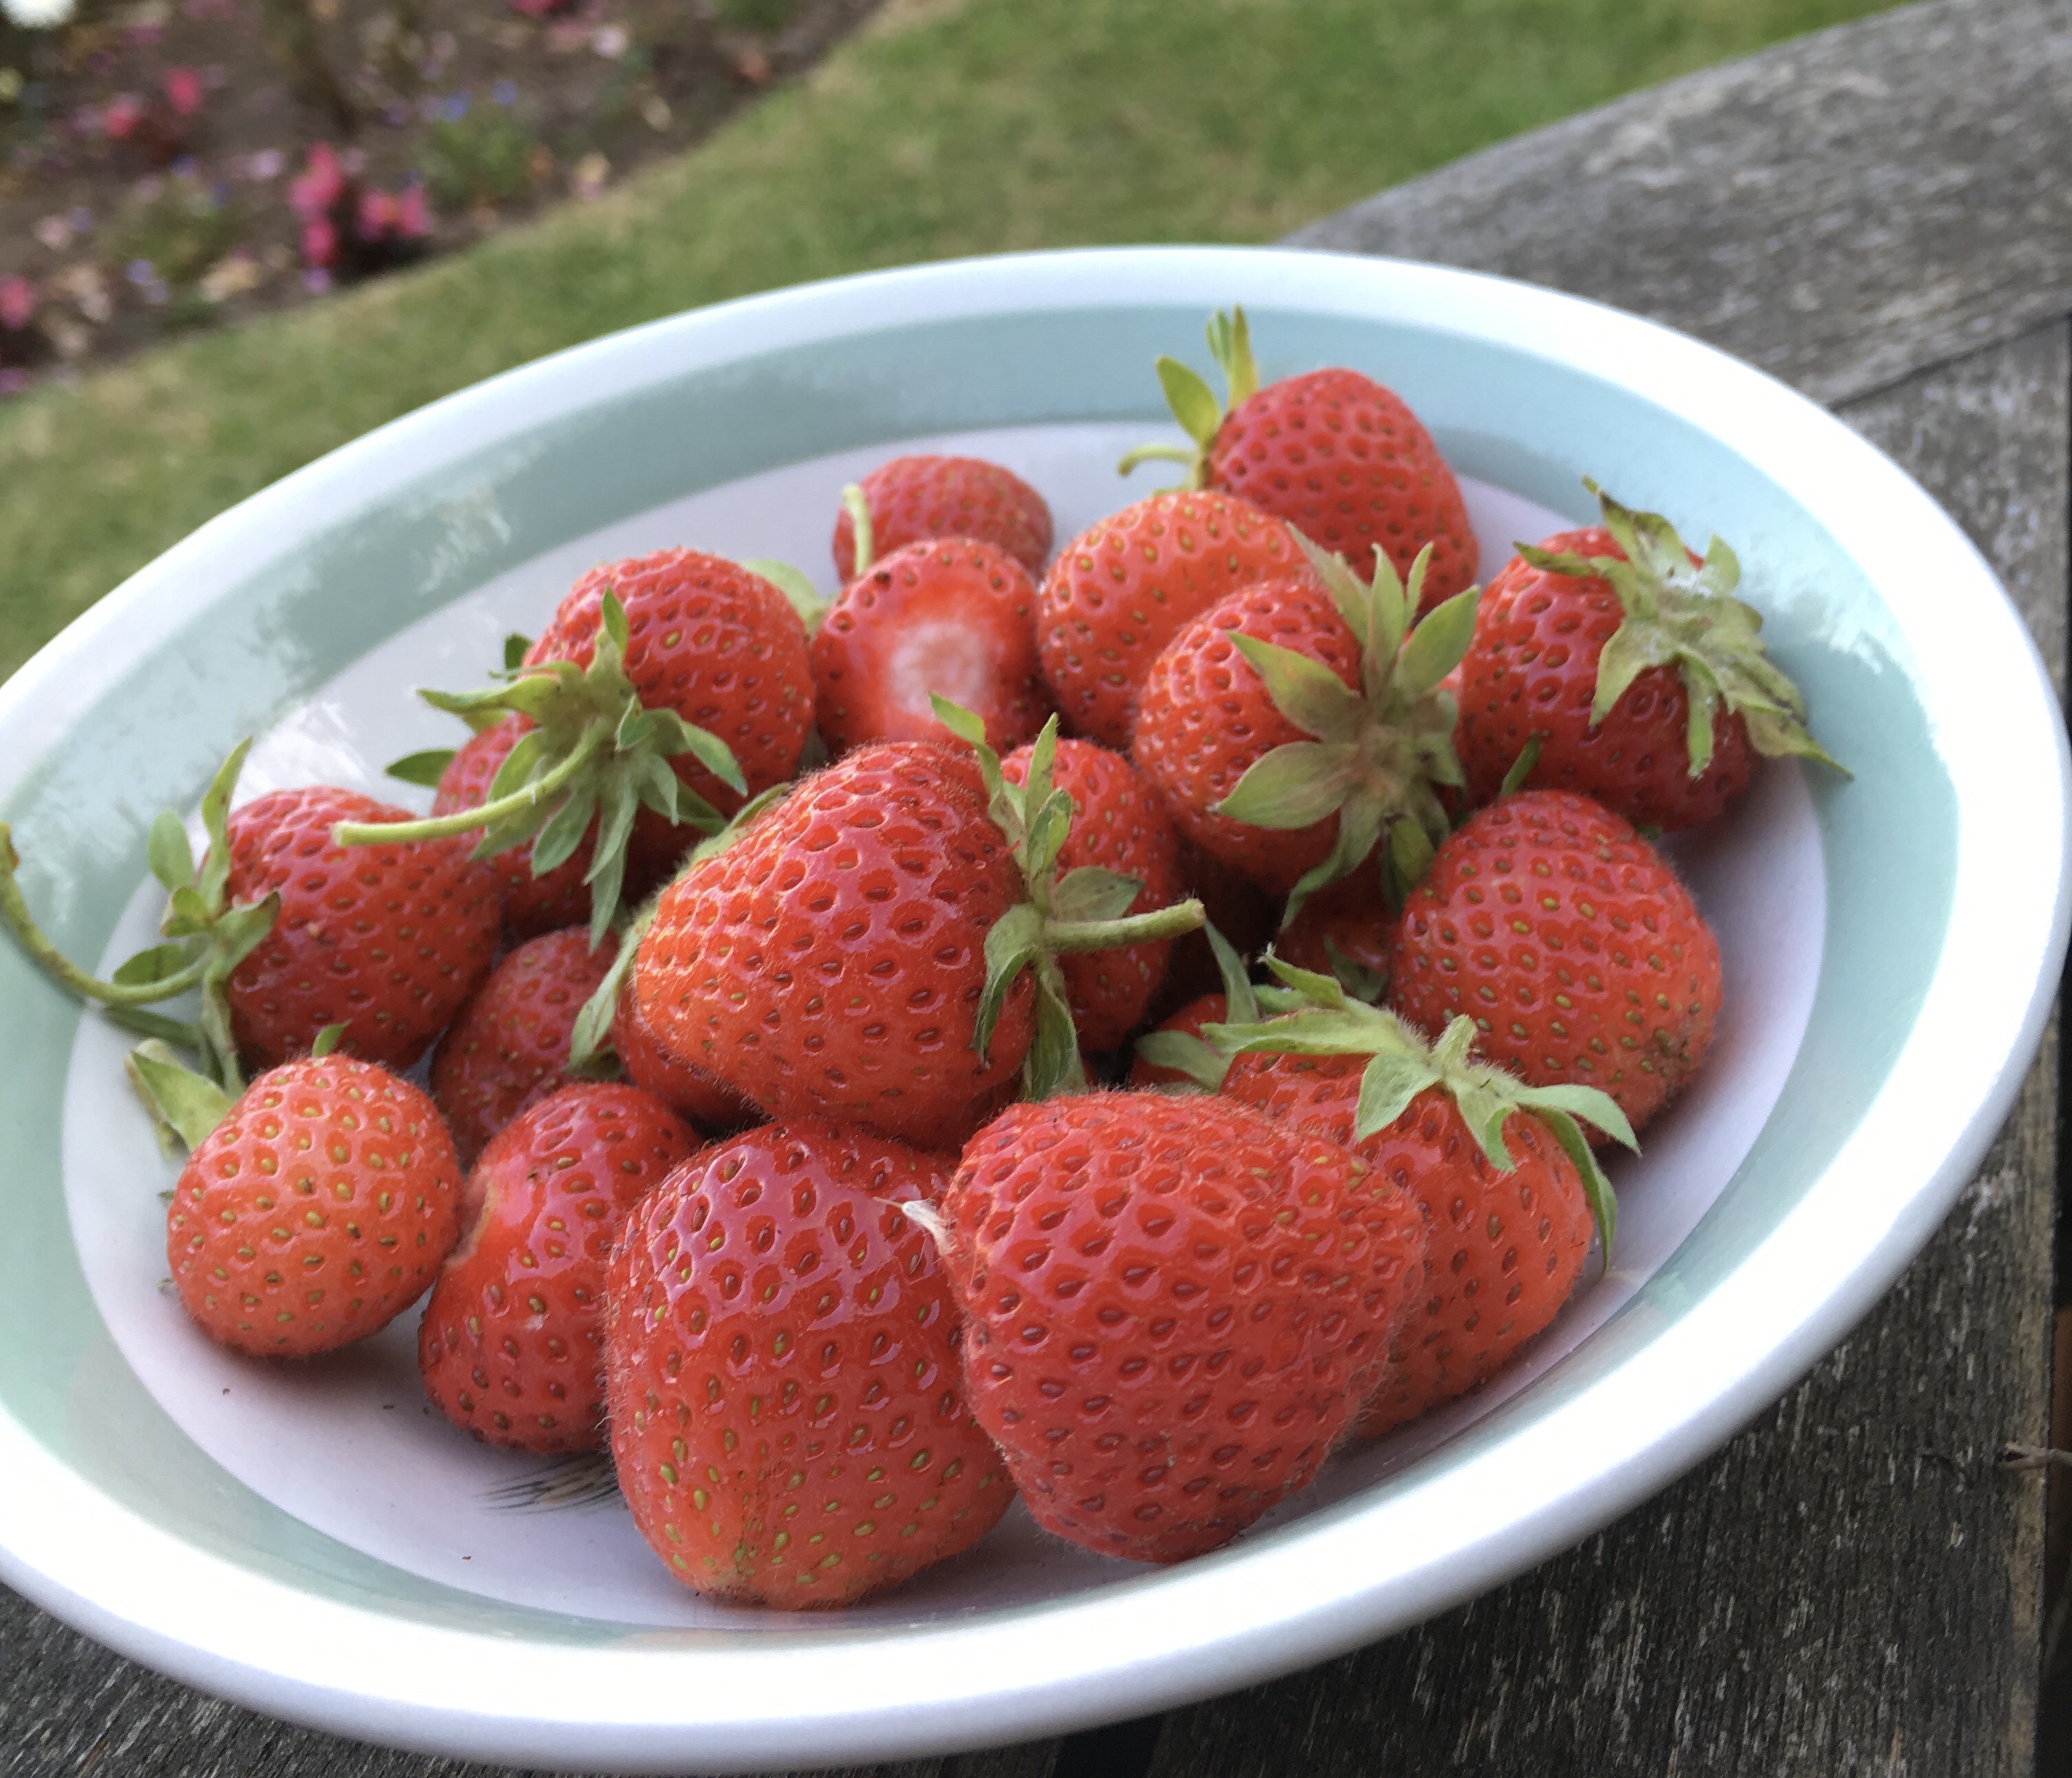
Strawberry scones will feature in the coming weeks too, as I’m talking about bringing my strawberry plants, growing in containers, into the greenhouse to get an early crop. I grow my strawberries in 10” pots and windows boxes. They are easy to pick up and move under cover. Also easy to protect the fruit from birds and slugs as well.
Daphne and the other hens have just started laying again, so there will be plenty of eggs for cooking. The bantams are undercover in a new run, specially made to protect them from the bird flu epidemic. Usually they would be out foraging in the orchard by now, but until we have the all-clear they have to be kept in.
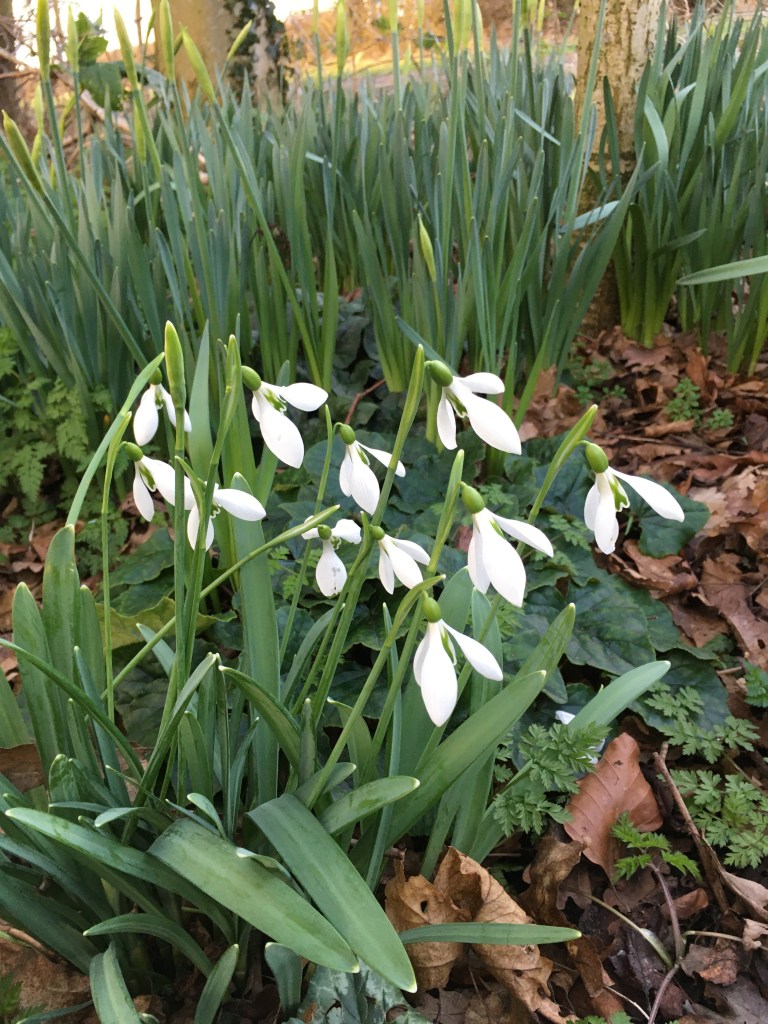
Walking from the hen run, out past the fruit trees and along the perimeter fence, there are more snowdrops. These are double and single types.
The doubles flower just a few weeks before the singles.
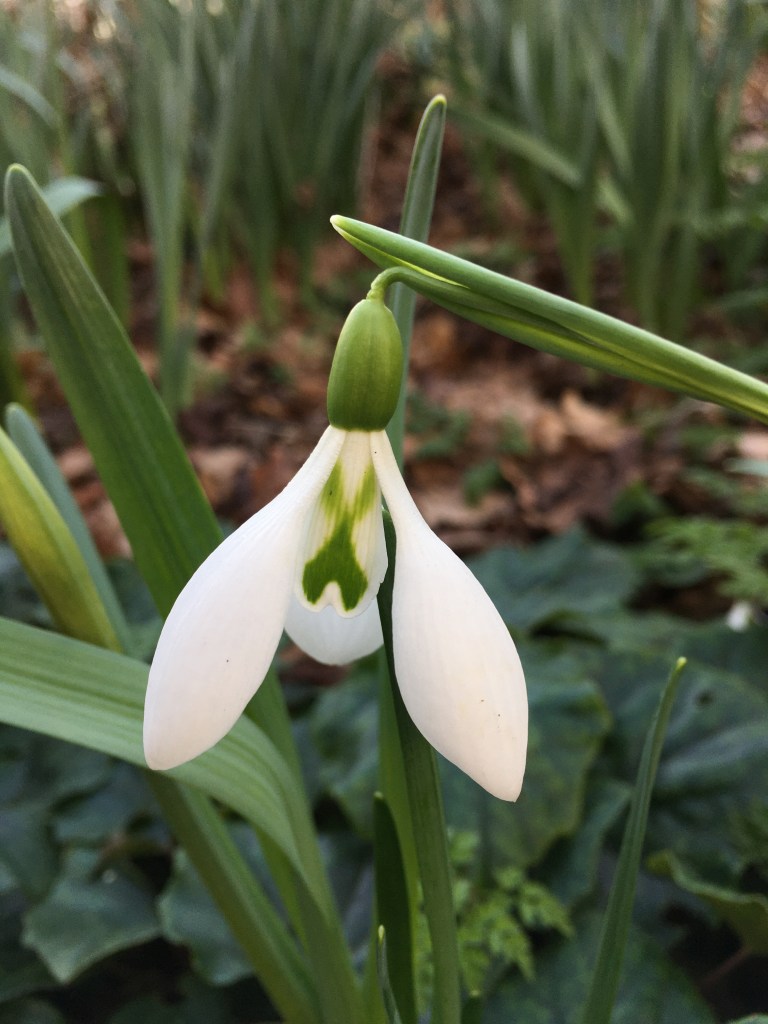
These have green tips. I believe they are a variety called Viridapice.
This one is called Walrus. It has elongated, green-marked outer petals.
A small patch of Galanthus Robin Hood.
It’s called Robin Hood because of the crossbow markings on the inner petals.
A small patch of Galanthus Jessica. I bought these because I have a niece called Jessica.
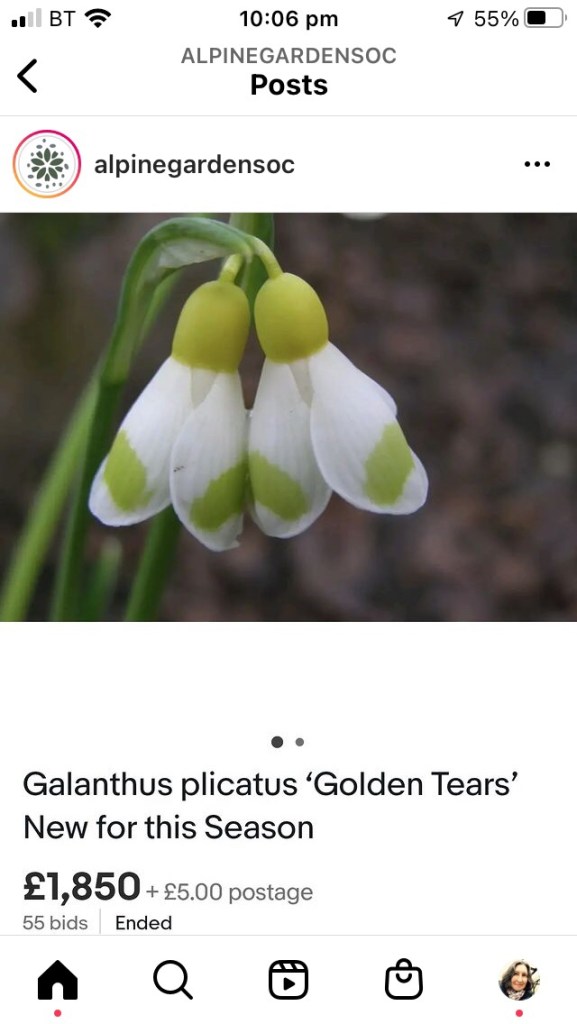
Have you all seen the news about the most expensive snowdrop ever? I think I would have been crying if I’d paid £1,850 for a single bulb of Golden Tears. Pretty as it is, it’s a staggering amount to pay. I saw the above photo on the Alpine Garden Society social media pages.
Here’s the view through the gap in the hedge. The field has been sown with winter wheat. I think the variety is Skyfall which is hardy and disease resistant and therefore requires less spraying.
And finally, just a few steps from my garden gate, here’s the view on the lane, looking across the back fields to ancient Bunny Woods on the horizon. Sometimes we walk across the footpaths to the woods. Today, I’m taking this photo in a welcome gap in the rain, but the clouds still look ominous, so I hurry home for a warming cup of tea. I hope you’ve enjoyed this tour of my garden and surrounding fields. Take care everyone and keep safe and well. And let me know what spring flowers are emerging in your gardens today.
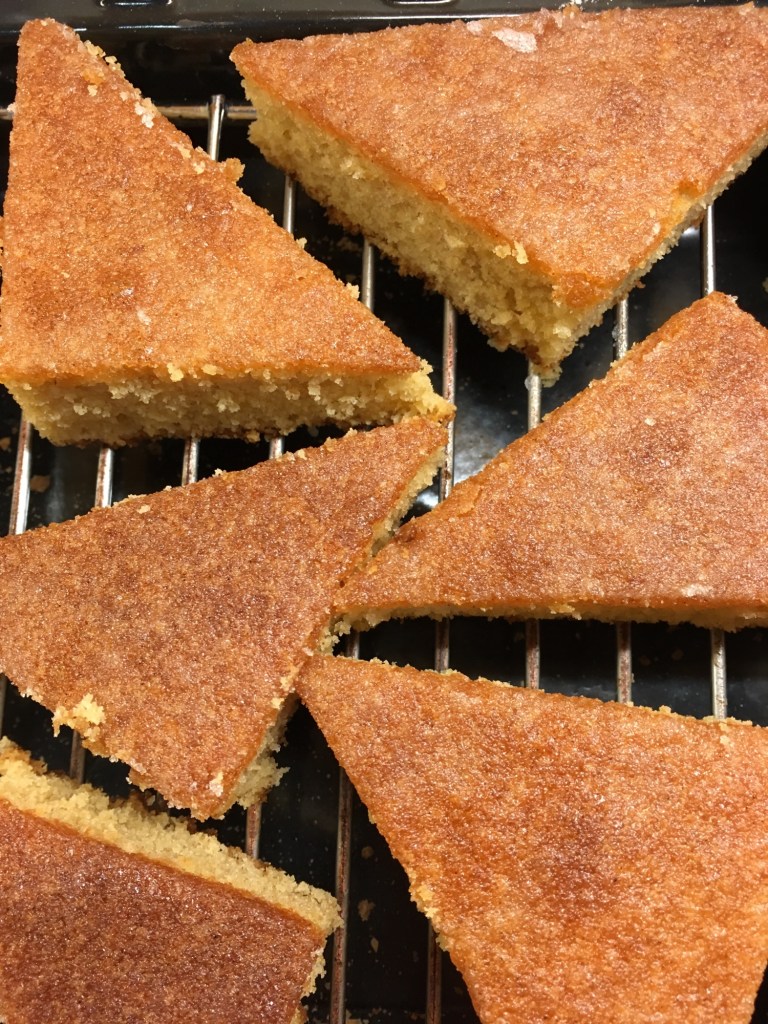
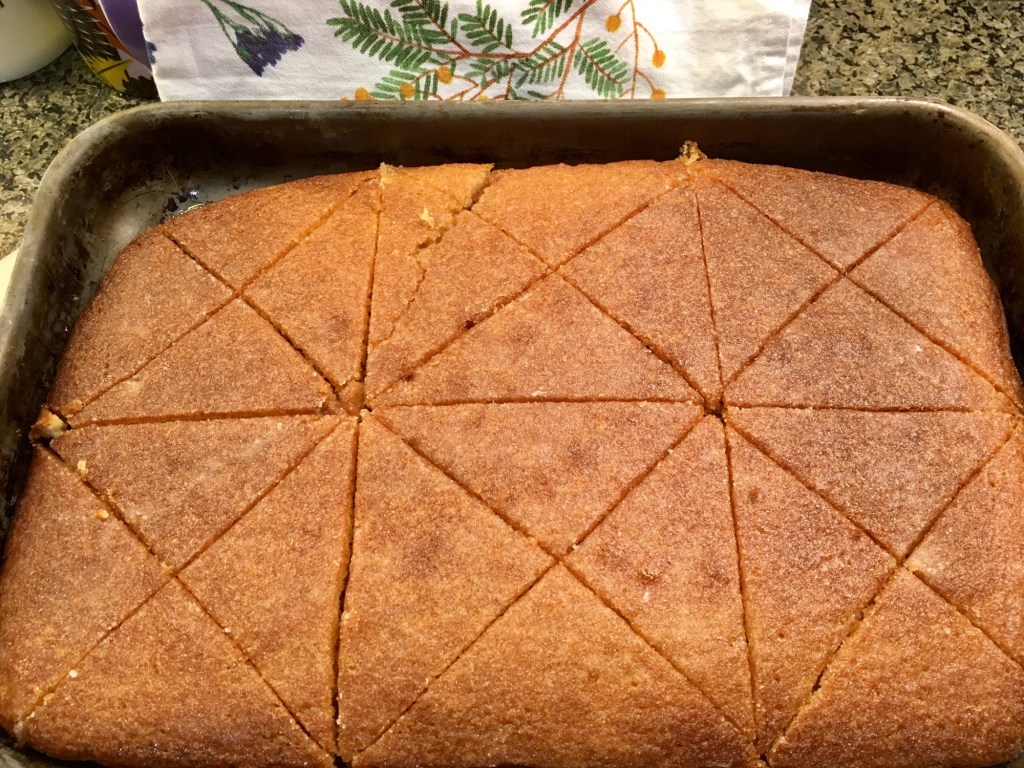
Here’s a link to my recipe for lemon crunch triangles:
Family favourite lemon crunch triangles. Easy tray bake. Tastes much like a lemon drizzle cake, but so easy to make. I used lemons from the greenhouse. I’ve had these fruit bushes for 20 years. Huge fruit and very juicy.
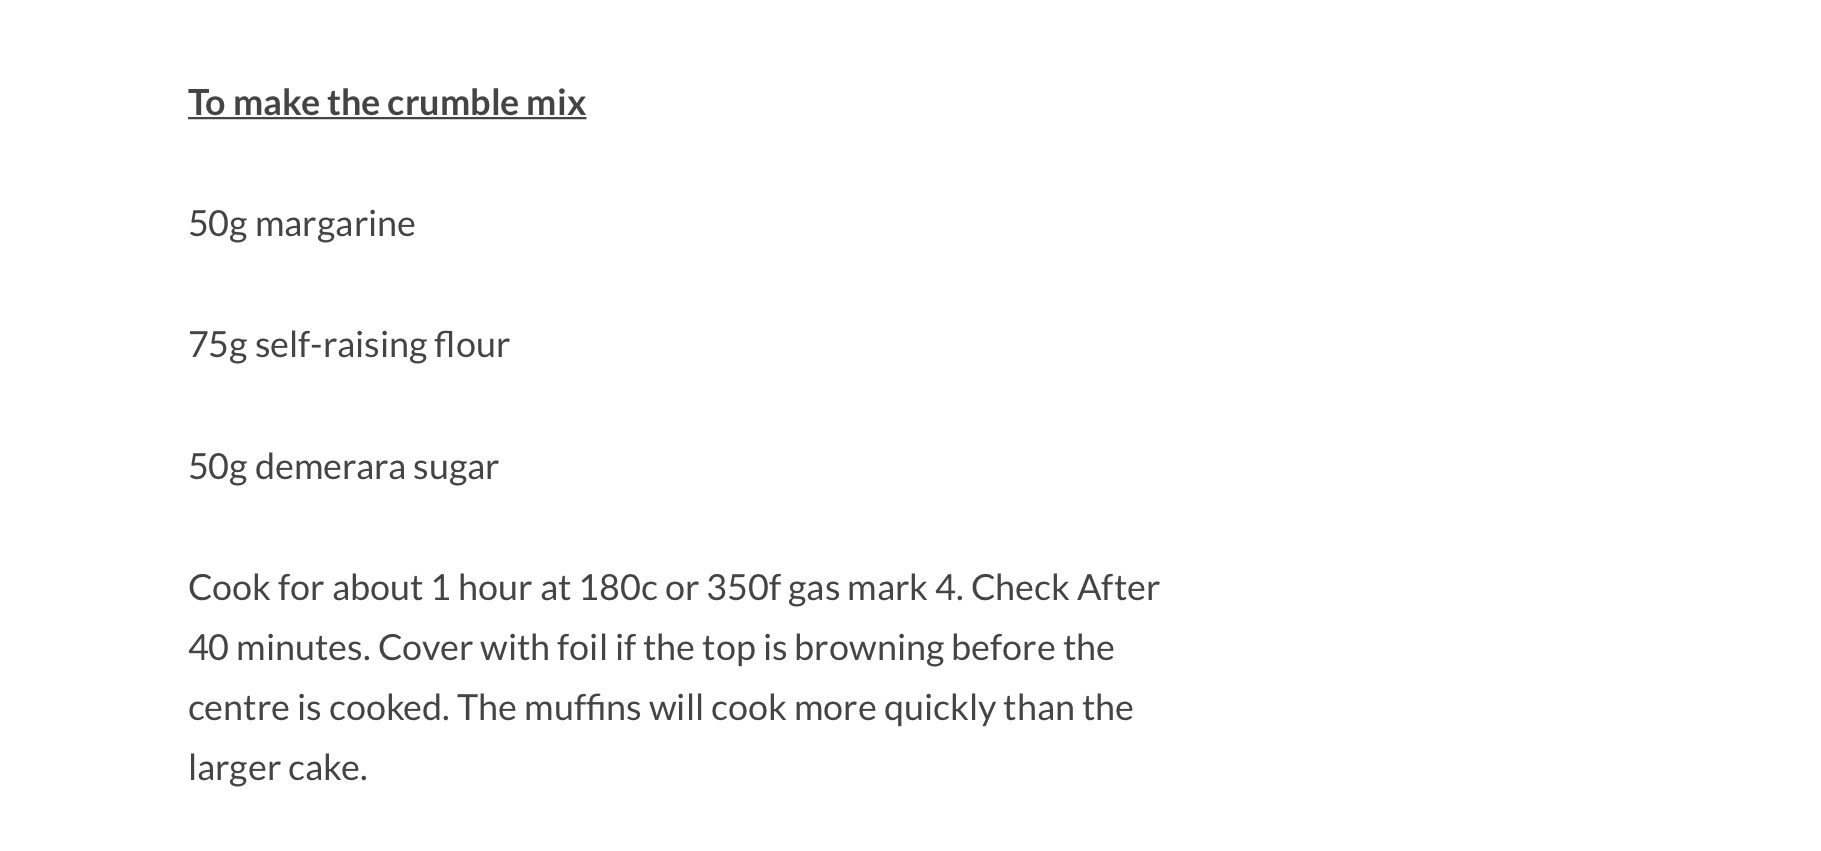
Recipe to follow from Garden News Magazine…..
Apologies, I accidentally deleted 9 years of blog diary photos!
I’m making these again today. I opened the kitchen cupboards and there was literally nothing cheerful in there! No biscuits, chocolate, cake. We’ve run out of everything. I wonder if we will look back on these times and ponder how we lived through this pandemic and learned to appreciate the simple things in life. I shall certainly never take for granted being able to just pop to the shops. Everything has to be so well organised. Lists on top of lists. All food is being delivered, for which I’m extremely grateful. But, oh, the dismay at discovering that I’ve forgotten something- just as I’ve pressed the button to order supplies. It’ll be a week before I can get another delivery. We do see an end in sight with vaccines on the way, so keep going everyone. Keep smiling. And make pastries, as there’s nothing nicer to cheer you up than the sight of these lovely tasty treats. Any fruit can be used, they are just as lovely with apples, frozen plums, raspberries, tinned peaches – any combination you like. Let me know what recipes are keeping you cheered up, and report back if you make any of these delicious pastries too.
And a photo of spring flowers to bring some joy as well:
White primulas. My favourites. Though I have seen some deep red double varieties mixed in with burnt orange which might look lovely in a blue China casserole dish…. if only I could get out to buy some.
Narcissi Geranium and cut flower collection tulips from last spring. All my tulips are poking through the ground now, and daffodils are in bud and flowering early. The veg patch is covered in forgetmenots. I use them as a green mulch to protect the soil and keep down weeds. Some are potted up to stand on the summerhouse steps. They are very easy to dig up as they have a shallow, fibrous root system. They do well when lifted and grown on in containers.
Daffodils make a very welcome return. I’ve watered them with potash or tomato fertiliser, having taken advice from a medal-winning grower. The liquid feed helps to strengthen the stems and enhances the colour, making them stronger and brighter. A good tip as we regularly seem to be getting stormy spring weather. It’s so sad to see daffodils flattened by the wind.
Eranthis hyemalis – winter aconite in the woodland garden. They won’t last long as temperatures are currently 13C.
Green-tipped Galanthus Viridapice looking pretty on the potting shed window. Snowdrops too have been a very welcome and joyous sight. But in the mild weather, they have opened right out and will be going over sooner than usual. I shall water these too with weak tomato fertiliser in the hope of boosting the size of the bulbs and increase the number of flowers for next year.
Have a lovely weekend everyone.
*I’m trying something new- doing Instagram live sessions from the greenhouse every day, essentially to keep in touch with my Mum and MIL Joan, and also to show my daughters how to grow plants from seed. Under normal circumstances I would be by their side helping them with their new houses and first gardens. But I can’t while we are in lockdown, so I’m doing what I can from home. I’m karengimson1 on instagram.
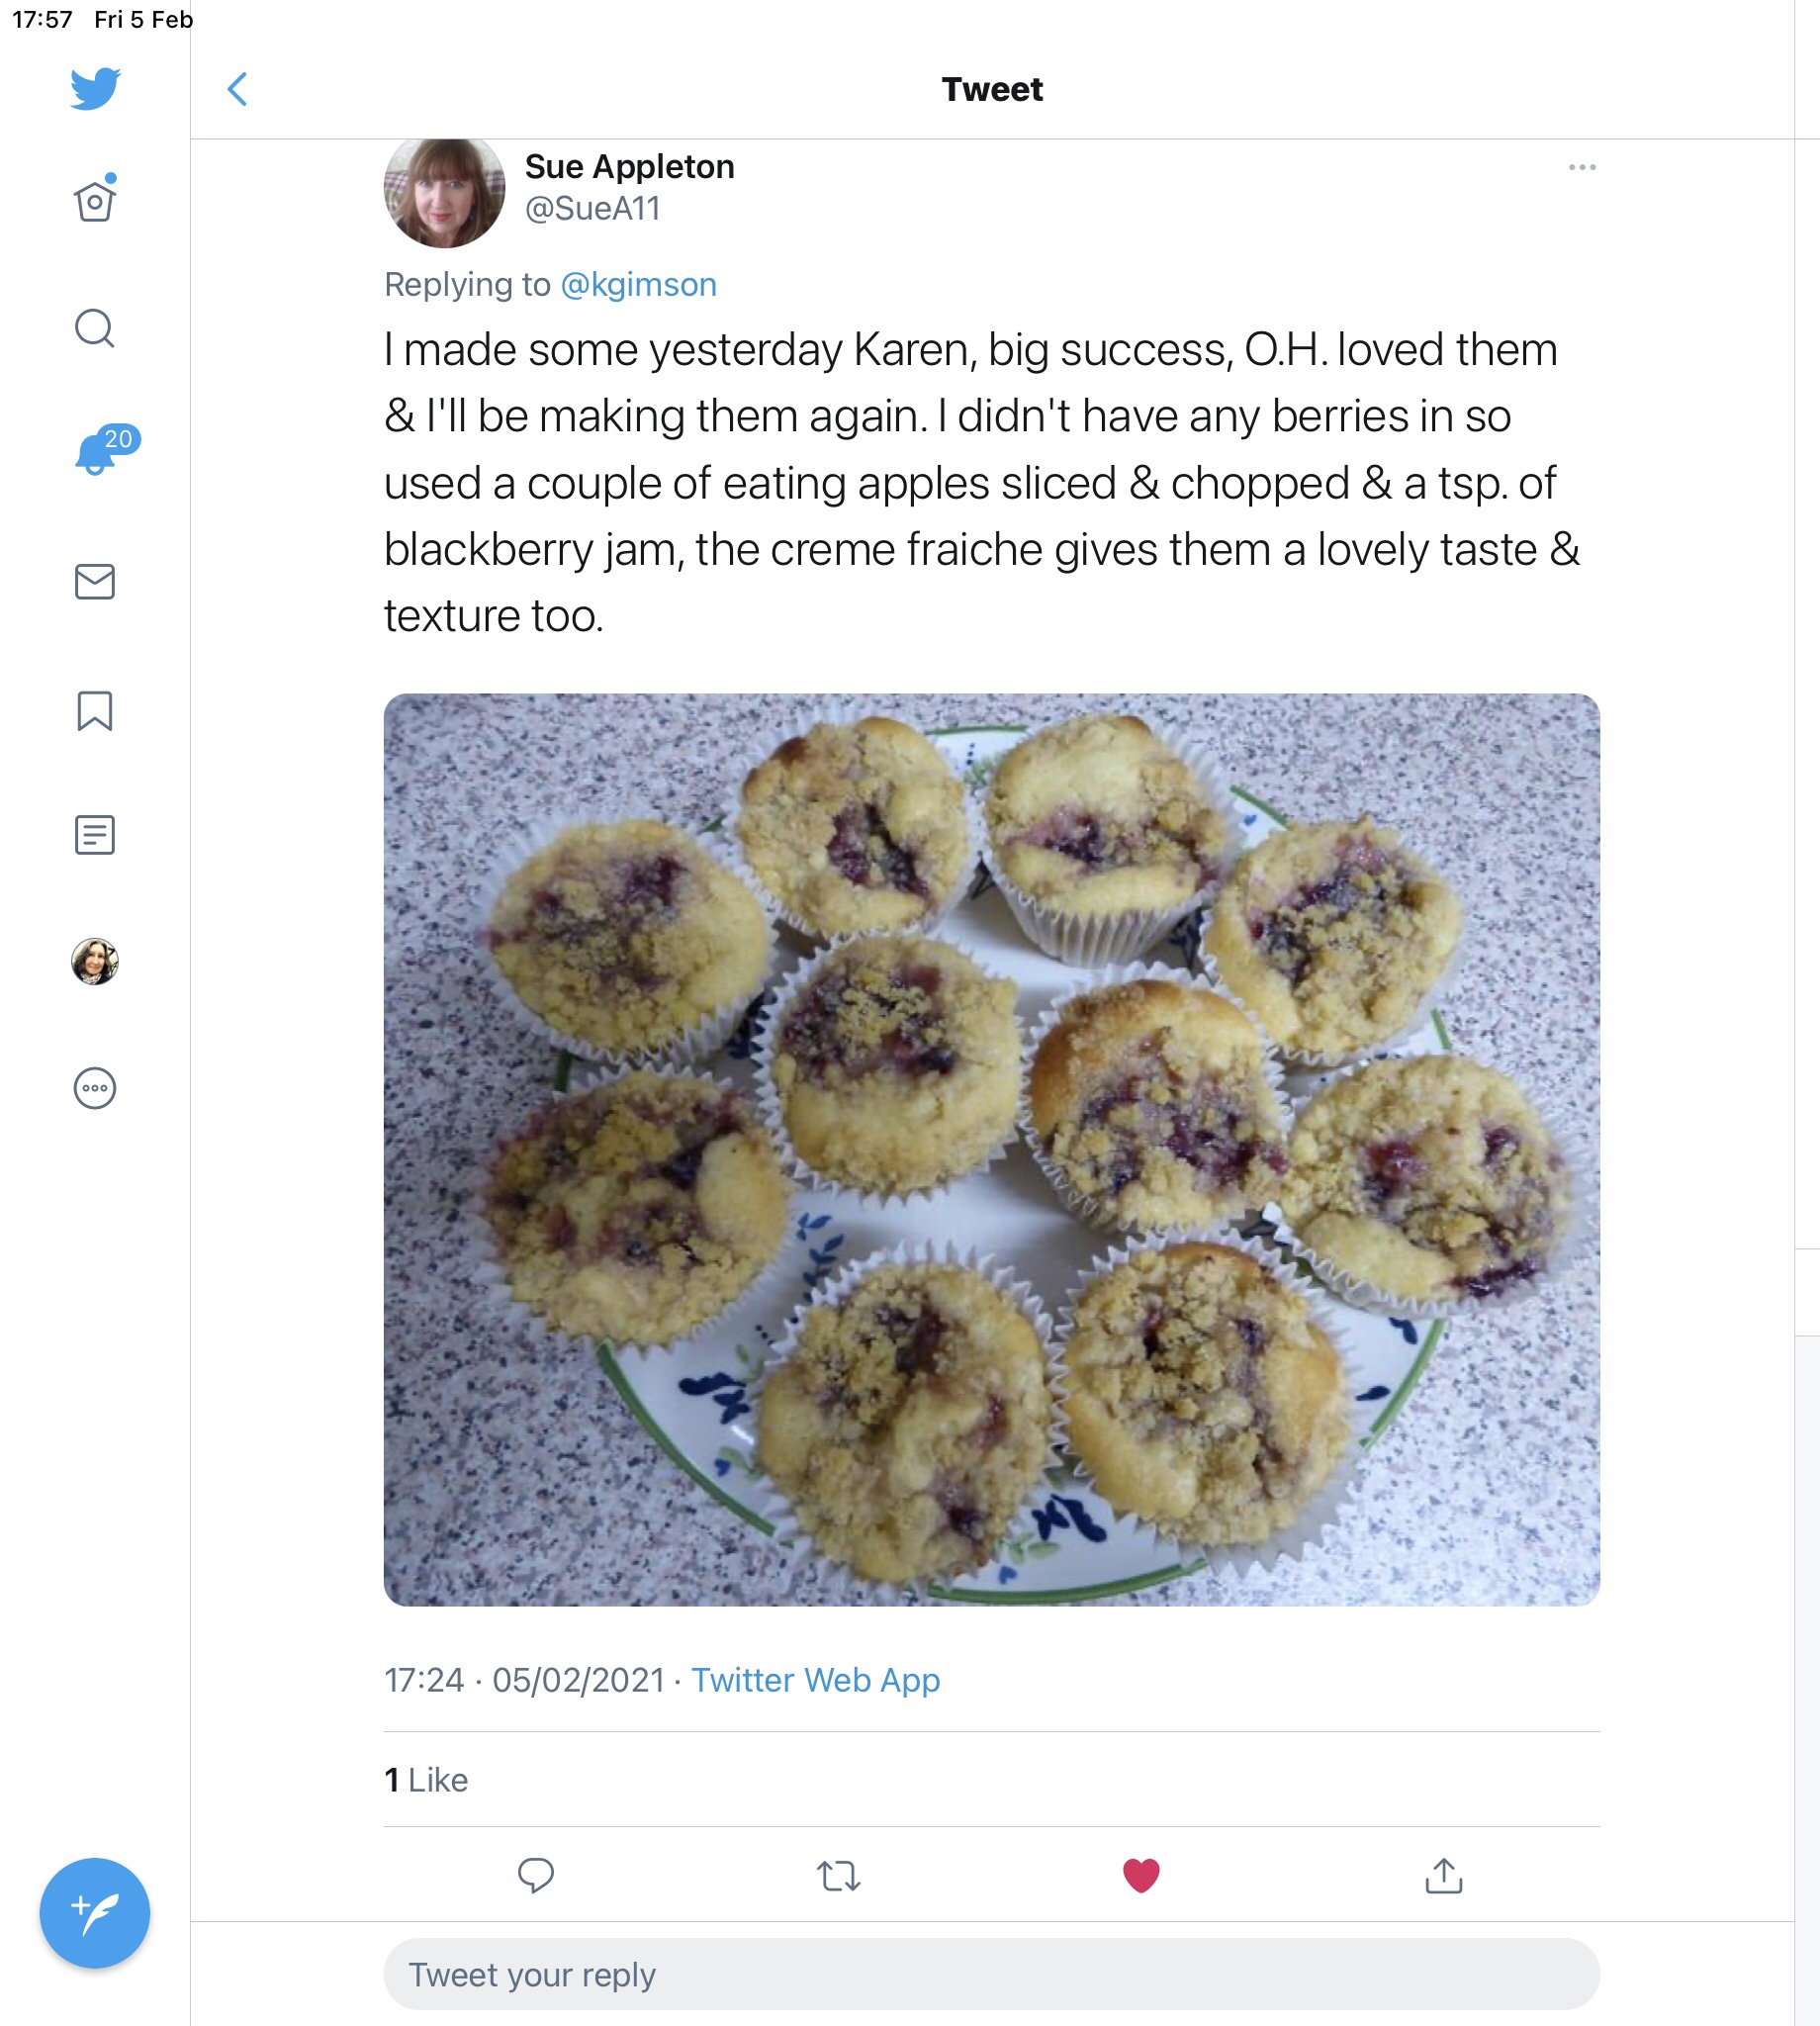
If you are reading this week’s Garden New Magazine (February 6 edition) here is the recipe I mention for apple crumble cakes. Our stored apples usually last until the end of February, but the autumn, and winter up until Christmas, was so mild the fruit started to go soft. I sliced and froze some of the apples, and turned the rest into delicious little cakes. These too can be frozen and will thaw within a few minutes, or defrost in a microwave. Let me know if any of you try the recipe, and how you get on with it. I’ve added frozen blackberries and raspberries to my cakes. Or you can just make them with apples on their own. All equally tasty. It’s lovely to have something reminding us of summer – right in the middle of winter.
You’ll need three or four apples, and a handful of berries, if using them. Use what you have. Equally good using tinned or fresh peaches, plums, blueberries, apricots, pears. It’s a very versatile recipe, using up store cupboard and frozen fruit.
I’ve made mine in silicone muffin trays, but you could just make one large cake and slice it. Use oat milk and egg substitute for vegans.
Muffins cook in 25 to 30 minutes. But check they are cooked through.
We store the apples wrapped in newspaper in the unheated glass porch and potting shed.
There was a good harvest from the orchard last autumn. Plenty of apples and pears.
I’ve been making apple crumbles all winter. Such a simple dish, so lovely and warming on a cold day.
Thanks for reading and getting in touch. I’ve started doing live videos from the greenhouse over on instagram as a way of keeping in touch with family and friends.
I’m karengimson1 on instagram
And @kgimson on twitter
Update: Sue Appleton on twitter used blackberry jam instead of berries and sent this message:
One of the ways I’m keeping upbeat at the moment is reading blogs. Barbara Segall writes about the Japanese rice recipe Seven Herbs of Spring in her ‘Garden Post’ blog. I was immediately inspired to go out into the garden and find seven herbs to make my own revitalising rice dish.
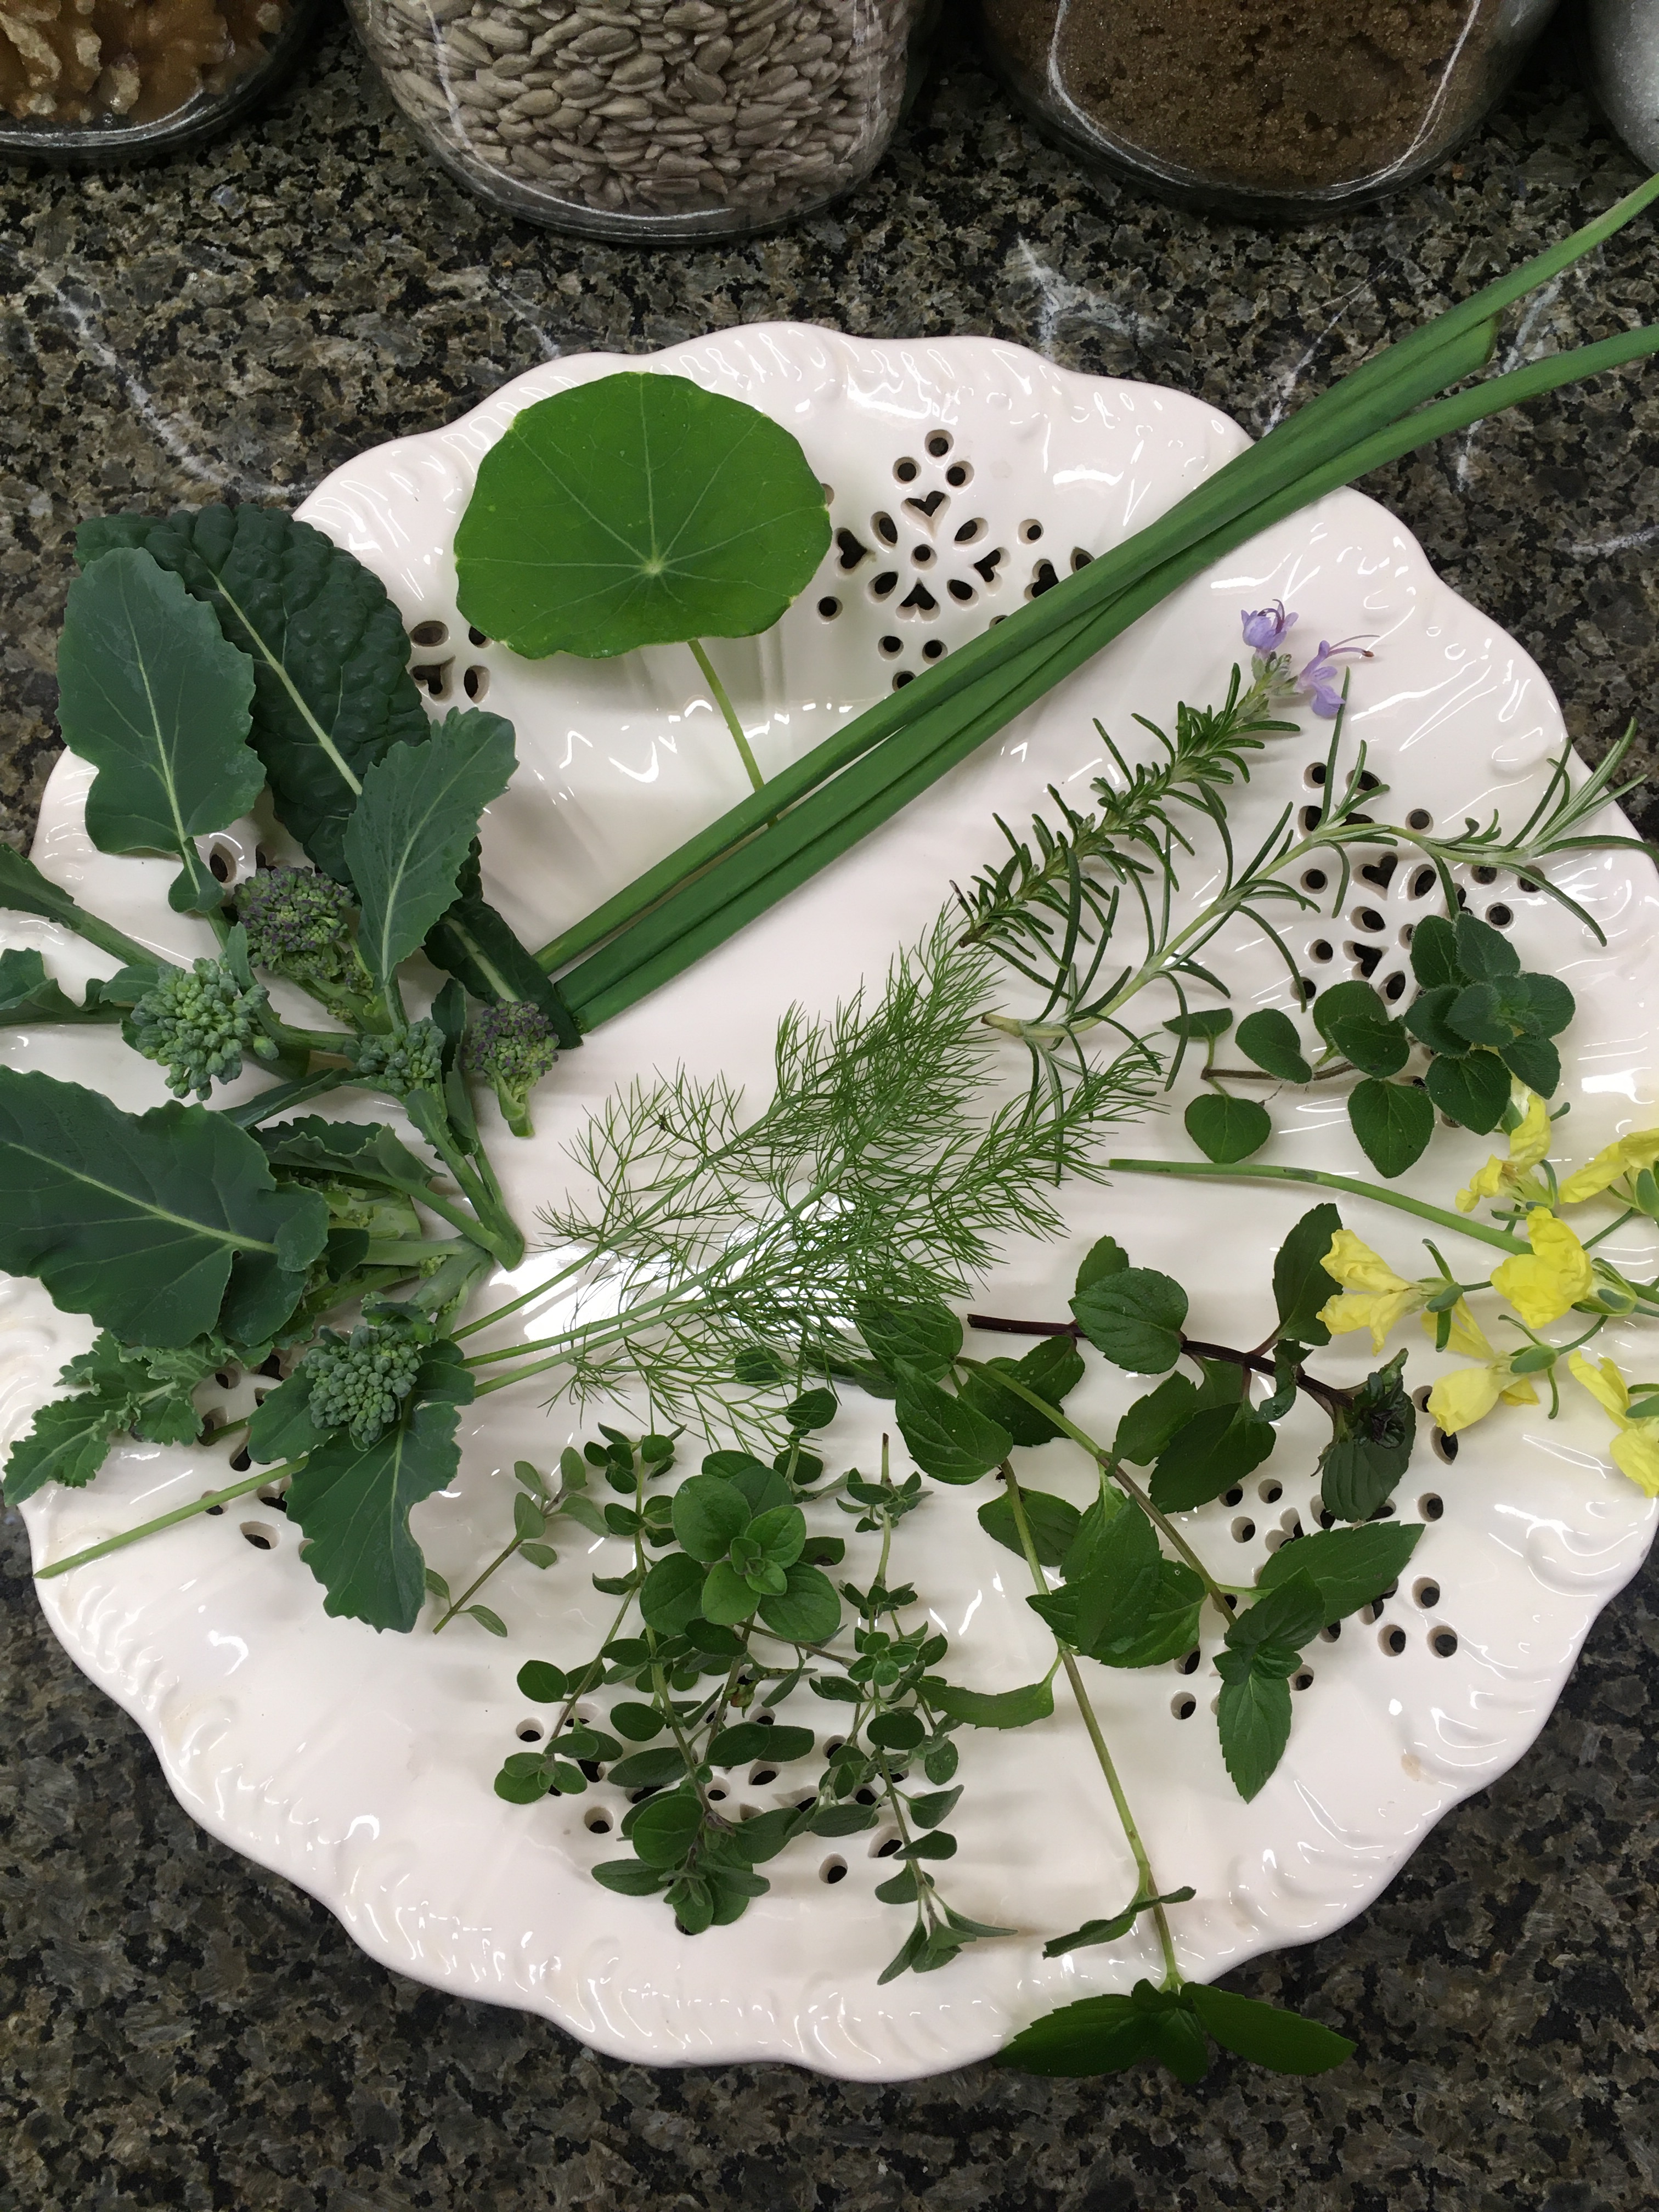
Barbara explains that the severn herb dish is a kind of porridge eaten during the first weeks of January as a way of detoxing and giving the digestive system a boost. Simple food after all the excesses of Christmas. I didn’t quite have the herbs Barbara mentions, but rather than just giving up, I searched out and used what I could find. I was delighted to discover small amounts of mint, fennel, rosemary, thyme, marjoram, Welsh onion, and chervil. Most were in self-watering containers placed in the greenhouse for winter protection. Rosemary grows by the back door, and perennial Welsh onions are in the polytunnel. They are a good source of fresh onion-flavouring when chives have died back for the season.
Just searching about the plot and discovering small amounts of herbs was a joy. The scents released as I snipped the herbs into a colander made me think of summer when I planted these containers. I perhaps use fresh herbs more in summer than I do in winter. It requires more of an effort to go out in the cold, ice crunching underfoot and wrapped up against the chill wind. Much easier to reach for the dried herbs (dare I admit to using such a thing). But the taste was worth it. Every mouthful was a burst of flavour – transporting me back to sunshine and summer heat.
I boiled some organic long grain brown rice to go with my herbs. A nice easy meal, in contrast to all the complicated, lengthy cooking of the festive season. The rice was ready in 25 minutes. I roughly chopped the herbs and sprinkled them over the steaming rice. I found some tiny emerging spring broccoli and nasturtium leaves to add to the dish and yellow broccoli flowers, which are edible and should not be wasted.
Delicious! Using what I have about the place and keeping things simple. It made me feel as if I was looking after myself. Which is no bad thing just at the moment when we are all rather stressed and in lockdown.
Do read Barbara’s blog and learn more about Japanese cooking traditions. Barbara’s writing is like silk. It’s a joy to read. And you never know, it might inspire you to grow more herbs and cook something delicious and good for you. Let me know if you do!
It’s going to be Christmas-with-a-difference this year. We are all going to stay at home and not mix the households. After making this sad decision, it’s full speed ahead to make this Christmas full of our usual food and special treats. We will just be enjoying them in our own homes – and not all together around the same table.
Here’s a recipe my mother-in-law Joan used to make every Christmas for as long as I can remember. The aroma of apples, spice and vinegar instantly makes me think of Christmas preparations. I feel quite tearful, standing here chopping the apples on my own. It only feels like yesterday when I was standing in Joan’s tiny kitchen chatting away, watching her cook. We were the ‘young couple’ then in our 20s, too busy to cook, with such a lot to talk about. Such busy lives. So much to say. We never stopped talking. Now I suddenly realise how silent I’ve become. Still busy lives, but somehow I have become the ‘listener’, and my children and their partners, the ‘young couples.’ I really hope it’s not too long before they can be here, standing in my kitchen, bringing the world into my home, with all their news and conversation again.
INGREDIENTS
900g eating apples
450g onions
225g sultanas
450g brown sugar
1tsp each of ground ginger, salt, cinnamon, mixed spice.
1tbsp whole pickling spice -tied in a muslin bag (optional)
450ml vinegar
METHOD
Chop the apples and onions into small 2cm pieces. Put all ingredients in a large saucepan or jam pan and bring to the boil. Gently simmer until the apples and onions are cooked ( about 35- 45 minutes). Remove the muslin bag of spices. Pour into clean sterilised jam jars.
This chutney keeps for about 1 year and is a perfect for cheese and festive meals. It’s a lovely quick-to-make present too.
For Joan and Keith, it will be Christmas at the care home for them this year, when they should be sat at the head of a very large table full of children, grandchildren, and two new great-grandchildren- born in the last few months. We are not allowed to visit, and they are not allowed out. Such a sad state of affairs for us, as it must be for many. But there’s hope on the horizon with news about a vaccine. And that’s what I’m holding on to this year. Hope.
What traditions are you keeping this Christmas? Do you have favourite recipes that make you think of Christmases past. Take care, and thank you for reading.
Joan’s favourite Christmas decoration that she’s treasured since she was a child. She’s 91 now. The little bell inside still rings.
Try these tasty treats. They are perfect for summer picnics and special occasions. And vegan friends and relatives will love them.
INGREDIENTS
Makes 3 small ramekins. We re-use the glass ones from Gu.
Base:
190g cashew nuts
1 tbsp. vegan margarine
1 to 2 tbsp. maple syrup
Topping:
150g Creamy Violife – original flavour (cream cheese substitute)
1 tbsp. icing sugar
1 tbsp. caster sugar
1/4 tsp. Vanilla essence
1 tbsp. soya milk
strawberries to decorate
1 tbsp. maple syrup to drizzle over strawberries.
METHOD
For the Base:
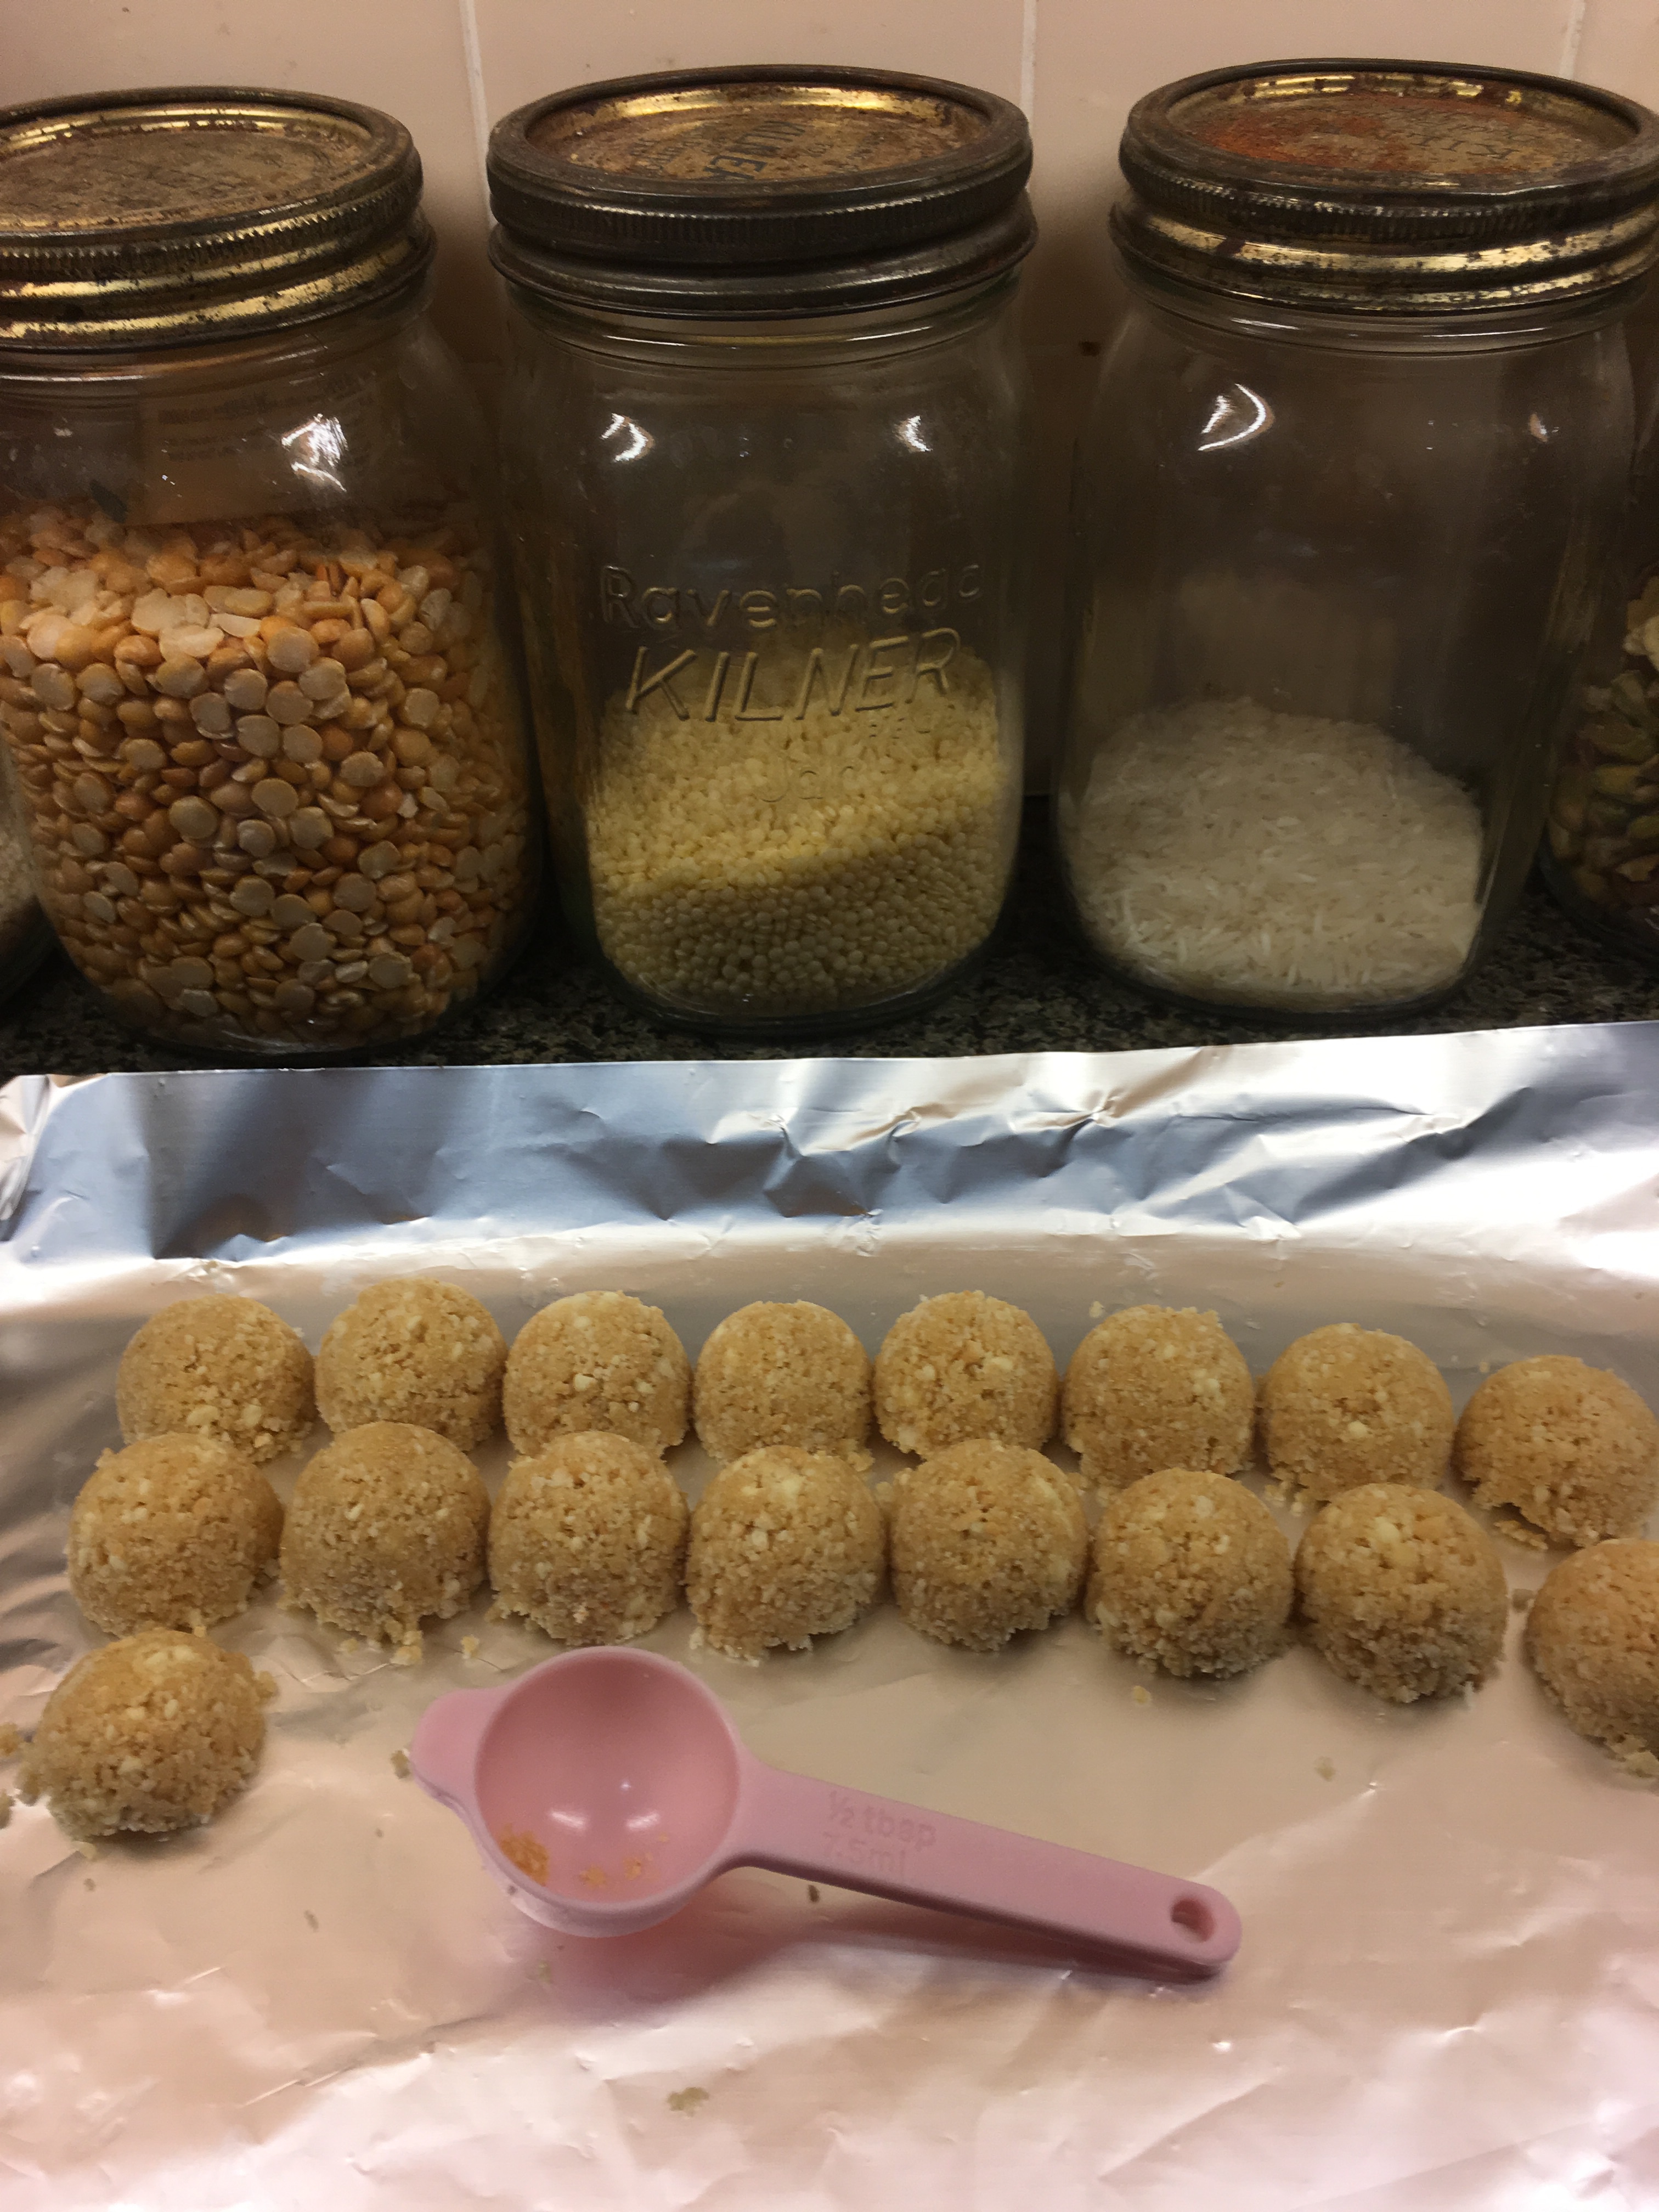
Roast the cashew nuts in the oven at 190C for 5 to 10 minutes. Keep checking and remove from the oven when the nuts have turned light brown. They easily burn, so keep an eye on them.
Whizz the cashew nuts in a food processor. Add the margarine and maple syrup.
Spoon the mixture into glass ramekins and place in the fridge to cool.
For the topping.
Cream all the ingredients together and spoon on top of the base.
Slice the strawberries and place on top of the cream mixture. Drizzle the maple syrup over the top.
Delicious! And very quick to make. The cashew nut base makes a change from biscuits and is healthier.
These delicious little cakes travel well and are perfect for picnics and parties. We always make them if we are invited round to a friend’s house. They are quick and easy to make and really tasty.
INGREDIENTS
Makes 12
12 plums, stones removed and fruit chopped into chunks.
For the sponge:
85g (3oz )sugar
85g (3oz ) margarine or butter.( I use Lurpack which doesn’t contain palm oil.)
1 egg
113g (4oz) self raising flour
1 level teaspoon baking powder
1 tablespoon milk
1 teaspoon good quality vanilla extract
Few blanched almonds for the top.
METHOD
Cream together the sugar, margarine and egg with an electric hand whisk. Add the flour and baking powder and whisk. Add the milk and vanilla extract, and whisk.
Place the chopped plums in the base of a silicon cup cake mold which has 12 ‘cups.’
Top with the sponge mixture. It will be about one large heaped tablespoon per cup. Sprinkle blanched almonds on top.
Cook for approx 15 mins at 180C, 356F gas mark. They are cooked when a knife comes out clean from the sponge. Take csre not to burn the almonds.
Leave to cool in the trays. Use a pallet knife to remove them. Sprinkle with sugar. Serve warm or cold.
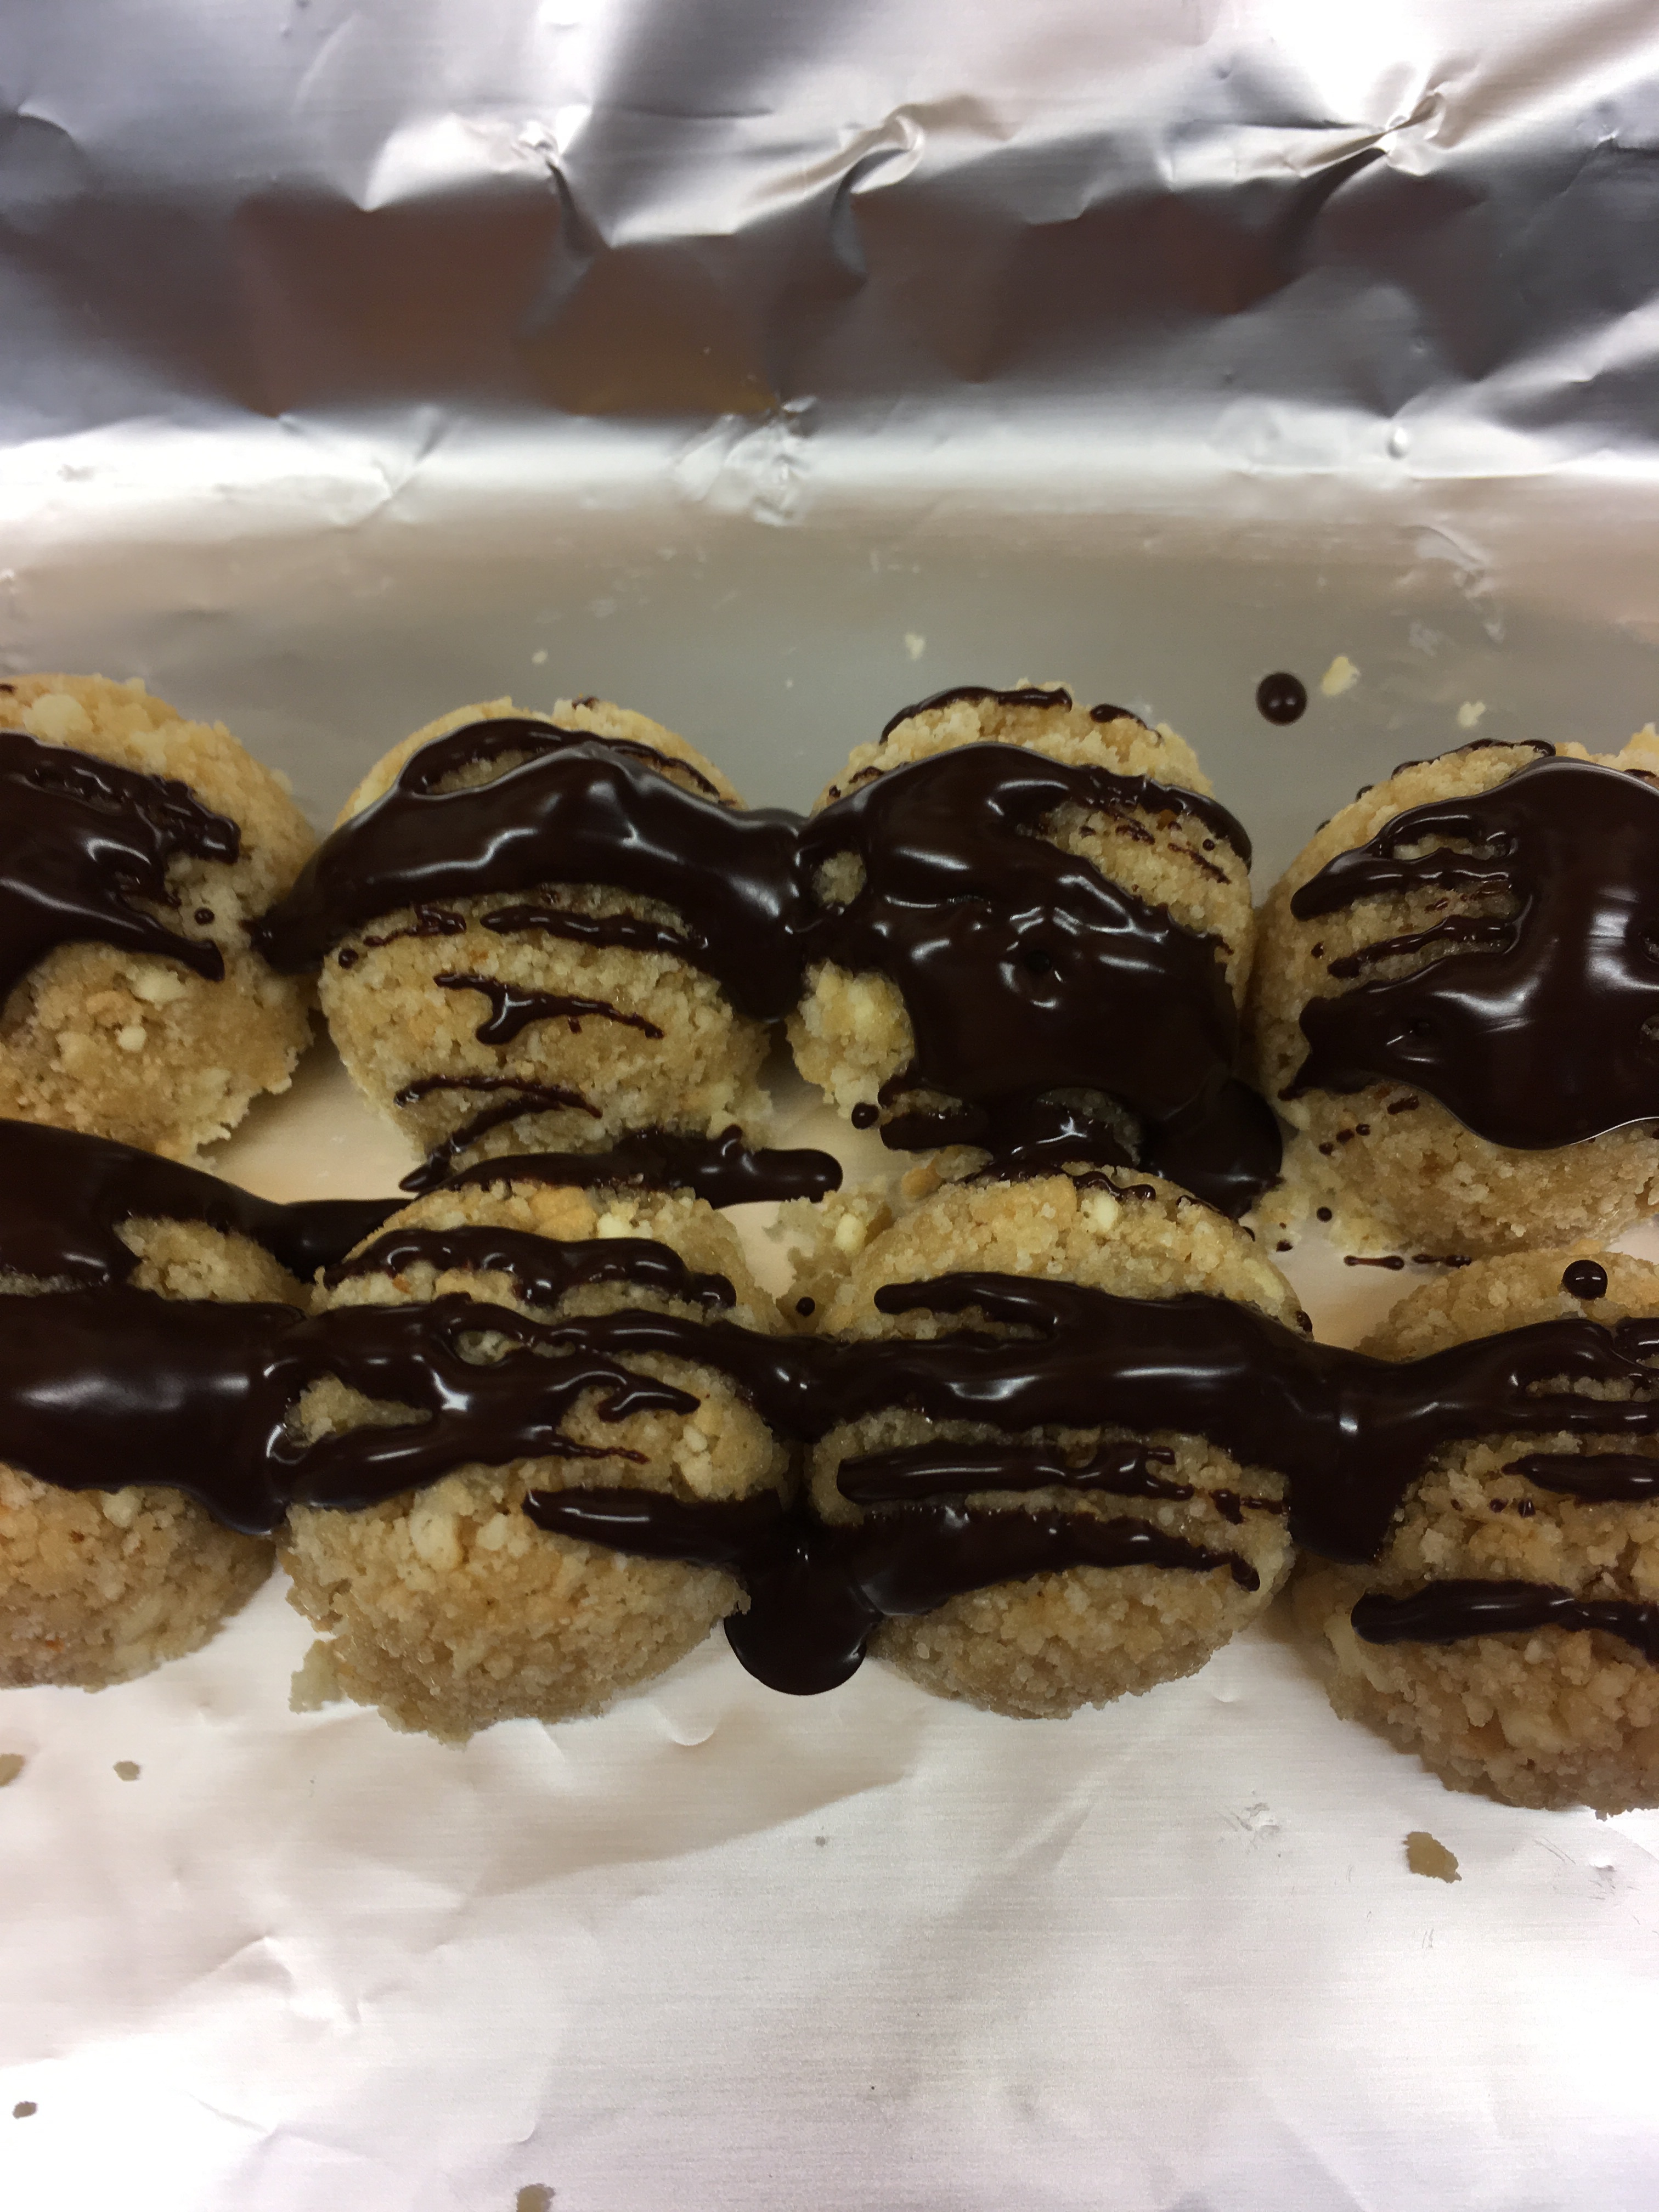
If you were listening in to the radio for Garden Hour, these are the biscuits I took in for the team. I made the lemon and white chocolate version yesterday. Today I made them with dark chocolate. Delicious!
Recipes featured here use produce from my garden. I’m always looking for ways to use up my citrus fruit from the greenhouse. This is a favourite recipe. It only takes ten minutes to make. Perfect if friends turn up unexpected and you want to give them a quick home-made treat.
Ingredients
180g biscuits ( I’ve used home-made Scottish shortbread, but you can use any biscuits. Custard creams are delicious, as are chocolate bourbons.)
3 tbsp lemon curd. Home-made (recipe below) is totally delicious, but any will do.
100g best quality dark chocolate, or white chocolate.
Few bits of fine lemon peel for decoration
Recipe
Crush the biscuits in a food processor, or in a plastic bag, bashing them with a rolling pin.
Add the lemon curd and mix to combine.
Use a melon baller or a 7.5ml measuring scoop to form balls. Press them slightly while in the scoop so they hold together.
Tap out on to a tray covered with foil. Place in a fridge.
Melt the chocolate in a Pyrex bowl suspended over a pan of boiling water. Ensure the water doesn’t get into the chocolate mixture. Or melt in a microwave in several 10 second bursts. Take care not to over cook.
Drizzle the chocolate over the biscuits in long lines. Add some fine lemon peel to decorate. Return to the fridge to set.
Will keep in the fridge for 3 days. But they won’t last that long. They are truly delicious!
Lemon Curd Recipe
Makes 1.15kg
Ingredients
6-8 large lemons (unwaxed, organic, or home-grown)
225g butter
575g caster sugar
5 large eggs
Recipe
Grate the zest from the lemons on the finest setting. Squeeze the juice and strain into a jug. You will need 300ml of juice.
Cut the butter into small pieces and put into a glass bowl along with the sugar, zest and juice. Set over a pan of hot water and stir until the sugar has dissolved. The bottom of the bowl must not touch the water which must simmer and not boil.
Lightly beat the eggs in a bowl but don’t whisk them. Strain the eggs through a sieve into the lemon mixture. Simmer on a low heat, sitting continuously until the mixture thickens. Will take about 20 minutes. Do not allow to boil or it will curdle.
Pour into warmed sterilised jars. (pop the washed jars in an oven for 10 minutes until sterilised).
Place wax disk over the lemon curd ( wax -side down). Smooth down the disk to remove any air.
Cover with dampened cellophane circles, label and store in the fridge.
February is a cold, dark, short month. But everywhere there’s signs of spring. Wild violets and the first primroses pop up by the front gate. And snowdrops cheer up the hedgerow, pushing up through hats of curled, brown leaf mould.
It’s traditionally a month of self-denial and fasting. Many people give up something for Lent – chocolate, wine, or favourite foods. Shrove Tuesday or Pancake Day is a way of using up egg supplies before the fasting period begins. I make orange curd to use up eggs and butter.
But I also like to make marmalade now. An antidote to winter. I line up pots of marmalade along my kitchen window. A kind of ribbon of orange light. My own stained glass window. Here’s my favourite recipe, which I make with Seville oranges – and some citrus fruits from my heated greenhouse. Tucked up indoors and standing over a steaming pan of oranges makes for a heart-sing moment. And we need plenty of those in February. My grandmother’s old saying is usually true. As the days lengthen, the cold strengthens. I highly recommend staying indoors, keeping warm and making marmalade.
ORANGE MARMALADE
2lb or 900g fruit ( I used Seville oranges, and some kumquats and calamondin fruit from the greenhouse.)
1 lemon
4lb or 1.8kg granulated sugar, warmed
4 pints water
6 x 1lb jam jars
Square of muslin
Cut the lemon and oranges in half and squeeze out the juice. Put any pips or pith that cling to the squeezer into a square of muslin placed over a pudding bowl. Now cut the peel into quarters. Scrape off the pith and add to the muslin. Cut the quarters into thin shreds. Add the juice and peel to the water in a heavy-based preserving pan. Tie up the muslin square and tie loosely to the pan handle with the bag suspended in the water. The pith contains pectin which will help the marmalade set. Simmer gently uncovered for 2 hours until the peel is completely soft. Remove the muslin bag and set aside to cool. Put a plate in the freezer. Pour in the sugar and heat gently until the sugar crystals have melted. Squeeze the muslin bag to extract the jelly-like pectin. I used plastic gloves, or you can press it between two saucers. Increase heat. As soon as the mixture reaches a fast boil, start timing. After 15 minutes, spoon a little of the marmalade onto the cold plate and pop in the fridge. If it has a “set” the marmalade will crinkle when you push it with your finger. If not, continue to boil for another 10 minutes. Remove pan from heat and stand for 20 minutes. Add a tsp butter to disperse scum. Pop the jam jars in the oven to warm for five minutes. Pour the marmalade into jars with the aid of a funnel, cover with wax disks and seal while still hot. Label pots- and enjoy!
A visit to my mother-in-law’s house would always find us searching the pantry for the cake tin. Over the past 50 years, you could pretty much guarantee to find some flapjack in there. Joan recently gave me all her treasured recipe books. Here’s my own version, adapted from Joan’s family favourite. It travels well and is ideal for picnics.
ORANGE AND WALNUT FLAPJACK
250g or 9oz unsalted butter, chopped into pieces
250g or 9oz golden caster sugar
175g or 6oz golden syrup
425g or 15oz porridge oats
50g or 2oz walnut halves,slightly crushed.
Grated zest of 1 orange.
3 tbsp orange marmalade
160C gas / mark 4 for 30 minutes
28cm x 18cm shallow baking tin
Melt together in a microwave the butter, sugar, and golden syrup. Stir into the oats, walnuts, and orange zest. Tip the mixture into a lined tin and level it off. Bake for 30 minutes or until the edges are golden brown and the centre is still slightly soft. It will firm up as it cools. Mark into 12 pieces while it’s still warm. Leave to cool and then brush the top with melted orange marmalade. Keeps for a week in an airtight tin.
Each week on BBC Radio Leicester there’s a Gardeners’ Phone-in programme between 11am and 12 noon. I like to take in a posy from my garden, showing what’s in flower all year round. And I also take in something I’ve made using produce from my plot. This week it was a jar of marmalade and some flapjack. Tune in on the i player to listen to the programme which starts at 2.11.31 on the timeline at http://www.bbc.co.uk/programmes/p05t8n69. Meanwhile, I’ll leave you with a photo of my greenhouse from last summer. A reminder of lovely warm weather to come.
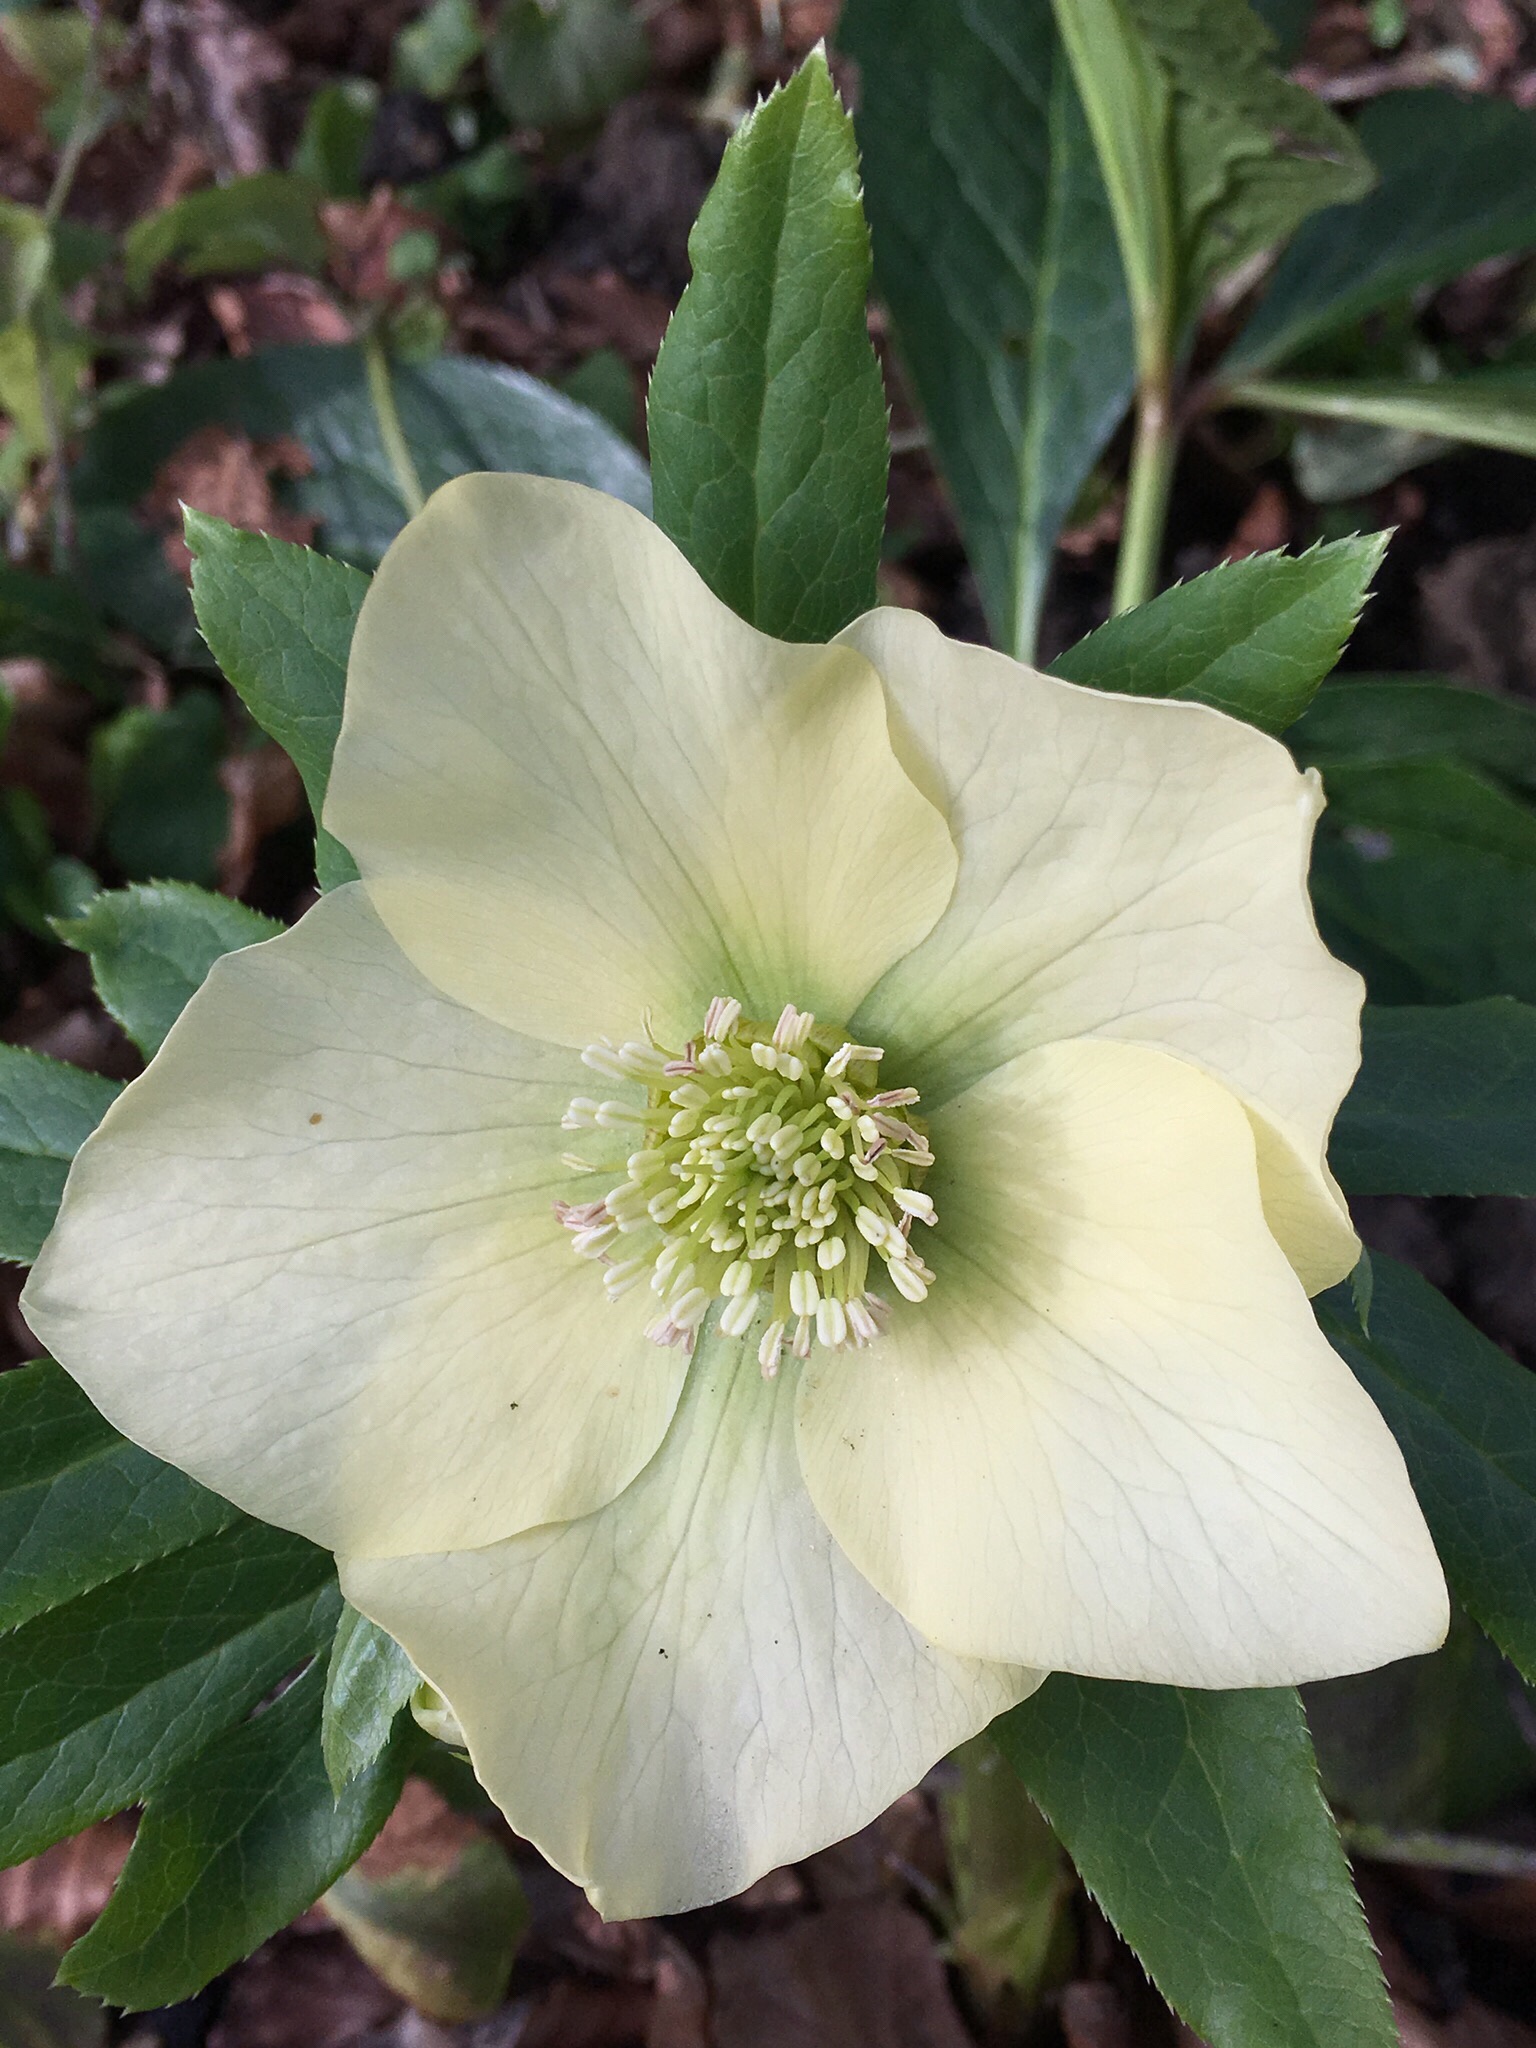
Just dashed in from the garden. Picked some hellebores for the kitchen table. Now for some cooking……
I’m standing at the cooker stirring a cauldron of blackcurrants. Outside the temperature has dipped to 1C and there’s a bitter north wind. But in the kitchen, it’s summer again. The scent of the blackcurrants transports me back to sunnier times. I’m making blackcurrant syrup. It is roughly equal amounts of fruit and sugar. The blackcurrants are first cooked and sieved. And then the sugar is added and the mixture simmers for 15 minutes. Add the justice of a lemon. When cooled, it can be added to yogurt, fruit sponges, or made into jam tarts. Today I’m making lemon cheesecake and topping it with the rich, full of flavour syrup. It will do us the world of good. We have been ill since Christmas, and the thought of all that vitamin C is cheering me up already.
Blackcurrant Cheesecake
500g packet of digestive biscuits
4oz or 113g butter. 1/3 cup in USA
4oz or 113g cottage cheese. 1/3 cup
8oz or 227g cream cheese. 2/3 cup
1/4pint or 142ml double cream.
3oz or 85g sugar. 1/4 cup
Juice and rind of one lemon
First whizz the biscuits in a food processor. Melt the butter and add the crushed biscuits. Press this mixture into the bottom of a glass Pyrex flan dish.
Sieve the cottage cheese and add the cream cheese and sugar. Whisk the double cream until it is firm and fold in to the mixture. Add the lemon juice and rind. Spoon the mixture on top of the biscuit base.
Drizzle the blackcurrant syrup over the top. Or you can add any fruit you like. It is lovely with strawberries, peaches, pineapple, raspberries, blueberries- anything you have spare.
Place in the fridge for at least four hours to set.
Growing Blackcurrants
Blackcurrants are easy to grow. The fruit forms on young wood, so now is a good time to prune out some of the old stems. I remove about 1/3 of the stems each year, leaving around 7 of the newer stems to develop. Mulch with well rotted compost, manure or mushroom compost. Blackcurrants can be grown in sun or semi-shade, but they hate being too dry. Incorporating humus into the soil will help. Plant deeply- about 6cm deeper than the plants were growing in their pots. I’ve found the best varieties to grow are anything with the prefix “Ben” – so Ben Connan, Ben Sarek, Ben Hope and Ben Lomond.
Today’s syrup was made from frozen fruit. They freeze well and are free flowing, so you only need to defrost a few at a time. A tip for preparing them. Freeze them straight from the garden. And when they are frozen, take them out and roll them carefully in a tea towel. All the stems and bottoms will come off easily and you can pop the fruit back in the freezer before they thaw out. This is much easier than trying to top and tail fresh, squashy fruit.
I’ll leave you with another view from the garden just now. I’ll be glad when the light returns. Meanwhile, every time I look in the freezer there’s a reminder of summer. It’s like opening a box of jewels.
It’s been a brilliant year for stone fruits. We’ve had a record number of plums and peaches at home. They are the easiest fruit to grow- just plant them and harvest delicious home-grown organic produce.
Here’s my favourite recipe for fruit crumble cake. You can use any fruit – peaches, plums apricots, apples. Takes only minutes to make, and can be frozen. The mini crumbles look fantastic for a party- or even a picnic.
FRUIT CRUMBLE CAKE
350g self-raising flour
2 level teaspoons mixed spice
175g butter
150g golden caster sugar
8 tablespoons milk (buttermilk if you have it)
1 teaspoon vanilla extract
5 peaches or a handful of plums
Icing sugar for dusting
A 12 hole pan, or 18 x 28cm tin lined with baking paper, or any 7″ pie dish
20 mins at 190c /gas mark 5
Using only 3 tablespoons of the milk – Put all the ingredients – apart from fruit- in a food processor and whizz to form crumbs.
Tip out into a bowl, and put two thirds of the mixture- and the rest of the milk- back in the machine. Blend to create a smooth cake-consistency.
Spoon the cake mixture into the pans and arrange chopped fruit over the top. Add the reserved crumble mixture on top, leaving some of the fruit uncovered.
Bake for about 20 minutes or until a skewer inserted into the centre of the cake comes out clean. Cut into chunky squares, if using the tin. Dust with icing sugar.
Note: You can used canned or frozen fruit, if fresh isn’t available
PLUM JAM
900g fruit
900g sugar
150ml water
Put all ingredients in a jam pan and cook gently until all the sugar is absorbed and the plums are soft. Gradually bring to a rolling boil. Check carefully to see that the jam isn’t burning on the bottom of the pan. After about 10 minutes put a tablespoon of the mixture onto a cold plate from the fridge. Leave to cool slightly and press with your finger or a spoon to see if the jam ripples. If it ripples it will set. If it stays soft and liquid it needs more boiling. This will fill about 4 or 5 jars which have been very thoroughly washed and warmed in the oven before filling. There are recipes with larger amounts of fruit, but this one works for me and is a manageable amount to cope with in one go.
Enjoy! Have you had a good year for fruit in your garden? And don’t forget to share your favourite recipes in the comments below.