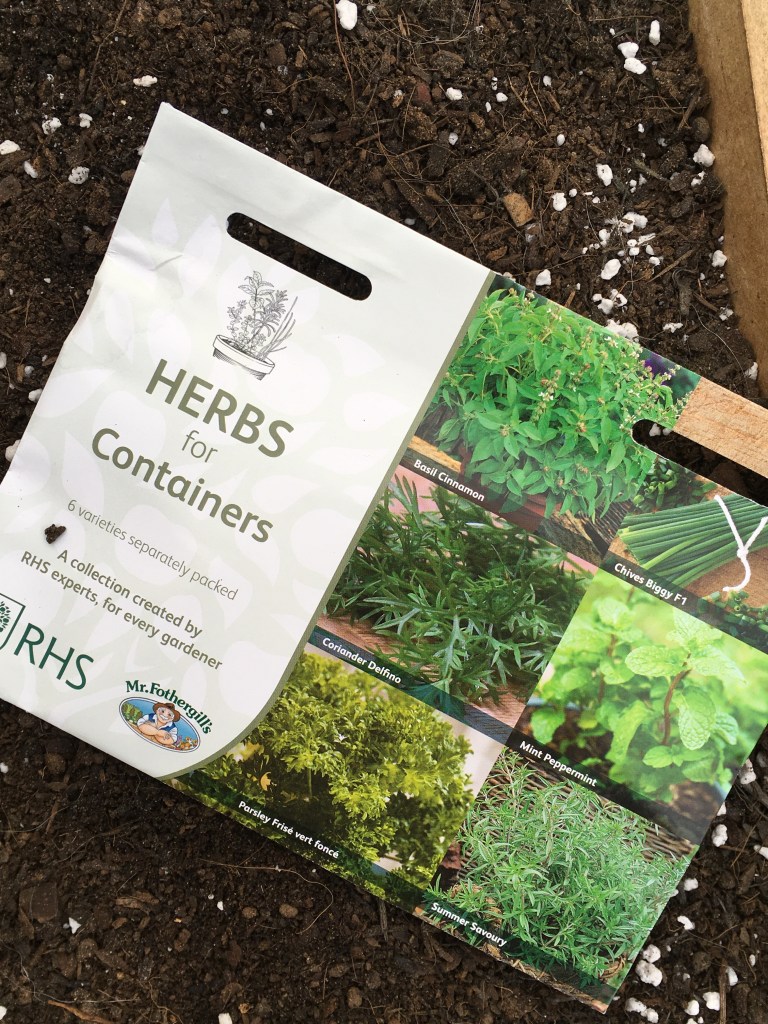
I like these multi-packs of seeds as they save money. As well as growing the chives and parsley, I can highly recommend the cinnamon basil which smells and tastes divine. Are you growing herbs from seed this spring? It’s an economical way to grow them and you don’t have to sow the whole packet at once. I often save half a packet for the next year.
These windowsill seed and box kits are recommended. I wrote about them here:
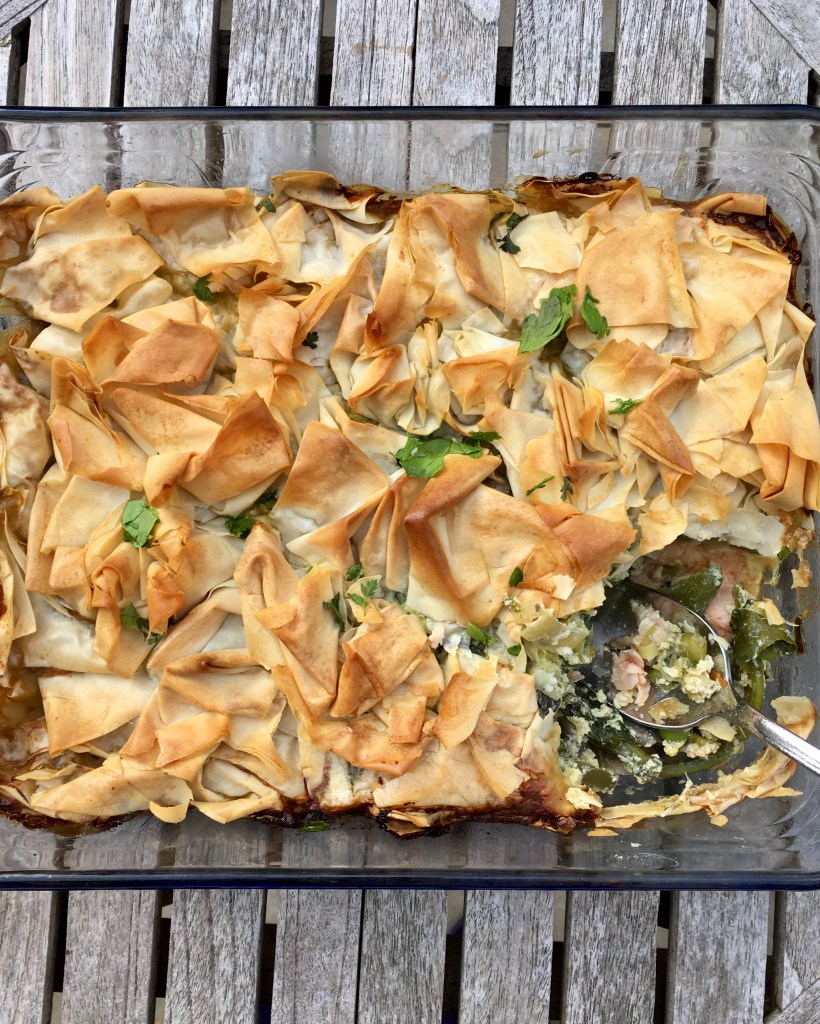
Let me know if you have a go at making these bread rolls. They are such a lovely accompaniment to spring vegetable soup. I’m making cream of celery soup today, using celery grown over winter in the unheated poly tunnel. Tastes nothing like the bland celery you buy from the shops. It’s so sweet and crunchy!
This week’s Garden News Magazine recipe using fruit grown in my garden. Strawberries don’t thaw out well after freezing. They tend to go soft. But frozen fruit is perfect for adding to pies, cakes and puddings. In this instance, I’ve added strawberries to some jam and filled a light sponge cake. Then I’ve added lashings of whipped double cream. I must admit, I had no complaints from the family! 😃
I slice and freeze strawberries in flat plastic trays before bagging them up and using them over the winter. Shop-bought strawberries seem to have no taste, but sun-ripened home-grown fruit is delicious- and free!
You can buy strawberry plants now from the garden centres or online. You can also buy bare-rooted stock which has been cold-treated to produce fruit this year. Strawberries need winter cold to prompt them to flower and fruit, so don’t put them in a greenhouse or other protected space indoors over winter. But you can bring them indoors now to get an earlier crop, if you grow them in containers.
I’ve had the best success growing them in window boxes and lifting them into the greenhouse in early spring. Growing in containers helps defeat the slugs which tend to be a nuisance in wet weather. And also it’s easier to cover them in fine netting to protect from birds. Take care not to use coarse netting, which catches birds’ feet. It can be difficult and distressing trying to untangle a delicate bird from netting. I tend to use fleece now, or micro mesh insect proof netting which has no holes to trap feet.
You’ll notice I mention David Hurrion’s new book. A review is to follow. Very highly recommended. It’s the only guide you’ll ever need for growing anything in raised beds. A very well-written and comprehensive book. Another Dorling Kindersley success story. DK spots all the best writers and is giving us a field day with new titles this year. And David Hurrion is a very well respected horticulturists, teacher and writer. Someone I have no hesitation in recommending for his book and also courses. I note he will be coming to Barnsdale Gardens this year to teach pruning techniques and caring for fruit trees and soft fruit (16 November) and gardening for beginners and plant propagation (3rd August).
Thank you for reading my blog. You are amongst 1,000 readers a week! I’m very grateful for all your support. Come back and read more reviews, and for recipes, and photos of what I’m growing here at bramblegarden. Please also sign up for notifications for future posts.
This week’s recipe from Garden News Magazine. Each week I have a look around to see what I’ve grown in the garden, and I make something for the family. It’s not fancy food, just good old-fashioned, easy-to-make family favourites. I try not to use too many ingredients, and include common items anyone would often have in their kitchen cupboards. there’s nothing worse than buying an unusual ingredient for a recipe, and never using it again! If you have a go at making this, please let me know how you’ve got on and send a photo too. Happy cooking!
The printing never really does the food justice. It’s always prettier in real life.
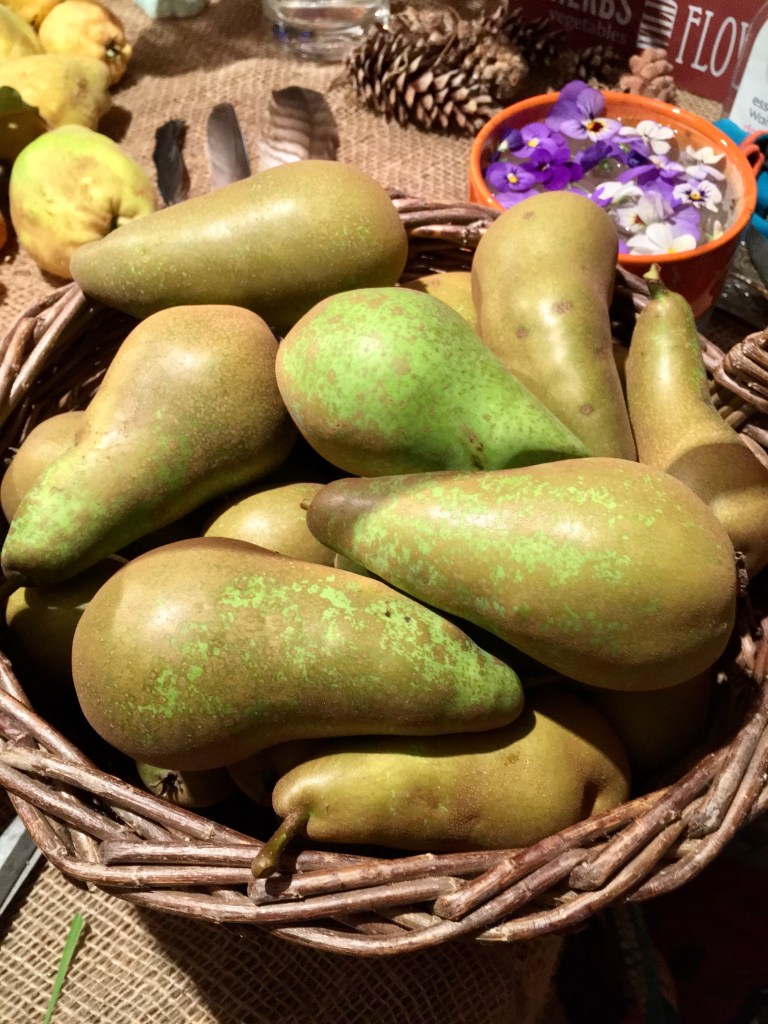
Potting shed pears
Conference pears growing in the orchard at home.
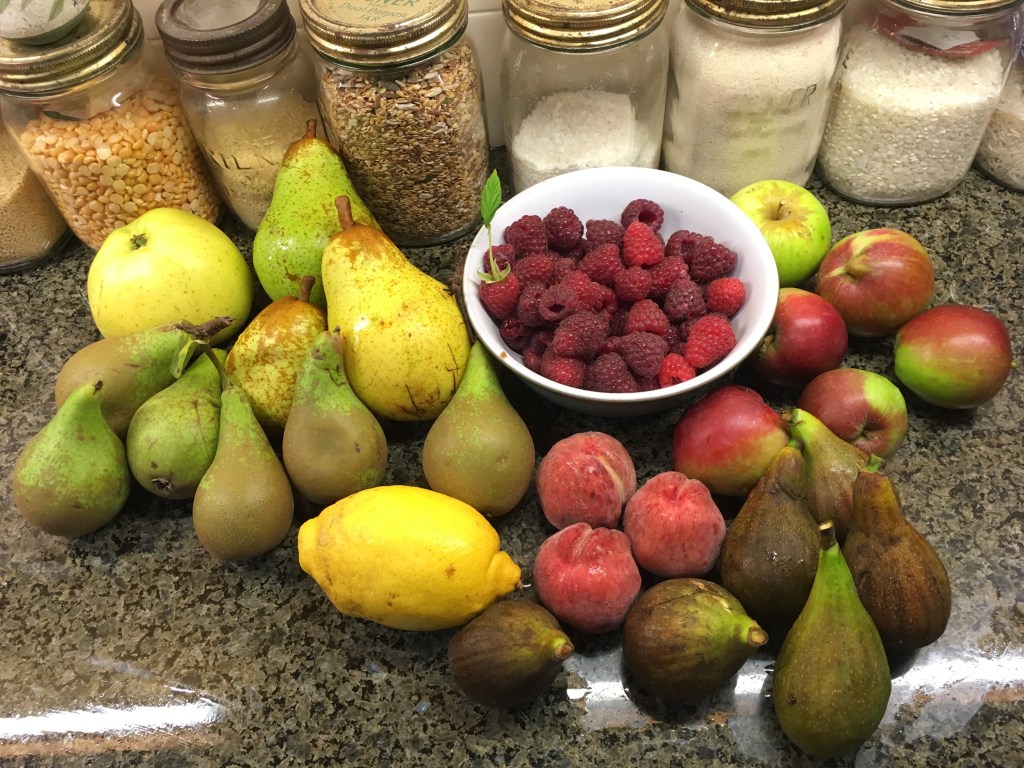
Fruit from the poly tunnel and garden.
Daphne and Daisy enjoying the windfall apples between storms and rain showers. They are safely tucked up in their house and covered run this afternoon. Torrential rain and high winds are shaking down the last of the apples.
Thank you for reading my blog. Please leave a comment in the box below (comment link is alongside the title, if you are reading on a phone). Please also sign up for updates and e mail alerts for new blogs.
I’ve spent the day clearing out my 20ft second-hand Alton Cedar greenhouse. This was purchased for £260, the best £260 I’ve ever spent. Admittedly, it was 32 years ago- but the greenhouse is still almost as good as new. I’ve painted it black, although it was a harsh bright red when it arrived. The staging is also painted black which really sets off the pelargoniums housed there. Plants live in pots along the front path in front of the greenhouse during the summer. It just gets too hot indoors, and they appreciate some fresh air and rainwater. But at this time of the year, I sweep it out, wash down the windows and give it all a quick re-paint. Everything must be back inside before the first frosts.
In the background you can see my 10ft sunflowers that I thought were small multi-headed types for cutting. I’d need a ladder to harvest those! Instead I’m leaving most of them to dry out for bird seed. A few blew down in the recent storms, so I’ve put them in jam jars on the kitchen table. I’ve made a note to carefully check the seed packets next summer so I don’t make the same mistake twice! They are beautiful though, and the bees and butterflies enjoying the pollen are currently a wonderful sight.
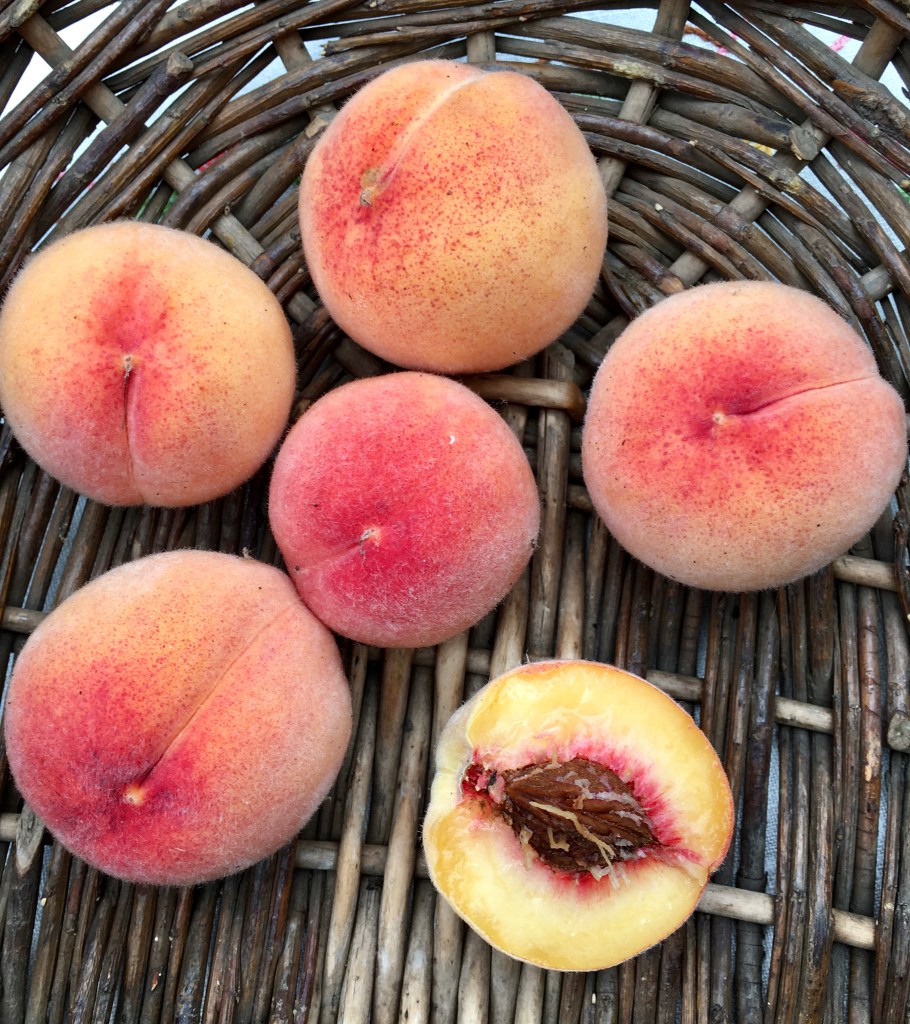
Next to the greenhouse there’s a matching 20ft polytunnel where I grow fruit, vegetables and flowers. Tomatoes and peaches have done really well this summer. You’ll also see a little pile of cobnuts in the basket. Alongside the greenhouse there’s a huge hazel tree which squirrels usually strip overnight. This year there were more nuts than they could manage, so I’ve harvested some to make into cakes and biscuits.
Peaches have been a great success this summer. My trees are grown in large 15” containers in the poly tunnel. This protects them from peach leaf curl which thrives in wet conditions. Keeping leaves dry is the best way to combat the disease.
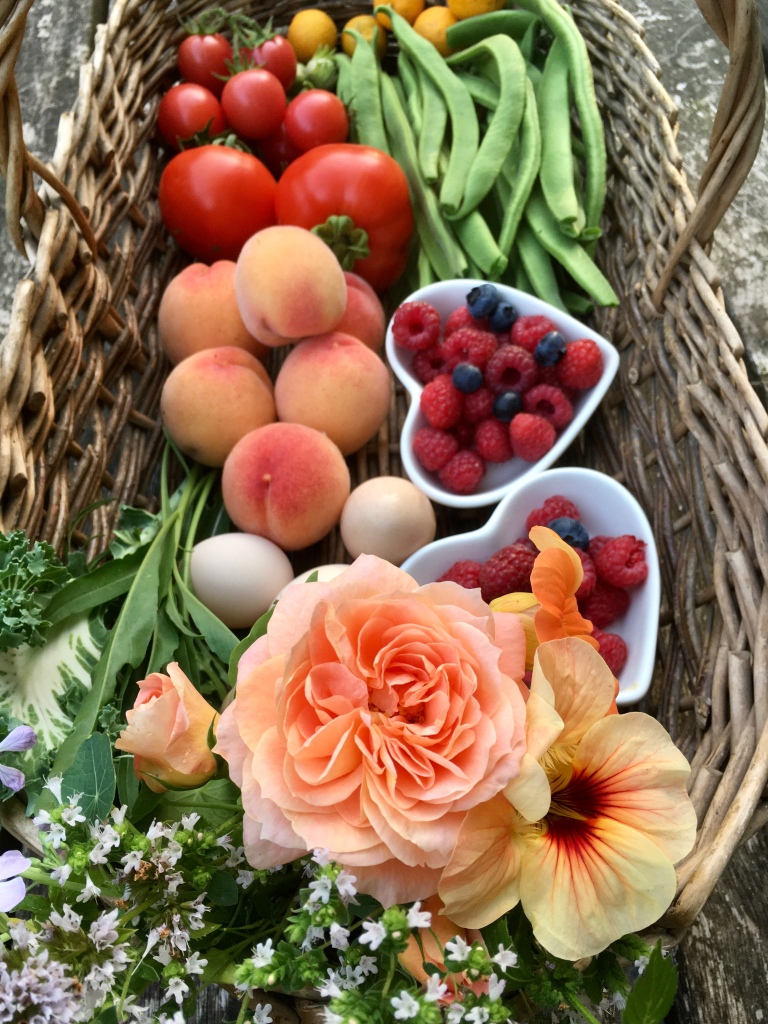
Baskets nearly always contain flowers as well as fruit and veg. This is Rose of the Year 2022, ‘It’s a Wonderful Life.’ Highly recommended for fabulous scent, repeat flowering and disease resistance. I’ve also picked some seedling nasturtiums. I’m particularly fond of this peachy-coloured one and keep it going by taking cuttings which root in water. I collect seeds too, but it might not come back exactly the same colour as nasturtiums readily hybridise. There’s also a few herbs, mint, marjoram and rosemary which add a lovely scent to any jam jar flower arrangement. The climbing beans are pink-flowered Celebration which don’t go stringy and crop late into the season.
Still on the theme of peaches, these are the little pastry custard tarts I made with slices of fresh peach, autumn raspberries and home-grown blueberries. The recipe is for my column in Garden News Magazine which I’ll share next week. They are very quick and easy to make.
I’ve had this potted purple bougainvillea for about 30 years. I’ve trained it into a round-headed shape so that it doesn’t take up too much room. It will be the first plant to go back in the greenhouse as it’s not at all hardy. Bracts stay colourful until December and I often use it in my Christmas table arrangements.
In pots alongside the bougainvillea are these beautiful grey-leaved tender perennial plants. They have long sprays of pale blue flowers. I’ve temporarily forgotten the name! Each winter I take insurance policy cuttings just incase I lose the parent plants.
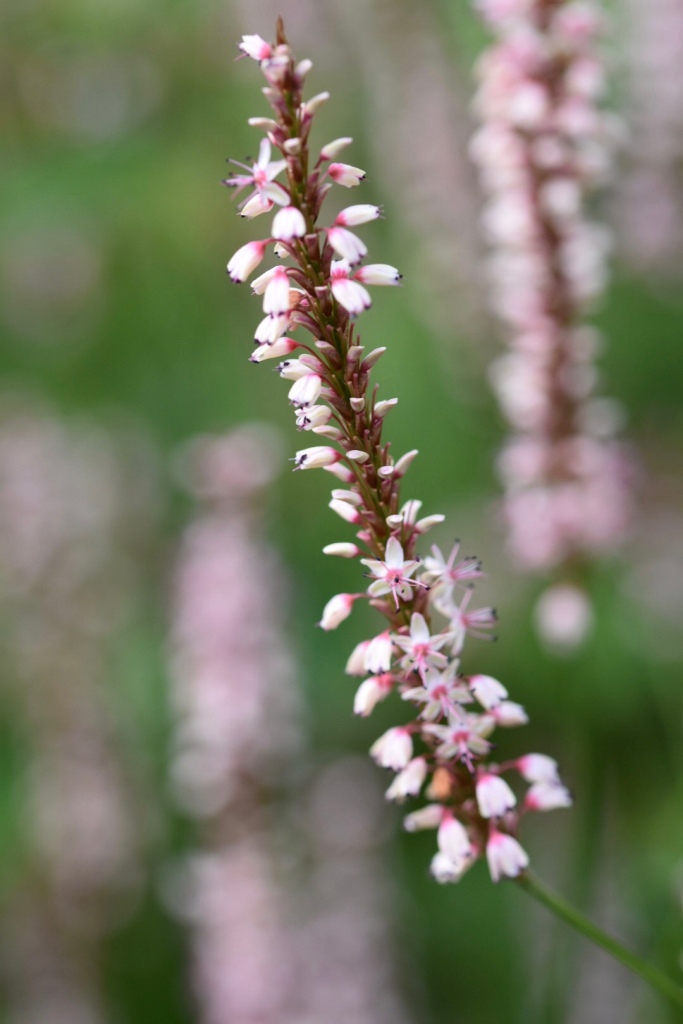
There’s a border full of low-maintenance day lilies in front of the greenhouse. In autumn when the day lilies are starting to die back, these beautiful spires of persicaria appear. This one is Persicaria Rosea.
The flowers deserve a close inspection, they are so dainty.
There’s also a white persicaria. Sadly, the label has been lost so I’m not sure of the variety. It thrives in dappled shade and flowers from August to November. The photo is out of focus as it was such a windy day, but it’s a very pretty flower nonetheless.
And finally, this one is also growing in with the daylilies. This persicaria is either Firetail or Firedance. They are good for cut flowers, lasting at least a week to 10 days in a vase if you change the water each day. The spire shape gives a nice contrast to round, daisy flowers.
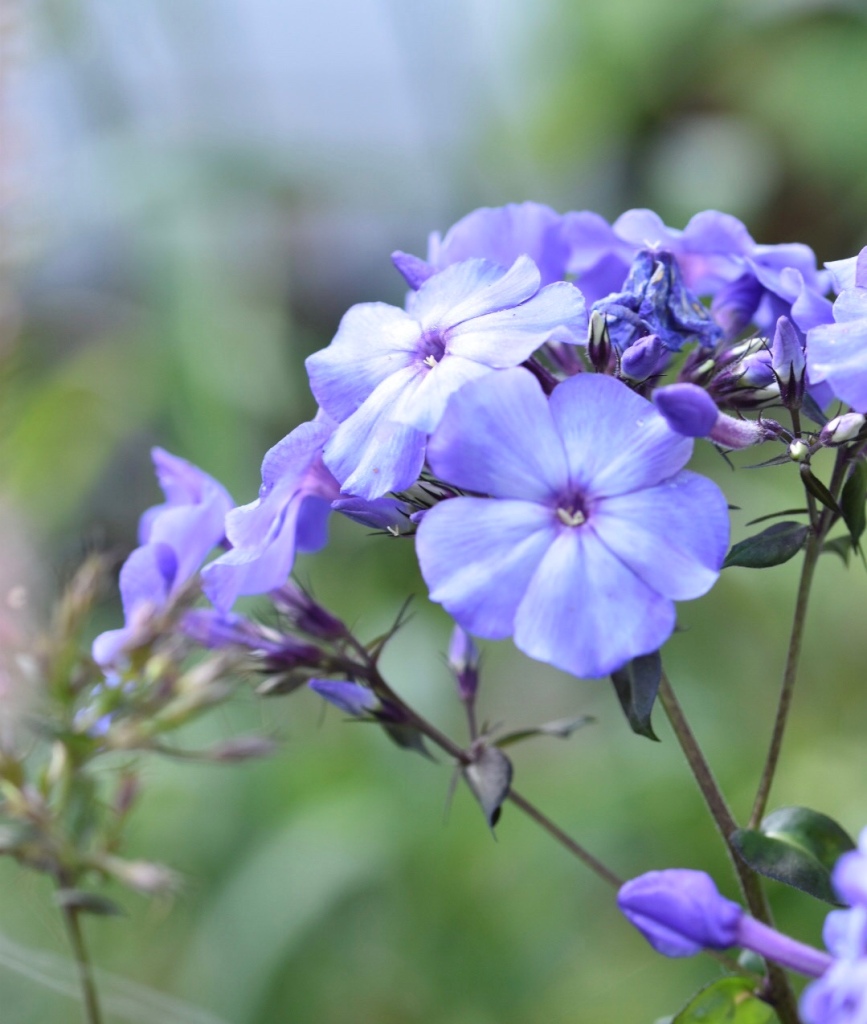
In amongst them are several types of phlox. This one is Blue Paradise- very highly scented and long-flowering in late summer.
The back field behind the summerhouse had oats growing there this summer. It’s been wonderful to sit in the shade and watch the field slowly turning to a shimmering gold. On a windy day, the crop ripples like waves and before it ripens the green-grey colour reminds me of the ocean. Instead of seagulls we have barn owls silently gliding by at dusk. There’s no sound at all from the beating wings and they quarter the field without knowing we are watching from the little wooden house.
We are always pleased and much relieved when the farmer manages to get the crop in before bad weather arrives. They work through sunset and into the night if rain is threatened. We lie in bed and listen to the tractors going up and down the fields and along the lane. At 2am there’s suddenly silence again and we know they have successfully got in the crops. Rain falls the next day and it’s wet for a week.
This is the view from our five bar gate at the top of the paddock. For a few weeks after the harvest, the fields retain their golden glow, and I drink in the scene and hold on to the memory as autumn and then winter darkness descends.
When we moved here, it was just a decrepit house and no garden. The farmer who built the house sold us an acre of land alongside it, and we planted 250 sapling trees given to us by the woodland trust and local council. At the time, there was a scheme giving free trees to anyone returning farm land to nature and we planted a small woodland area. All along the boundary, we left viewing points through to the fields beyond. The ever-changing seasons are a delight to spy through these holes in the treescape.
Thank you for reading my blog. Please sign up for e mail updates and I would love you to press ‘follow’. I often join in with Cathy for her ‘In a Vase on Monday’ meme. Mostly I write about what flowers I’m growing to give to my friends and family, and what produce I’m growing for family meals. I don’t grow in traditional rows, everything is mingled together and much is grown in window boxes and containers, with many different varieties ripening early, mid-season and late. There’s nearly always something to ‘forage’ from the plot.
This week’s recipe from Garden News Magazine. So lovely to have sunny weather at the weekend to sit outdoors and eat with the family. Food seems to taste better in the sunshine.
Herbs are grown in shallow terracotta pans and window boxes. These are still in the greenhouse, but will go outdoors the first week of June when all the cold winds should have disappeared.
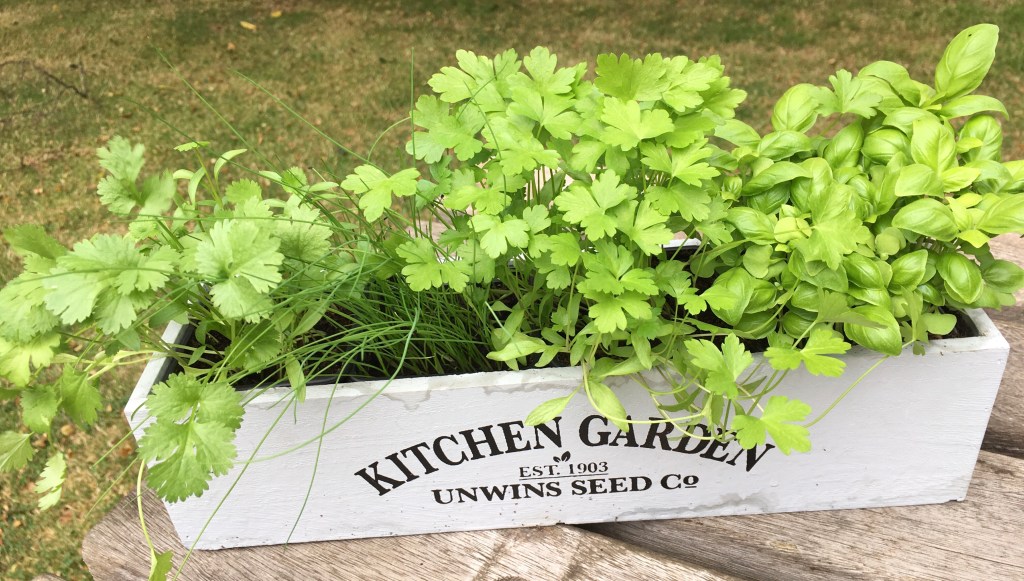
Here’s a mini-windowbox full of basil, parsley, chives and coriander. The kit comes with small packets of seeds and just enough compost for four individual pots.
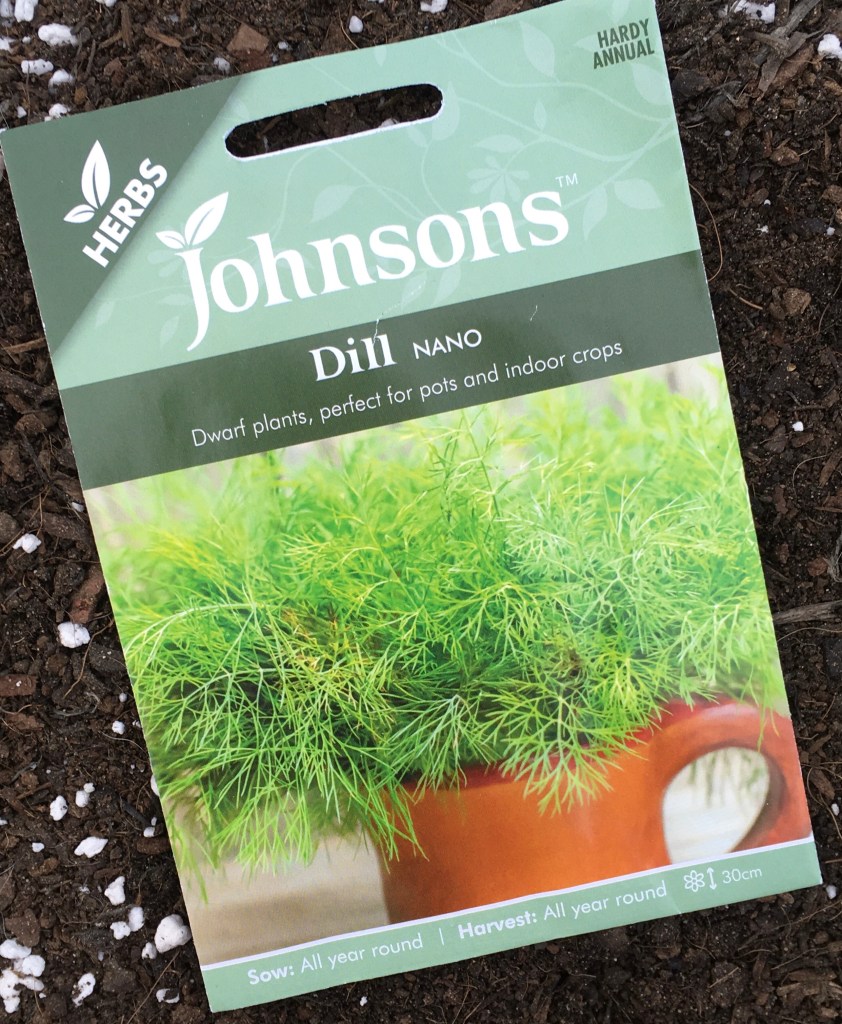
I recommend Johnson’s seeds for herbs. Dwarf dill can be grown in containers.
I also recommend Jekka’s Herbs produced by Johnson’s Seeds.
A very useful book to dip into, especially if you’d like to try different herbs.
Hope you are having a good gardening week. It’s been a cold spring so far and very wet. We are behind with most vegetables, but the spring flowers have enjoyed the cool conditions and lasted longer than usual. Bluebells are just starting to fade, but bright blue geraniums have started to flower to take their place and all the wild flowers, ragged robin, pink campion and oxeye daisies are starting to bloom. Thank you for reading the blog and, if you have time, leave a comment in the box below, letting me know what herbs you are growing for your summer cooking. I’m very grateful to have the opportunity to write for Garden News Magazine. Each week I share a different recipe featuring something harvested from the garden. Sometimes I only have a handful of herbs, or a dish of berries. It doesn’t have to be a huge amount, just whatever I can find to put into my cooking.
For listeners of today’s BBC Radio Leicester gardening. Here’s what I was talking about today. This advice comes from Glenn Facer, who has worked in the gardens at Chatsworth House for 33 years. Glenn has been growing fruit and vegetables in the kitchen garden for 14 years and grows produce for the Duke and Duchess of Devonshire. Glenn supplies the family in the main house and also the restaurants, cafes and hotels on the estate.
Glenn Facer working at Chatsworth
Glenn says: “I force the rhubarb by lifting small clumps off the rows out on the beds from November until about the end of march, leaving the roots on top of the ground to be frosted for a few days. This aids the forcing process.
Rhubarb dug out ready to be forced Forced rhubarb has sweet and tasty, pale stems
In dustbins, I place a layer of compost in the bottom and place the clumps on top, filling round with more compost but not covering the crown. Then lightly water and replace the lid to exclude light.
The dustbins are placed in a heated glasshouse for a quicker crop, but can be placed in a cold greenhouse or shed. They are usually ready to harvest in about 3 to 4 weeks time.
I usually dispose of the crowns after forcing, as they are worn out and would take a while to crop again.
The varieties I use are Victoria , Timperley Early and Champagne.”
Forced rhubarb from the Chatsworth gardens. photos Glenn Facer
Recipes we talked about on the radio. These were published in the Garden News Magazine in 2022. I write a column each week focussing on what I’m growing and how I’m using the produce in the kitchen.
Smoothy recipe:
1/2 cup cooked, cooled rhubarb
1 teaspoon sugar ( optional) or maple syrup or honey
1.5 cups plain yoghurt
1/2 teaspoon vanilla extract
1/4 teaspoon fresh grated ginger
Or pinch of dried ginger
Add icecream to serve (optional)
Cut the rhubarb into 2cm pieces. Wash and place in a saucepan with just the water clinging to the stems. Cook until soft. Add the sugar or sugar substitutes if using. Cool. Add the other ingredients and whizz in a food processor. Adjust the taste/ consistency by adding milk/cream/ or a scoop of vanilla ice cream according to taste.
If you are looking for a special dish for New Year celebrations, I can highly recommend this recipe. It’s a really tasty onion, mushroom and nut filling encased in golden puff pastry. It’s easy to make and serves 7-8. You can also make it ahead and re-heat it, or cut it into portions to freeze. We have it for Christmas every year, served alongside roast potatoes and honey roast parsnips, greens and onion gravy. wishing you all a very happy Christmas and wonderful New Year! Thanks as ever for following the blog and leaving your comments.
Take the pastry out of the fridge so that it comes to room temperature while you make the filling.
Heat the butter, sugar and onions in a frying pan. Gently cook for about 15 to 20 minutes, until caramelised and soft. Allow to cool
Use the same frying pan to cook the red onion in the 1 tbsp olive oil. When they are soft – which takes about 20 minutes on a low heat- add the chopped mushrooms, herbs, lemon juice and vegetable stock.
Cook on a low heat for 10 minutes.
Chop the nuts in a food processor very briefly. Add the mushroom mixture and process for a few seconds to incorporate. Leave it chunky, but well mixed
Add the breadcrumbs and seasoning and stir.
Mix in half the beaten egg. The other half will be for glazing the top.
To assemble, unroll the pastry on a baking tray, using the paper covering as a non-stick parchment
Spoon the caramelised onions down the centre of the pastry
Add the mushroom nut filling on top.
Cut the pastry sides into diagonal strips about 2cm wide and fold these one at a time over the filling to form a plait.
Brush the top with the reserved half beaten egg or oat milk for vegetarians.
Cook for about 40 minutes until the pastry has risen and turned golden and the filling has heated through.
Can be made the day before and reheated in foil in the oven. Also nice cold of there are any leftovers, served with jacket potatoes and salad. Enjoy!
The filling mixture The filling piled in the centre of the pastry. I’ve put the caramelised onions on top here. Doesn’t really matter either way. Plaiting the pastry
The finished roast. Sprinkle some fresh herbs over, if you like.
Early Crocus Tommasinianus and Galanthus nivalis in the front woodland garden
Ukraine is constantly in my thoughts. I will not say much, as I’m sure you have arrived here for gardens, flowers, peace and tranquility – much needed in current times. But rest assured, although I am small and insignificant I am doing all I can in the background to support the people of Ukraine in any way I can. It’s easy to think that we are powerless, but often if many people come together then their efforts can be great. Think of one small thing you could do today to make a difference. We are not helpless- and we are not without hope.
Meanwhile, here’s some photos of my garden today for anyone who needs the restorative power of plants. Here’s Galanthus Madeline at the foot of the willow and hazel trees.
Wild primroses poking through the leafmould path. The scent is honey-like and delicate. The very essence of spring.
Wild daffodils are just emerging too. This one is Narcissus pseudonarcissus. There are drifts of the Welsh wild flower, the Tenby daffodil, in honour of my Welsh grandmother. But the little lobularis daffodil is the first to open.
The winter aconites are just going over now. The are making a nice swathe of colour in the woodland corner at the end of the pergola.
Cyclamen Coum flowers are popping up all over the garden- not necessarily where I planted them. Apparently the seeds have a sticky substance much-loved by ants which then carry the seed far and wide. They must have carried them off into the back fields as there’s a thriving collection of plants on the other side of the fence.
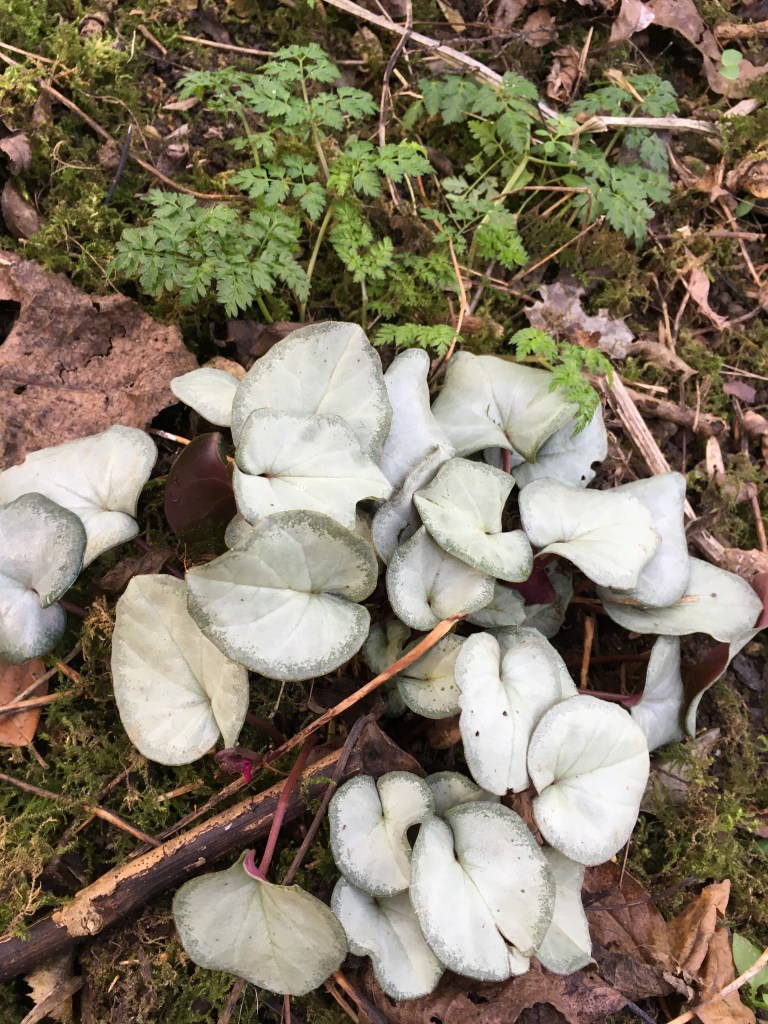
Some of the cyclamen have come up with these bright silvery-leaves. These are worth growing for the foliage alone. Both white and purple flowers are emerging from the leaves.
There’s also Cyclamen persicum flowering in the greenhouse. These have been making a display since last October; really good value long-lasting plants. They are not hardy in my garden, coming from the Eastern Mediterranean region. But they thrive in a greenhouse or cool room, just watering them when they droop – and not before.
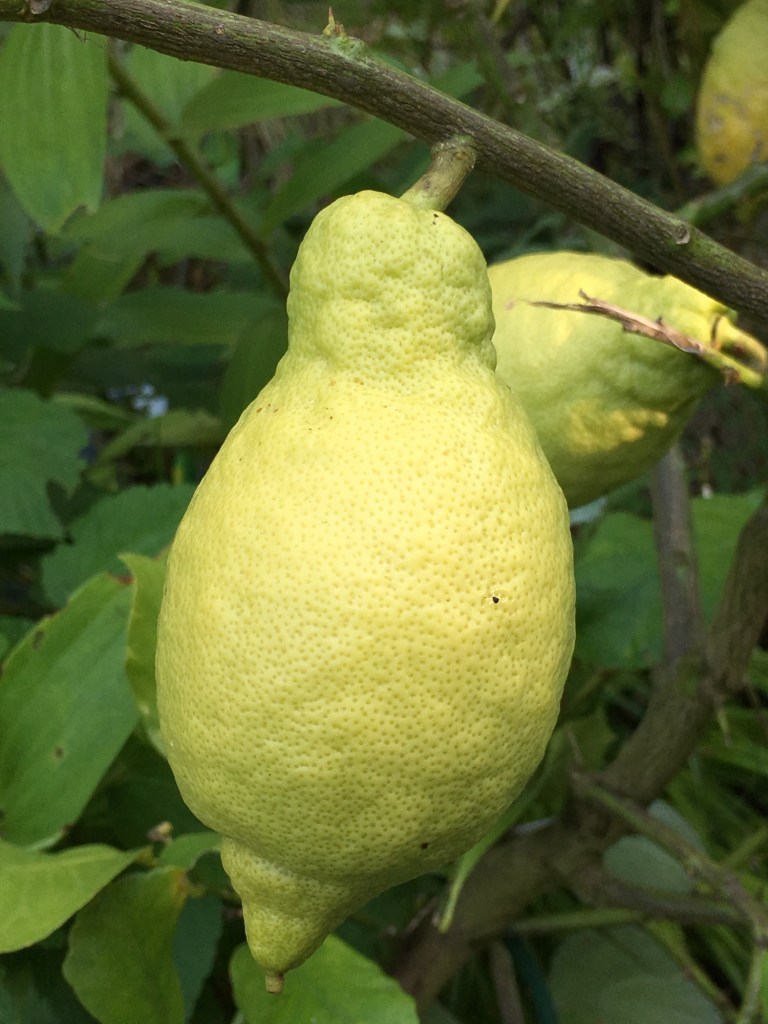
While we are in the greenhouse, I’ll show you the citrus trees which have produced the best ever crop of lemons and oranges here. We have had a relatively mild winter and the plants have been kept at 4C in the heated greenhouse. To be honest, the heater has hardly been on. A well insulated cedar-wood greenhouse keeps plants cosy. I’m just starting to water them again and top dressing with fresh compost. They are too big now to be repotted, but topdressing with new compost and adding liquid fertiliser in the watering can will perk them up and bring them into flower again.
And this is what I made with the orange zest; citrus shortbread. The recipe will be in Garden News Magazine next week, and I’ll copy and paste the article here for anyone who would like it. It’s part of my new ‘family favourites’ column for the magazine. Quick recipes anyone can make. There won’t be long lists of ingredients and fancy products you have to search high and low for. It’s mostly about simple ingredients and home grown produce, and all the recipes that have been passed down to me from my mother and my grandparents and friends.
Strawberry scones will feature in the coming weeks too, as I’m talking about bringing my strawberry plants, growing in containers, into the greenhouse to get an early crop. I grow my strawberries in 10” pots and windows boxes. They are easy to pick up and move under cover. Also easy to protect the fruit from birds and slugs as well.
Daphne and the other hens have just started laying again, so there will be plenty of eggs for cooking. The bantams are undercover in a new run, specially made to protect them from the bird flu epidemic. Usually they would be out foraging in the orchard by now, but until we have the all-clear they have to be kept in.
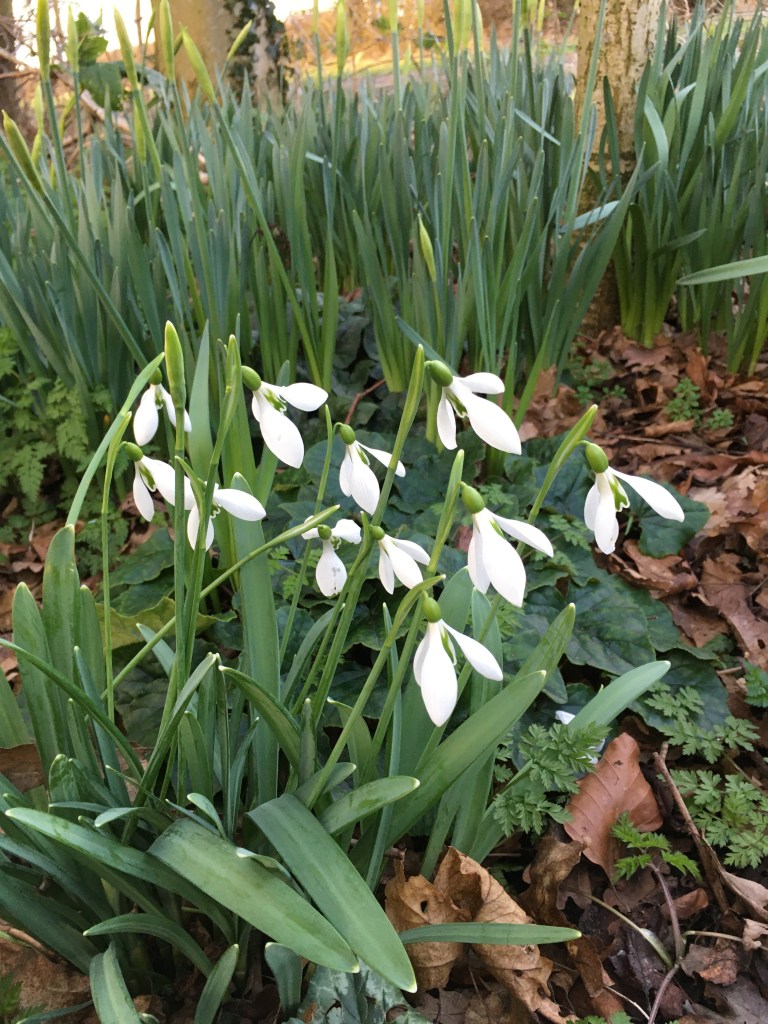
Walking from the hen run, out past the fruit trees and along the perimeter fence, there are more snowdrops. These are double and single types.
The doubles flower just a few weeks before the singles.
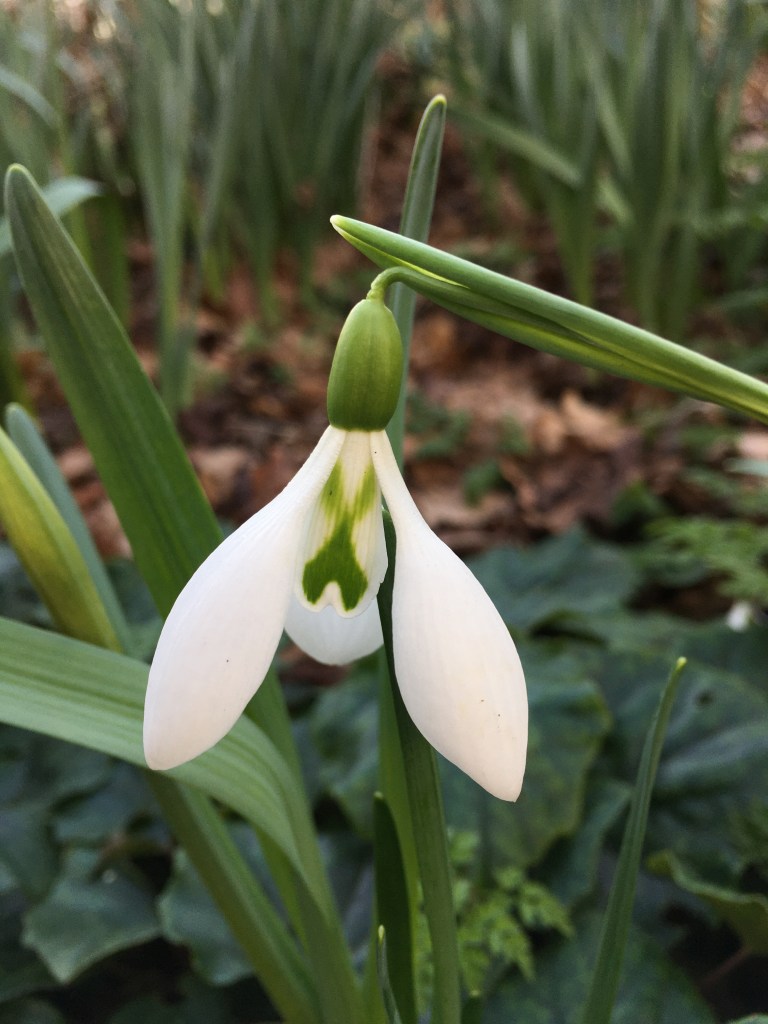
These have green tips. I believe they are a variety called Viridapice.
This one is called Walrus. It has elongated, green-marked outer petals.
A small patch of Galanthus Robin Hood.
It’s called Robin Hood because of the crossbow markings on the inner petals.
A small patch of Galanthus Jessica. I bought these because I have a niece called Jessica.
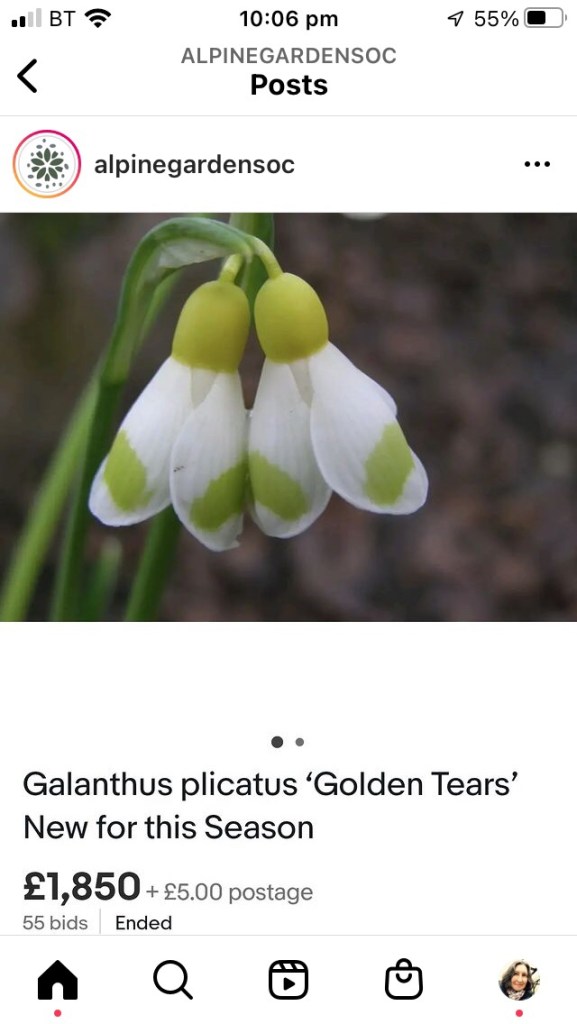
Have you all seen the news about the most expensive snowdrop ever? I think I would have been crying if I’d paid £1,850 for a single bulb of Golden Tears. Pretty as it is, it’s a staggering amount to pay. I saw the above photo on the Alpine Garden Society social media pages.
Here’s the view through the gap in the hedge. The field has been sown with winter wheat. I think the variety is Skyfall which is hardy and disease resistant and therefore requires less spraying.
And finally, just a few steps from my garden gate, here’s the view on the lane, looking across the back fields to ancient Bunny Woods on the horizon. Sometimes we walk across the footpaths to the woods. Today, I’m taking this photo in a welcome gap in the rain, but the clouds still look ominous, so I hurry home for a warming cup of tea. I hope you’ve enjoyed this tour of my garden and surrounding fields. Take care everyone and keep safe and well. And let me know what spring flowers are emerging in your gardens today.
Here’s some links to the recipes I mentioned today, and ideas for home-made and home-grown Christmas decorations and presents.
Thanks to everyone who listens in on a Saturday morning at 11am, and thank you also for all your kind and encouraging comments. Many thanks to Tracey from Melton who says she feels like rushing out into the garden to do some gardening every time she hears us talking on the radio. It’s much appreciated.
We talked about:
Planting tulips
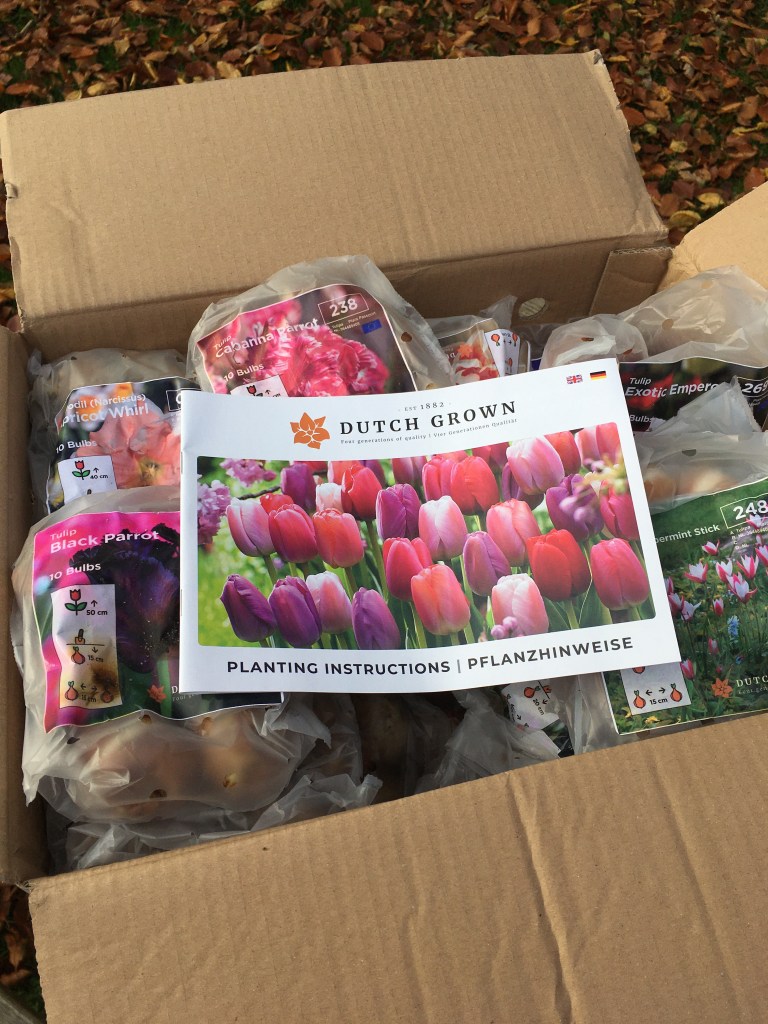
As regular readers know, I love to save money. If you wait until December, many tulips have been reduced in price. If you are looking for a bargain, try well-respected suppliers. I recommend:
Dutch Grown: (now sold out- but keep a note for next year)
If you are buying from garden centres, tulips will be sold in plastic bags with a cardboard front showing the photo of the variety and information about growing them. These are usually hanging up on racks. Gently squeeze the bulbs to make sure they are firm. Any soft mushy bulbs will fail to grow. They need to be firm and dry. Don’t buy any with a blue mould growing on them. Nice large, plump bulbs with the brown papery skin intact are best. I wouldn’t buy any that have been stored and displayed outside either, incase they’ve got frosted or wet. Choose ones stored inside the garden centre instead.
Here’s some inspiration for bulb planting from a previous blog I wrote. I’ll be planting my tulips up until the first week of January:
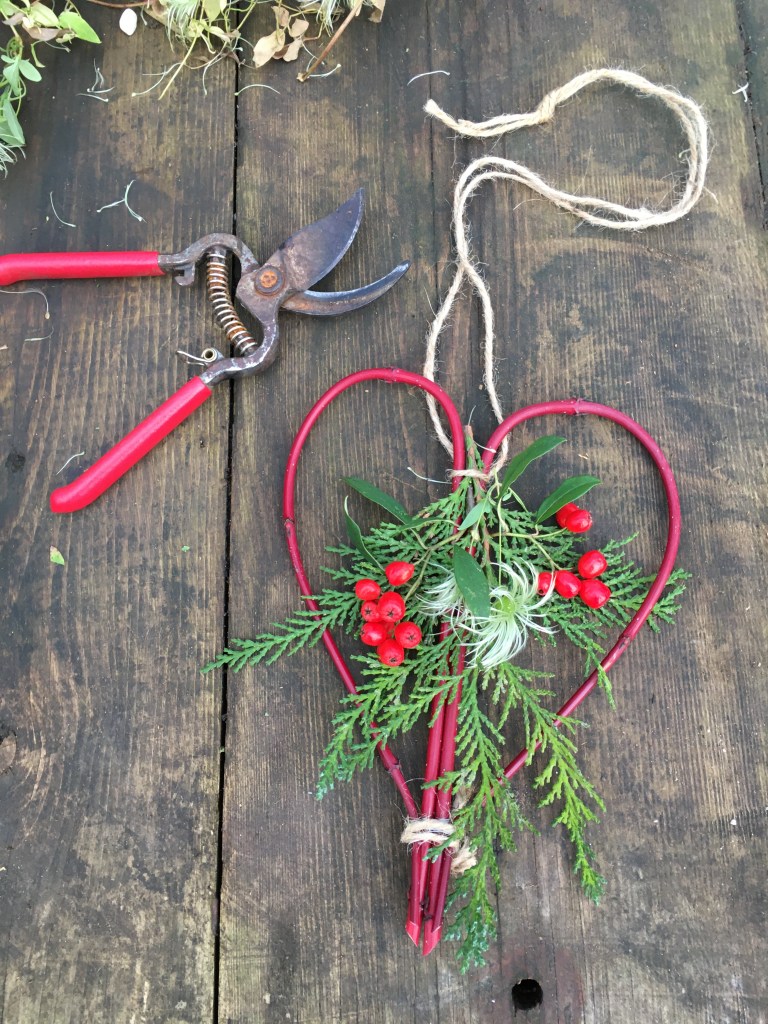
Dogwood hearts are really easy to make. Take two pencil thin stems of dogwood or coloured willow. Bend each side over to form the heart. Tie with florists’ reel wire or string to secure. Decorate with foliage and berries. I’ve used cotoneaster here. Add some fluffy seed heads, such as. ‘old man’s beard’ or wild Clematis Vitalba. I’ve used string, but you can use any type of ribbon to hang the decoration. These hearts can be any size. I make a giant one with four stems to create a double heart for decorating our five bar farm gate.
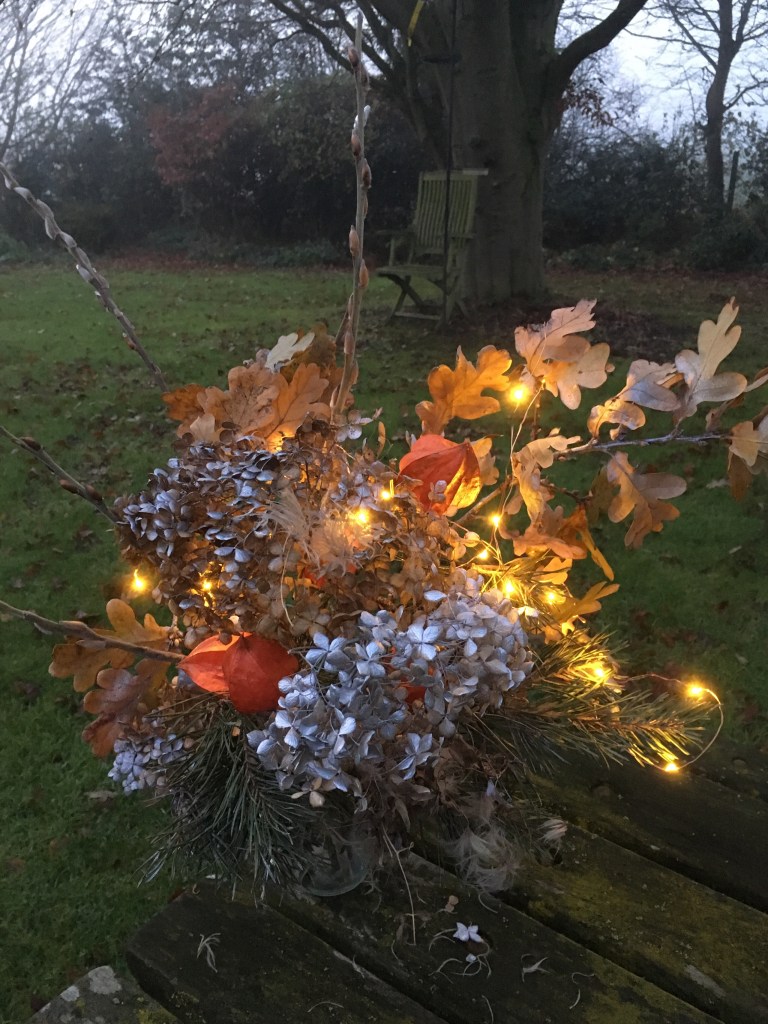
Some more ideas for using natural materials from the garden. I’ve threaded inexpensive, mouldable wire lights from Wilkos to these dogwood and willow stems. I sprayed hydrangea heads with florists’ silver spray.
My front door wreath also has flowers and foliage from the garden. The flowers are hellebores from the Gold Collection. There’s a whole range of them, all recommended. Hellebore Jacob flowers for Christmas and is pure white. This one is Winter Gold, with white hydrangea flowers which have dried lime green.
I learned how to make these willow wreaths on a course by the highly respected florist, author and social media/ you tube star Georgie Newbery. Workshops in flower farming, creating a cut flower patch, growing sweet peas, and floristry, are highly recommended. Would make a perfect present for a gardener. There are also many on-line courses. Have a look at the you tube channel and on instagram to get some wonderful, original ideas.
We talked about growing beetroot today. Most of my beetroot is stored in dry sand or recycled, dry compost over winter in the frost free potting shed. I grew it in the spring and summer. I’ve left some in the ground, but it’s easier to lift and store, as it can’t be harvested from frozen ground. The best variety to grow is Bolthardy, which does what it says; it grows well without bolting or running to seed. Did you know you can eat the leaves? You can use them in salads and stir fries. You can grow just leaves now on the windowsill. Look out for Bulls Blood variety sold as windowsill growing seeds. Mr Fothergills (Johnson’s seed) sell them on-line and in garden centres. You can grow them in 9cm pots on a sunny window and harvest shoots and leaves when they are 4” tall. They will re-grow several times, making a tasty addition to salads and sandwiches.
BEETROOT CAKE
We talked about baking with beetroot and making chocolate beetroot cake. Here’s my recipe for a rich fruit/ beetroot cake. It’s tasty and good for you!
Regular readers will know that my much loved wonderful mother-in-law Joan is in a care home in Oadby, Leicestershire. She suffers from mixed dementia. Before she became ill, I wrote down all the family favourite recipes and at Christmas I make them for her children, grand children and great grandchildren. It’s a wonderful way to ‘keep her with us’ even though, sadly, she can’t remember who we are.
Here’s the link for the blog piece with the recipe
We talked about cutting grass in winter. Twenty or thirty years ago we used to send our lawn mowers off to be serviced in October and we didn’t see them again until March. It’s an indication of climate change that nowadays we are cutting our lawns all year round. Grass grows when the temperature is above 6C. There is no harm in ‘topping’ grass if it needs it, providing the conditions are dry. Set the cutters high for winter, and don’t scalp the lawn. We don’t cut the grass if the ground is wet or frozen, as it damages the lawn and makes muddy skid patches where weeds will grow. Never walk on frozen lawns as it damages the base of the grass stems and leads to fungal diseases. I would collect clippings over the winter too, and not leave them lying on the grass. Best not to walk on very wet ground as it causes compaction, which grass doesn’t like. Remember to leave some areas of the garden with long grass as a winter habitat for caterpillars and insects – these will be food for frogs, birds and mammals. Just a strip down the edge of the lawn will help.
HOME MADE CHRISTMAS PRESENTS
I mentioned my mint sugar and rosemary salt recipes which make lovely home made presents. Nearly all my presents are made from things grown in the garden.
Take 5 stems of mint, thoroughly dry leaves on kitchen towel. Strip leaves from the stems and layer them in a clean jam jar with 350g sugar. Stir every day for two weeks. Tip the contents into a sieve and remove the leaves. Pour sugar into clean jam jars and use within a year. Lovely for hot chocolate and cakes.
I recommend Stephanie Hafferty’s book The Creative Kitchen for seasonal plant-based recipes for meals, drinks, garden and self care.
And finally, Arun mentioned that I had been shortlisted for Columnist of the Year for my Garden News magazine column, and Blog of the Year by the prestigious Garden Media Guild. I was delighted to be shortlisted in two categories. A really wonderful end to another challenging year. Thank you, every one of you, for reading this blog, listening to the radio on Saturdays, getting in touch and leaving encouraging comments, it is truly appreciated. Have a great gardening weekend!
You can listen back to the gardening show on BBC Sounds. It’s at 11.12.35 on the timeline. Or ask your smart speaker to tune in to BBC Radio Leicester on Saturdays from 11am. Questions are welcome via e mail, phone, text or WhatsApp. Start your message with the word Leicester, else it goes to other radio stations.
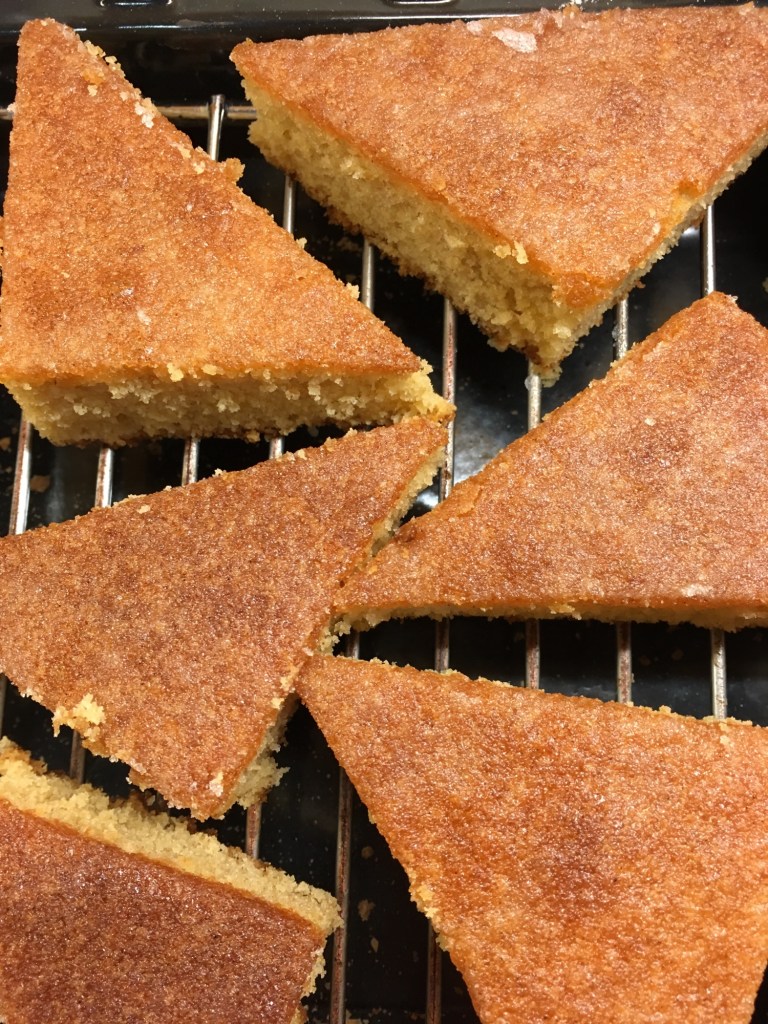
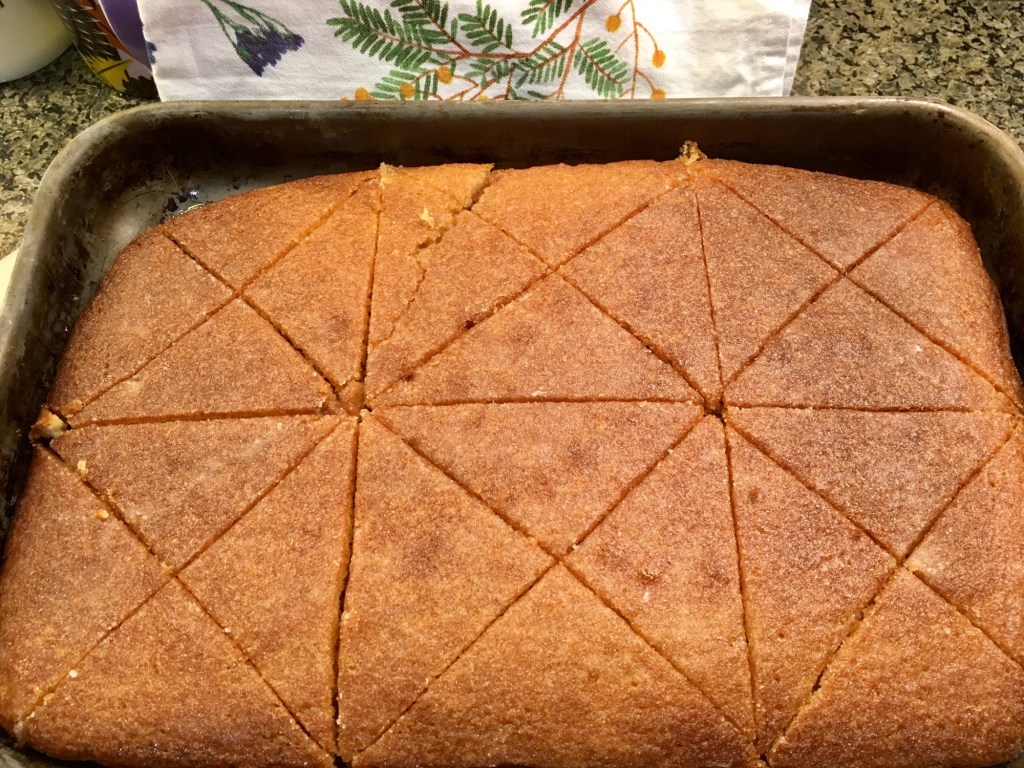
Here’s a link to my recipe for lemon crunch triangles:
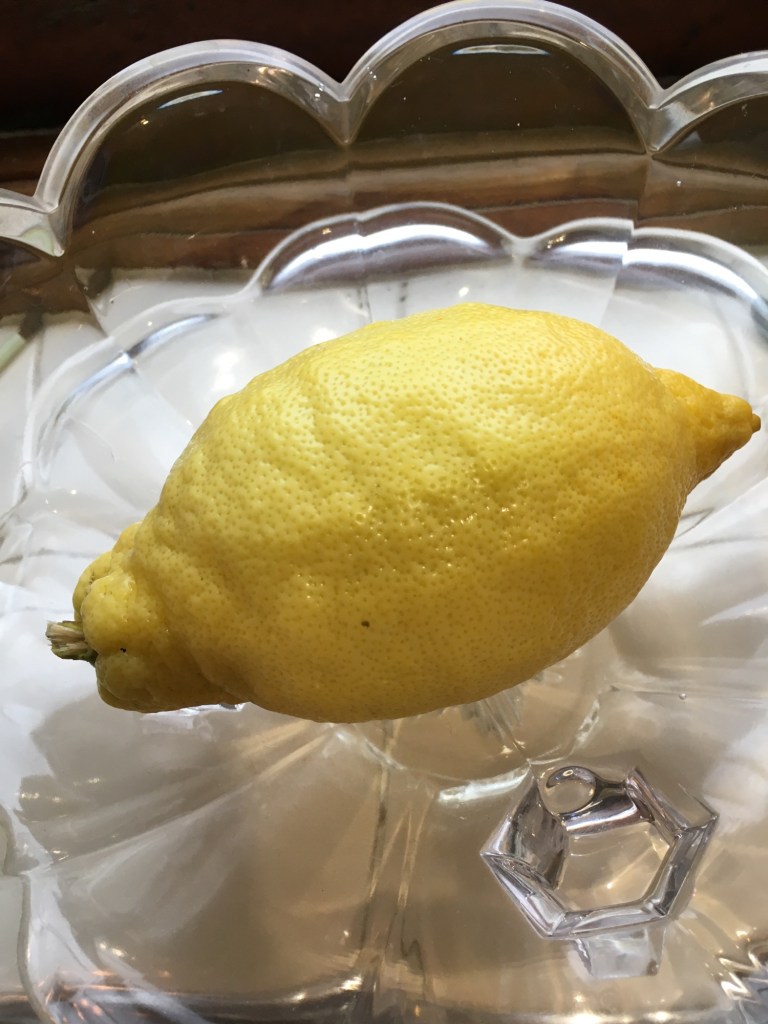
Family favourite lemon crunch triangles. Easy tray bake. Tastes much like a lemon drizzle cake, but so easy to make. I used lemons from the greenhouse. I’ve had these fruit bushes for 20 years. Huge fruit and very juicy.
Recipe to follow from Garden News Magazine…..
Apologies, I accidentally deleted 9 years of blog diary photos!
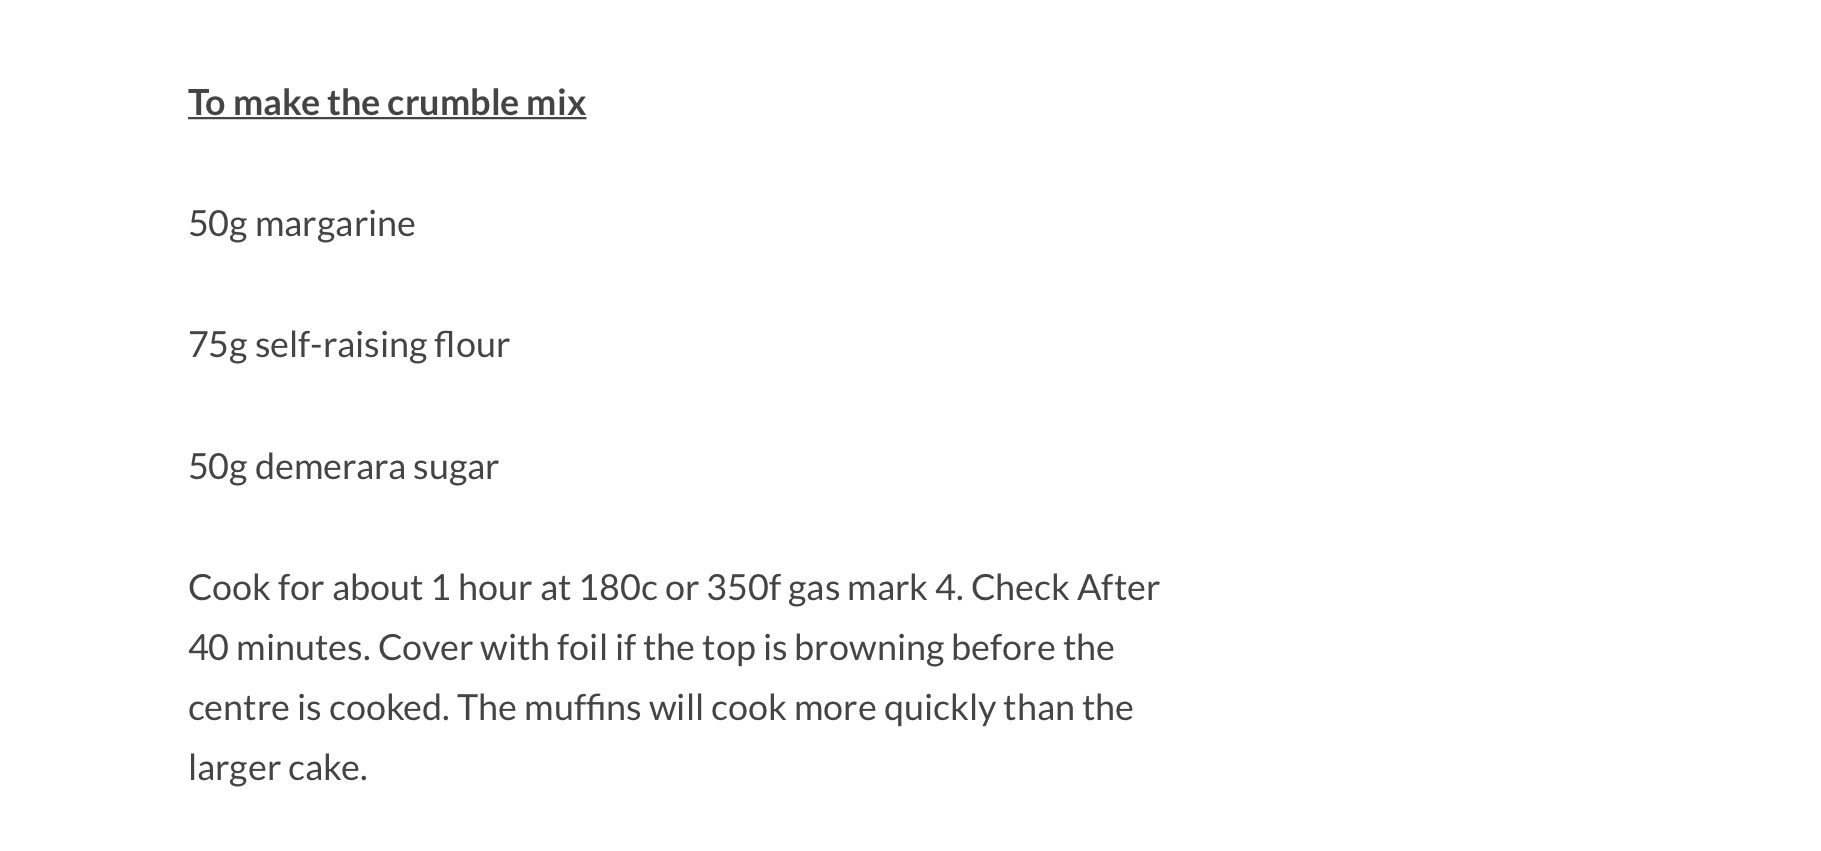
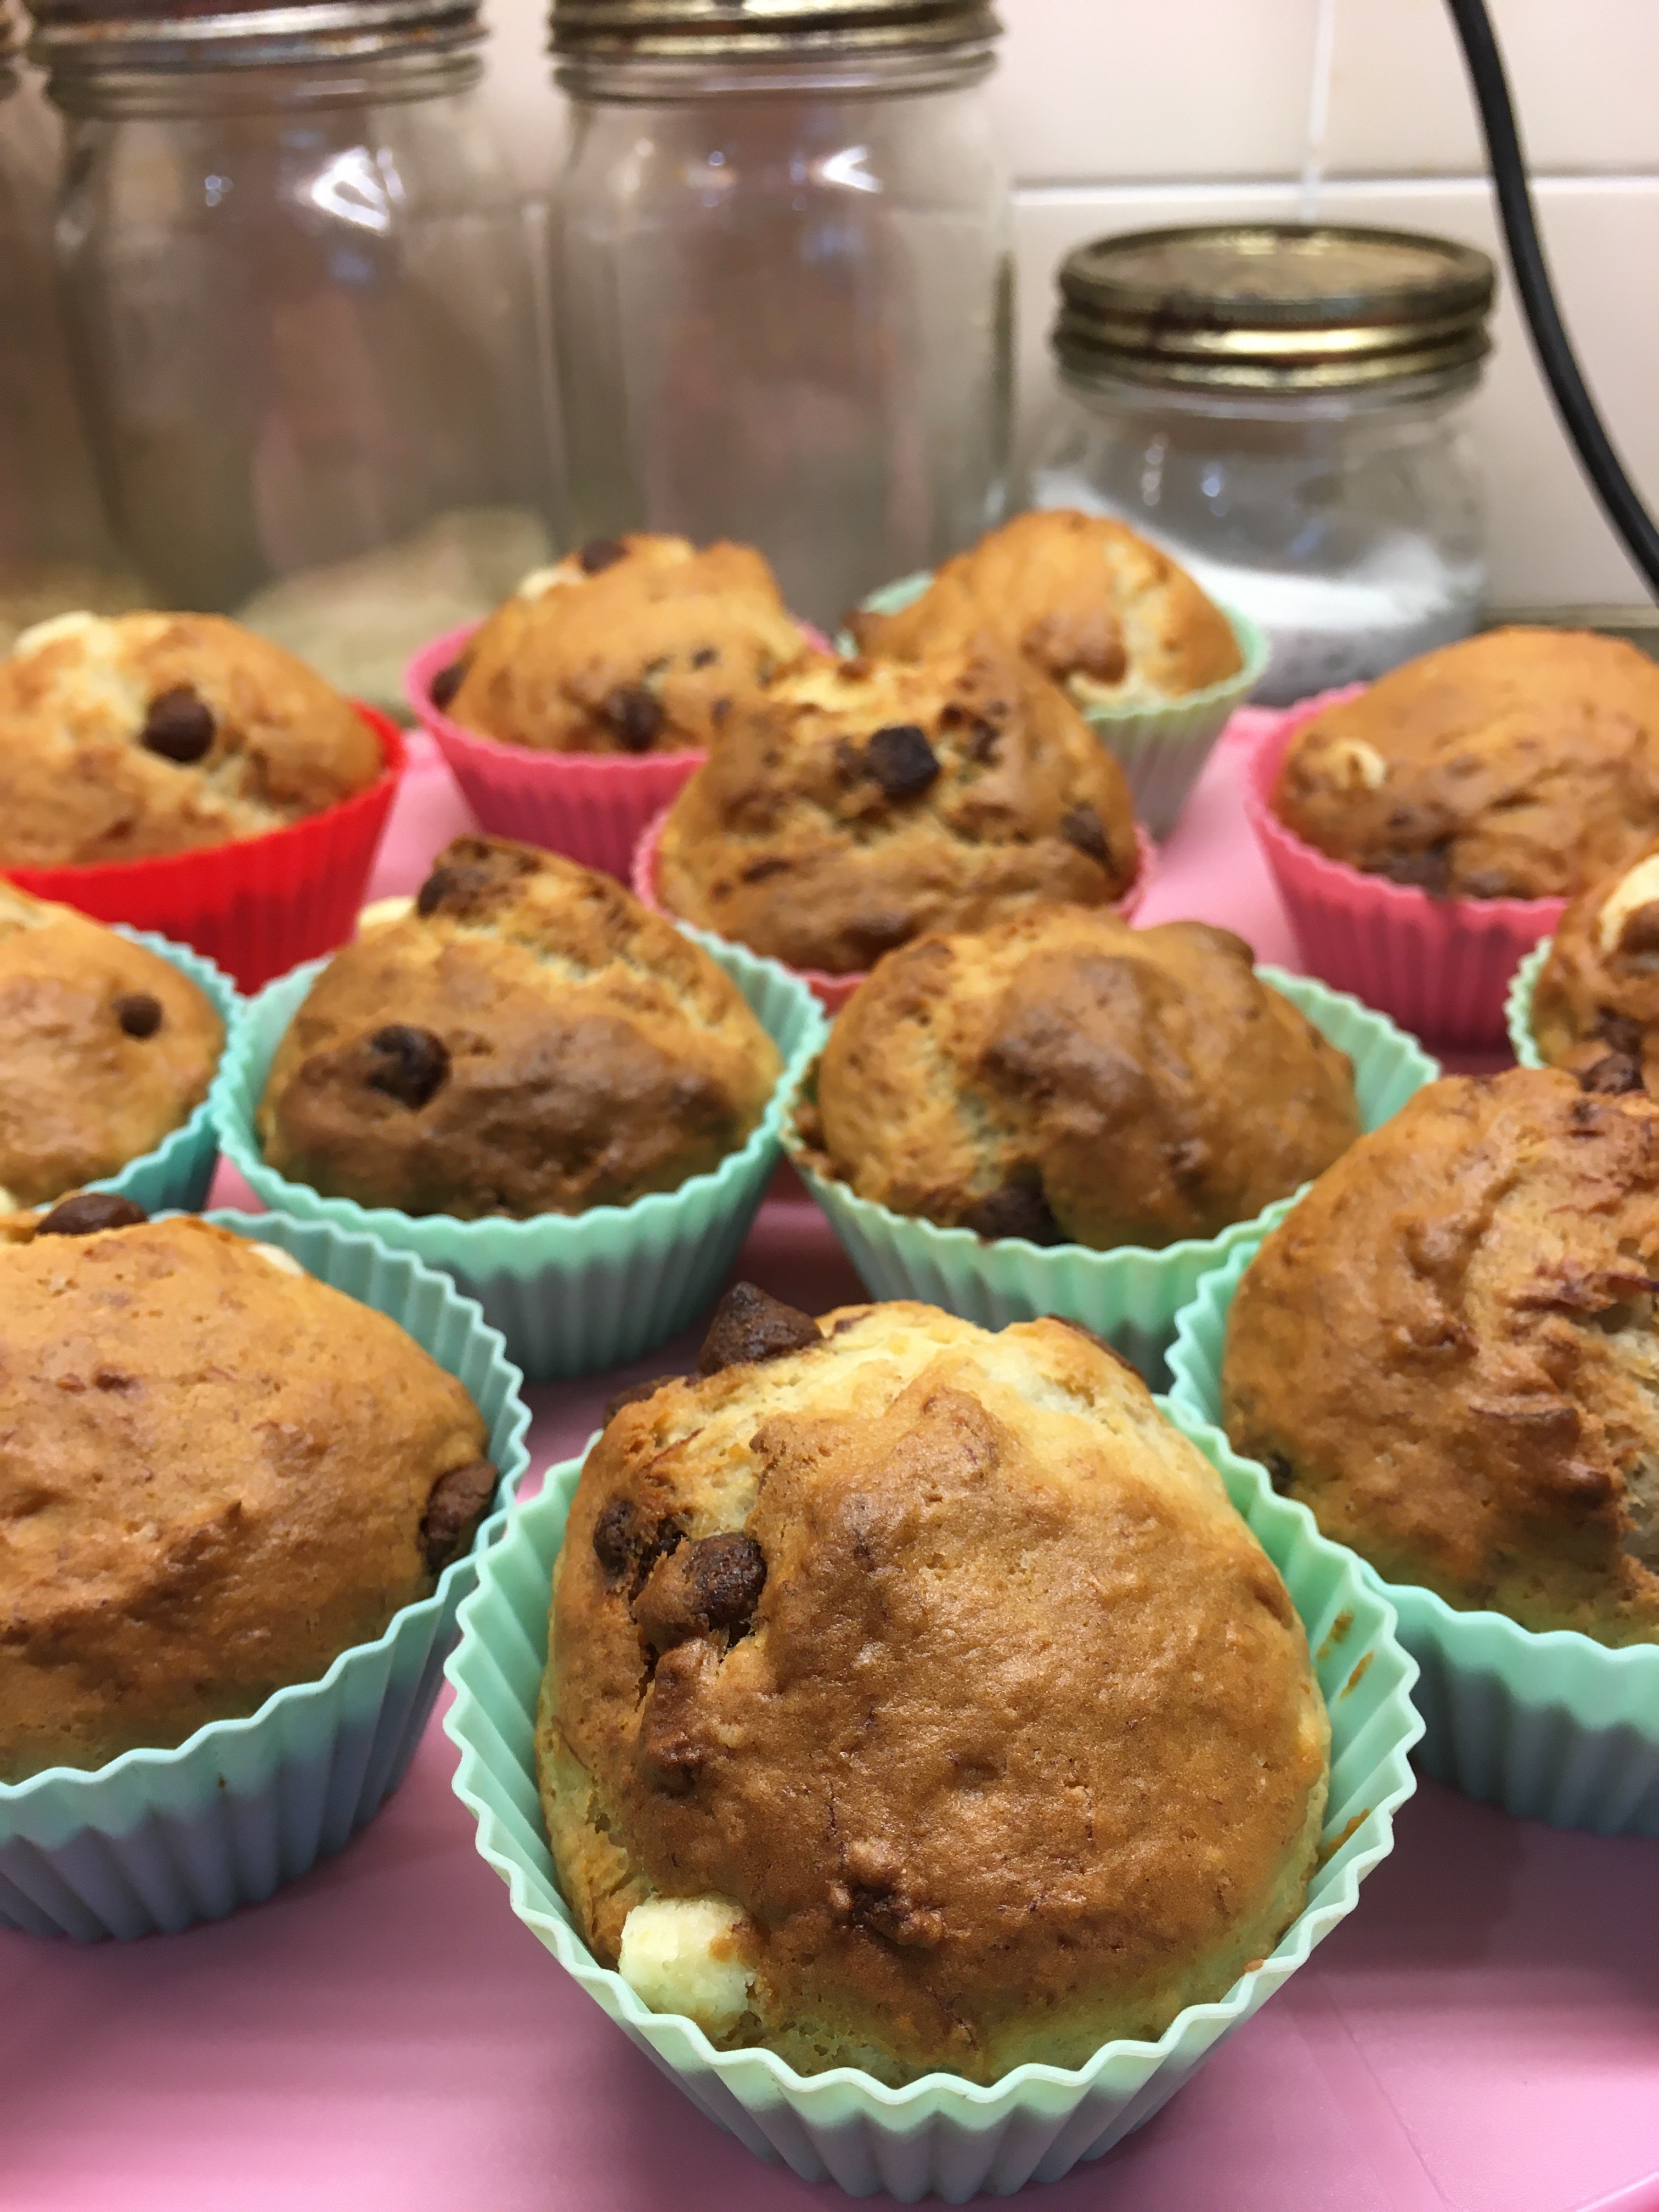
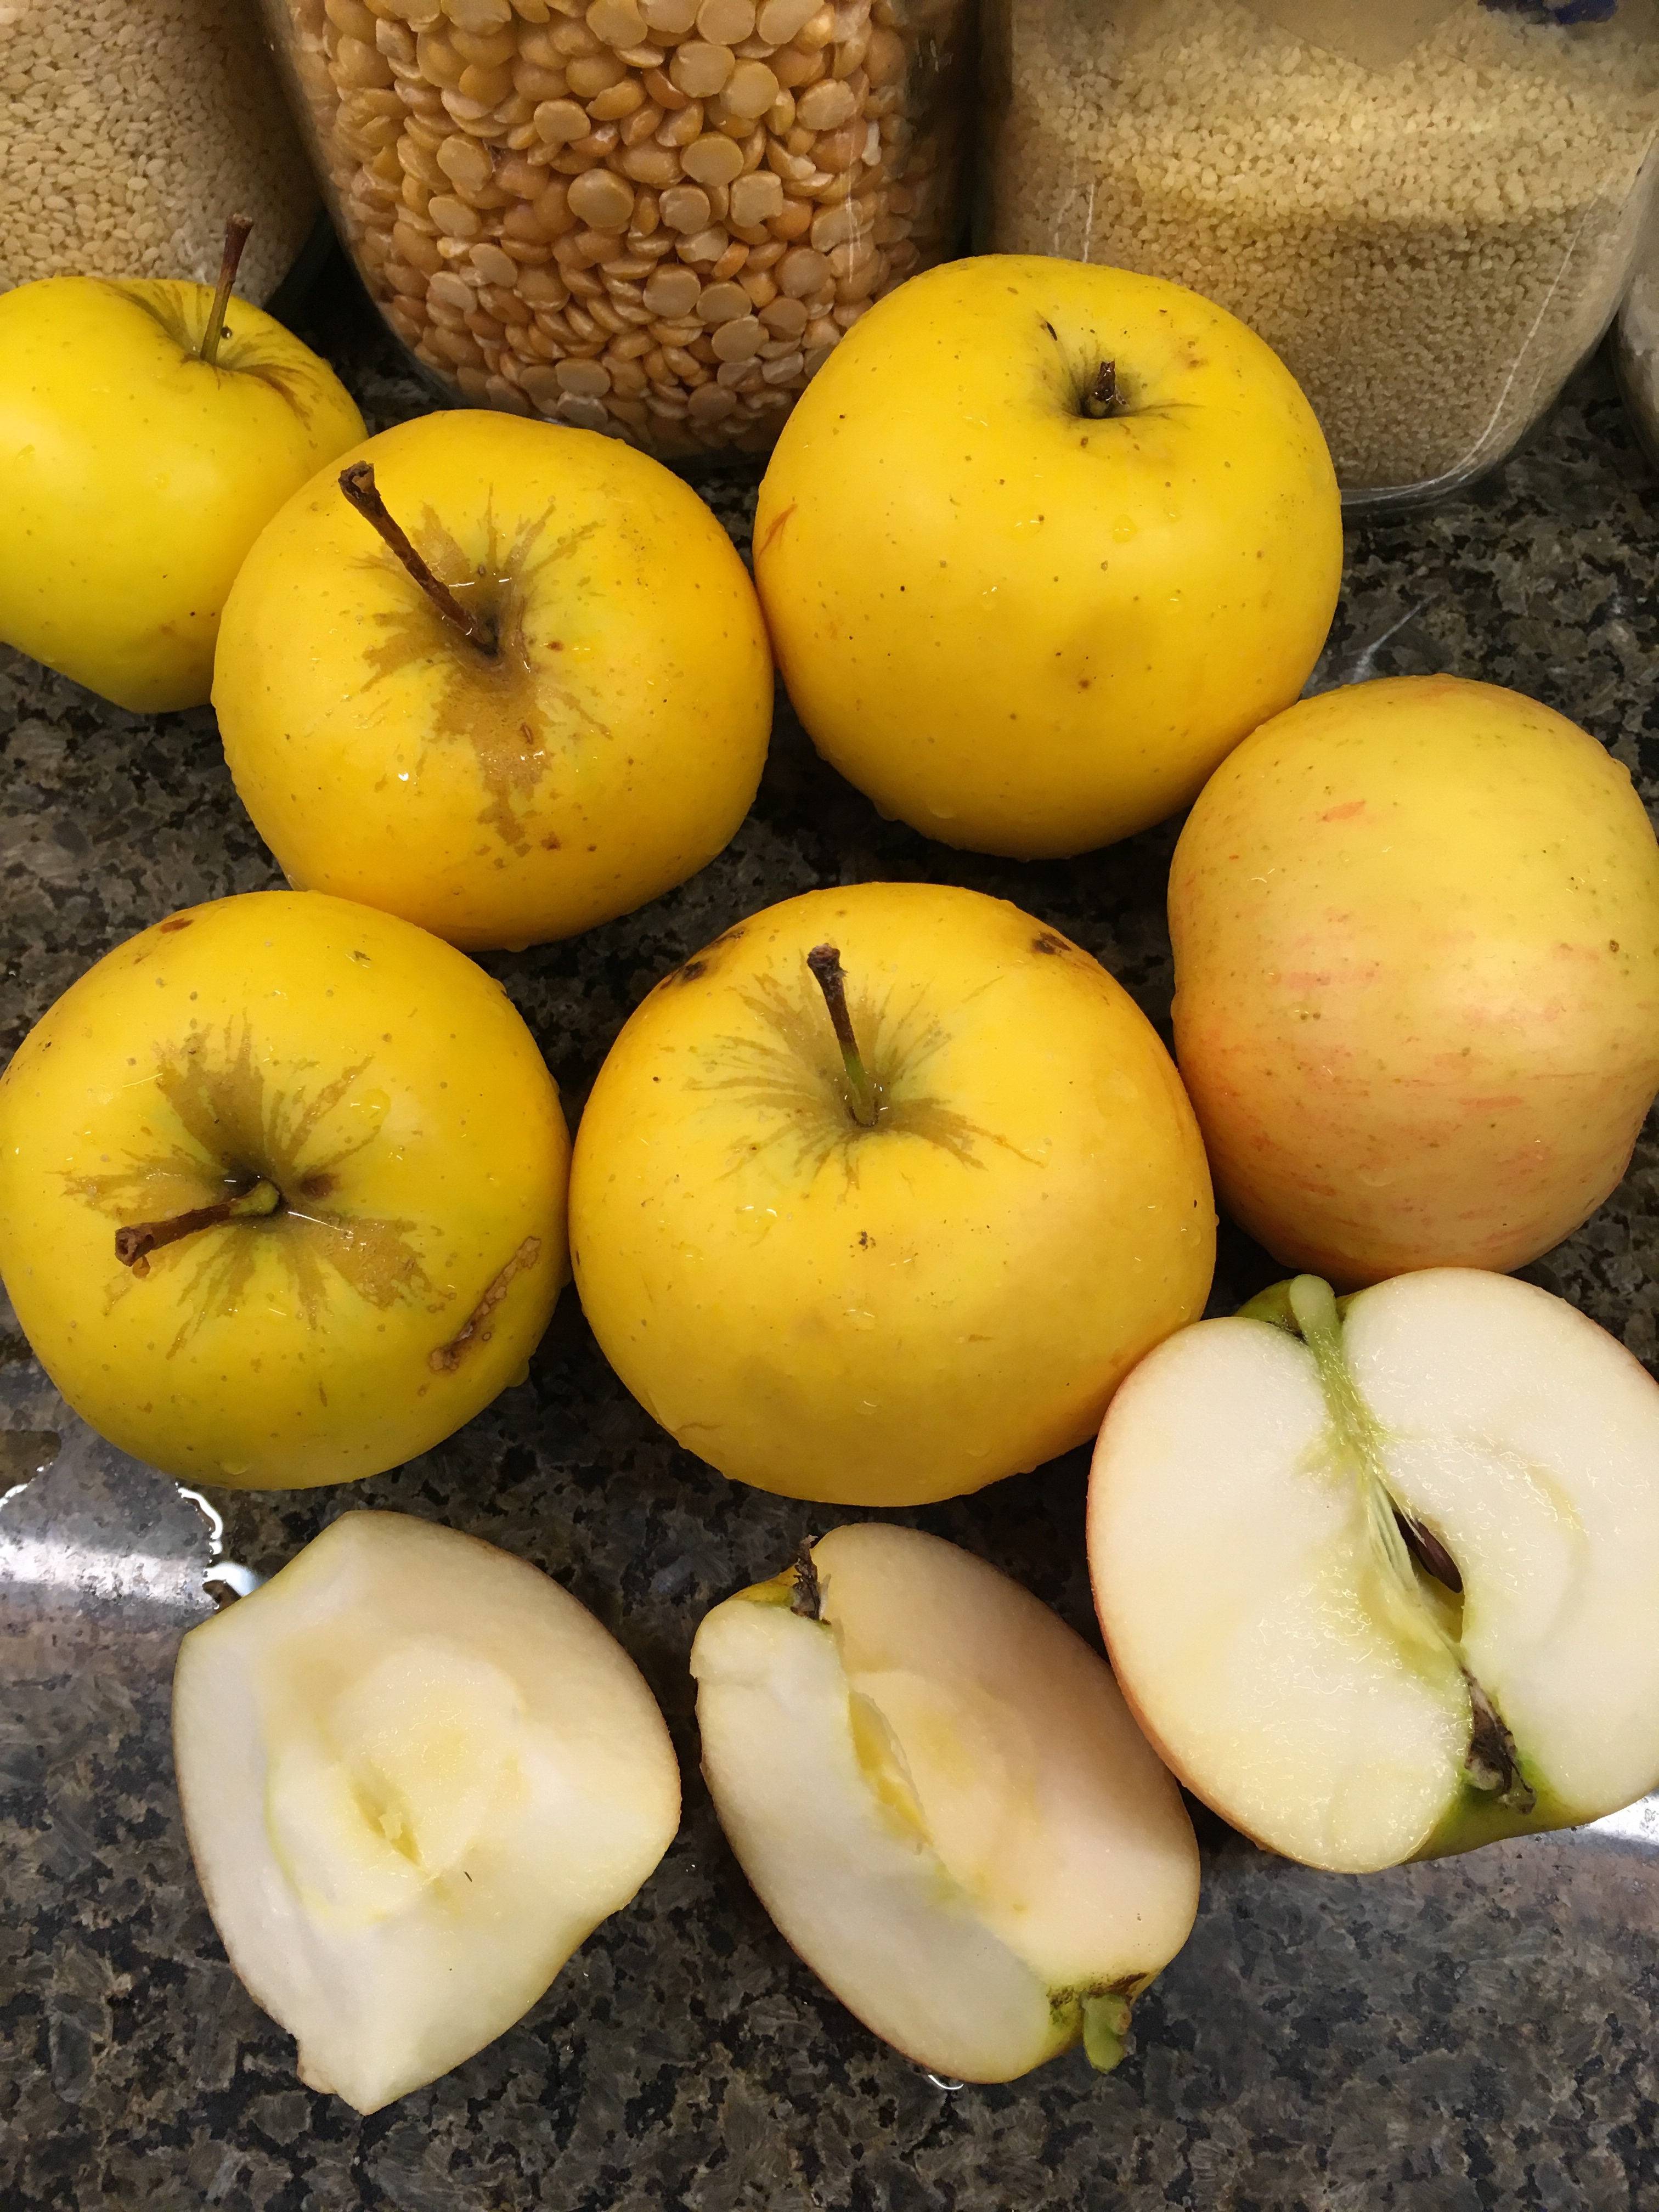
If you are reading this week’s Garden New Magazine (February 6 edition) here is the recipe I mention for apple crumble cakes. Our stored apples usually last until the end of February, but the autumn, and winter up until Christmas, was so mild the fruit started to go soft. I sliced and froze some of the apples, and turned the rest into delicious little cakes. These too can be frozen and will thaw within a few minutes, or defrost in a microwave. Let me know if any of you try the recipe, and how you get on with it. I’ve added frozen blackberries and raspberries to my cakes. Or you can just make them with apples on their own. All equally tasty. It’s lovely to have something reminding us of summer – right in the middle of winter.
You’ll need three or four apples, and a handful of berries, if using them. Use what you have. Equally good using tinned or fresh peaches, plums, blueberries, apricots, pears. It’s a very versatile recipe, using up store cupboard and frozen fruit.
I’ve made mine in silicone muffin trays, but you could just make one large cake and slice it. Use oat milk and egg substitute for vegans.
Muffins cook in 25 to 30 minutes. But check they are cooked through.
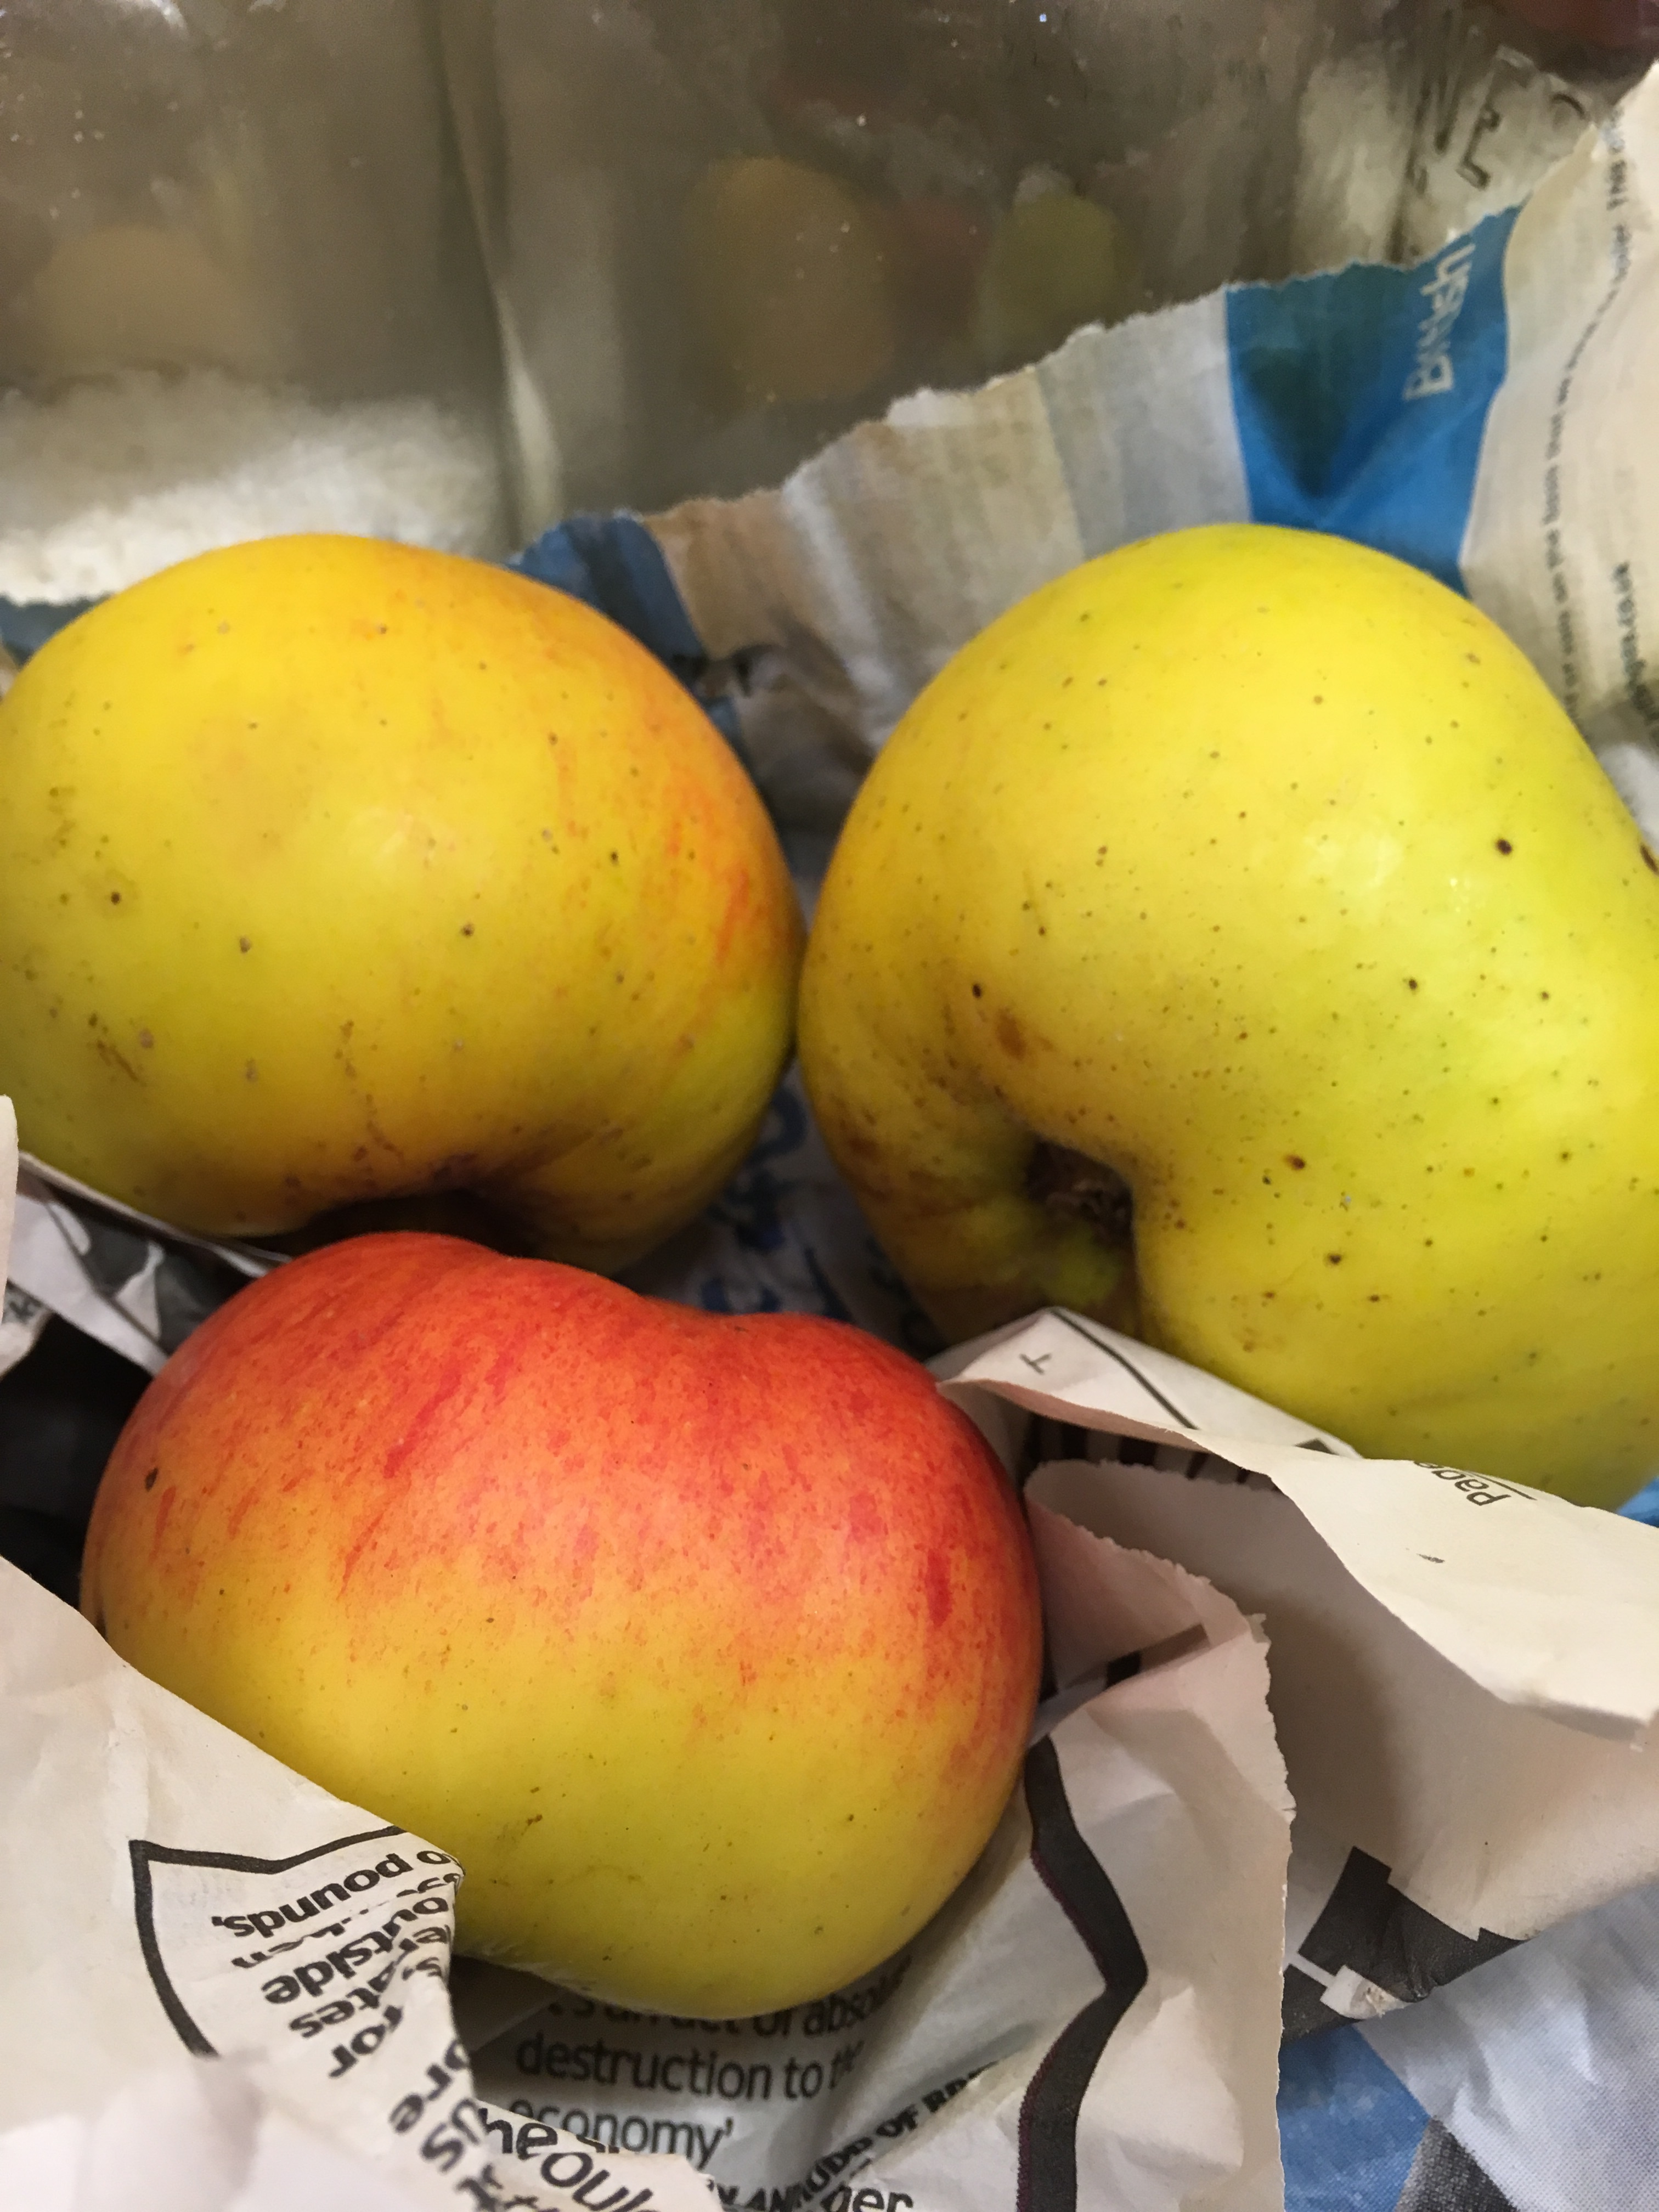
We store the apples wrapped in newspaper in the unheated glass porch and potting shed.
There was a good harvest from the orchard last autumn. Plenty of apples and pears.
I’ve been making apple crumbles all winter. Such a simple dish, so lovely and warming on a cold day.
Thanks for reading and getting in touch. I’ve started doing live videos from the greenhouse over on instagram as a way of keeping in touch with family and friends.
I’m karengimson1 on instagram
And @kgimson on twitter
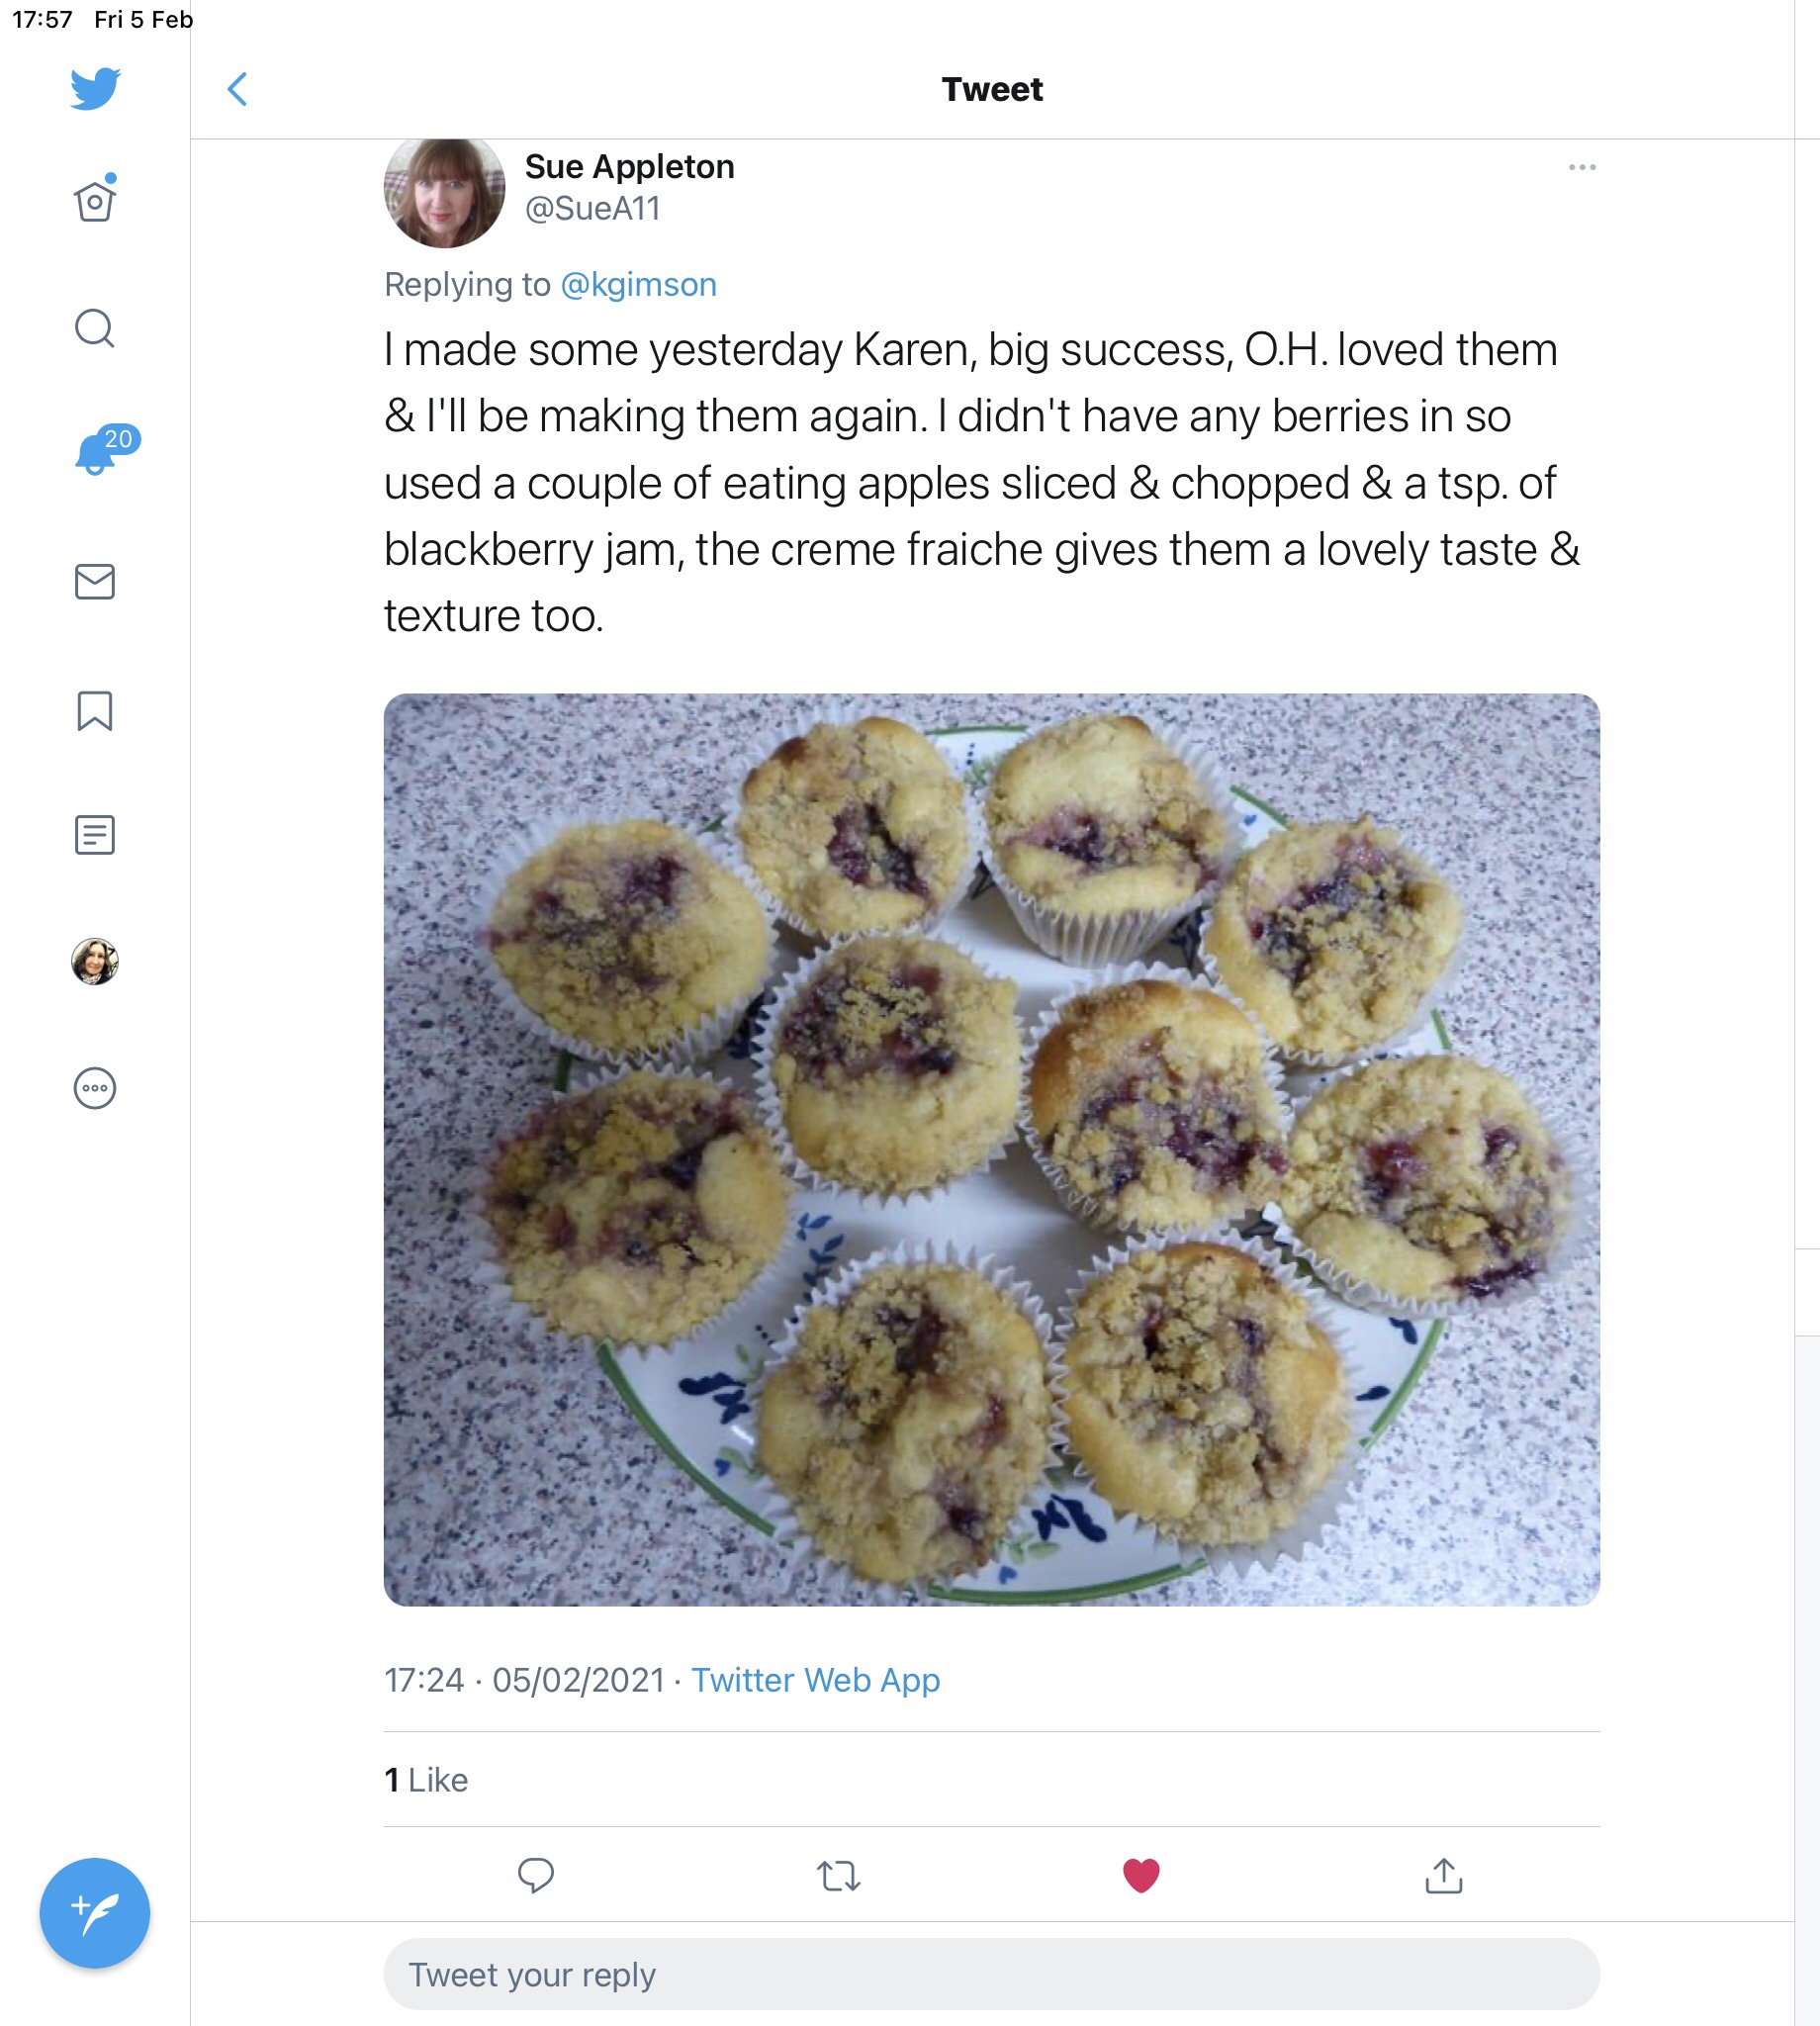
Update: Sue Appleton on twitter used blackberry jam instead of berries and sent this message:
If you’ve received your copy of Garden News Magazine this week, here’s the recipes I mention in my column. Above is the summerhouse where I write my pieces, and where I sit and make my cherry marzipan chocolates.
The recipe link for Cherry Marzipan Chocolates is here :
They are very quick to make and children love creating them. They make tasty home-made presents for Christmas.
I also write about Chocolate and Orange Panettone. Start saving your tins now to make these delicious treats. They are very easy to make and look beautiful. Get the children to make potato stamp labels. Be as creative as you like. Everyone can get involved.
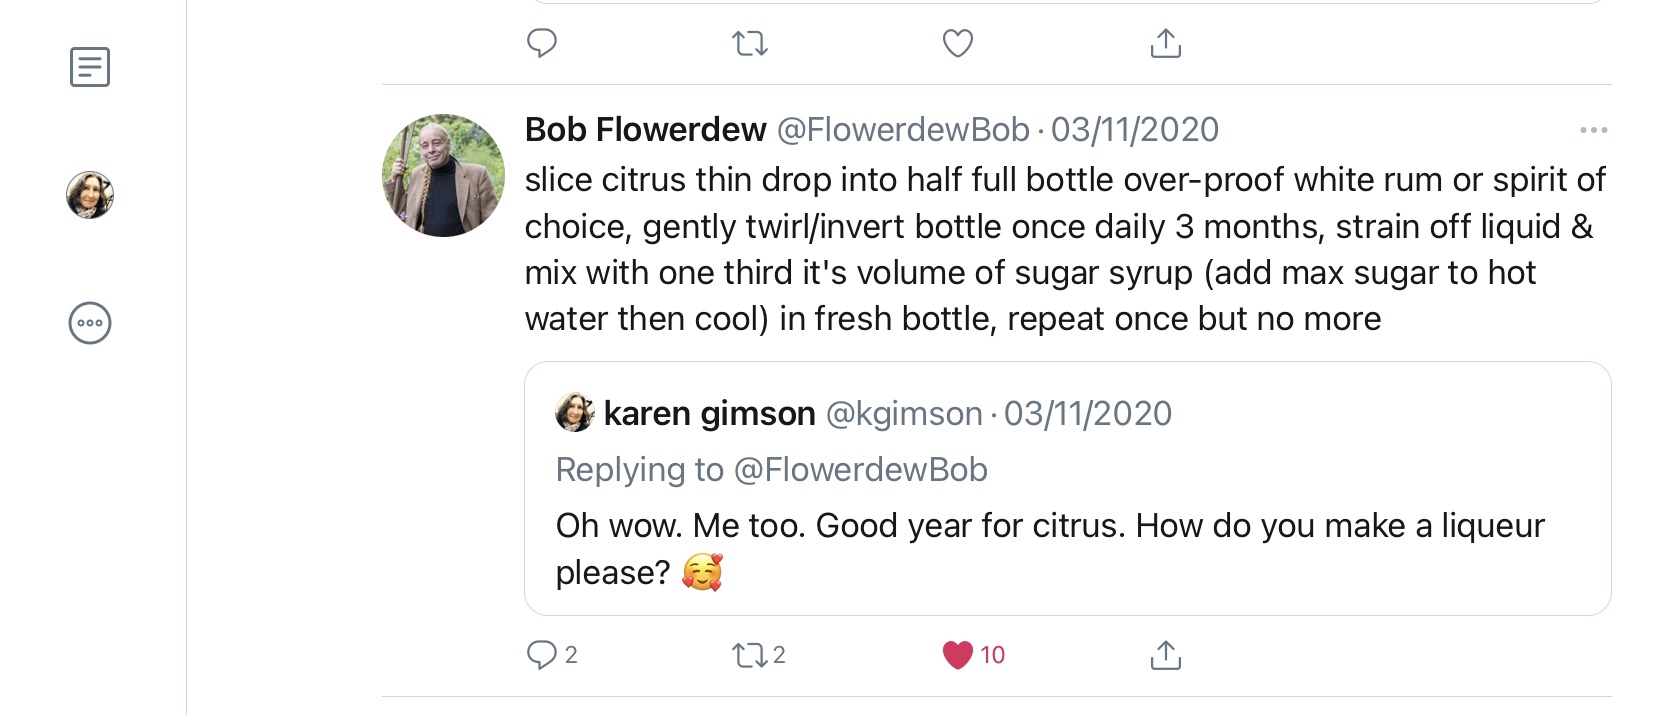
I write about turning my satsumas from the greenhouse into a liqueur. The recipe comes from Bob Flowerdew, replying to me on twitter when I asked what I could do with this year’s prolific harvest. It’s been a good summer for growing citrus. Bob always has great suggestions for what to do with produce from the garden, and is generous with his advice.
Here’s Bob’s recipe for Satsuma Liqueur :
And finally, I was talking on the radio last week, when I mentioned I was making Sloe Gin. Here’s the recipe, with thanks to garden writer Barbara Segall, who inspires me on a daily basis to try something new.
Sloe Gin
450g sloe berries -or whatever you can find. If you only have 300g, use those.
350g caster sugar
710ml gin
Kilner jar or lidded jar
Place the ripe sloe berries in the freezer to break the skins. Add all ingredients to a large kilner jar. Swirl the contents every day for a week, every week for a month, and every month for a year. Strain the gin. Use the berries for cakes or trifle.
It’s wonderful to have a bottle on the north-facing kitchen windowsill. Mine has changed colour now and it’s a joy to see. Almost like a stained glass window.
Here’s a link for Georgie Newbery at Common Farm Flowers for growing cut flowers, floristry and Christmas wreath workshops and courses, in person, and on-line. Vouchers make a great present for any gardener. https://www.commonfarmflowers.com/collections/workshops
This year, more than ever before, we are rolling out the Christmas family favourite recipes. It seems more important than ever to have reminders of all the happy celebrations from the past.
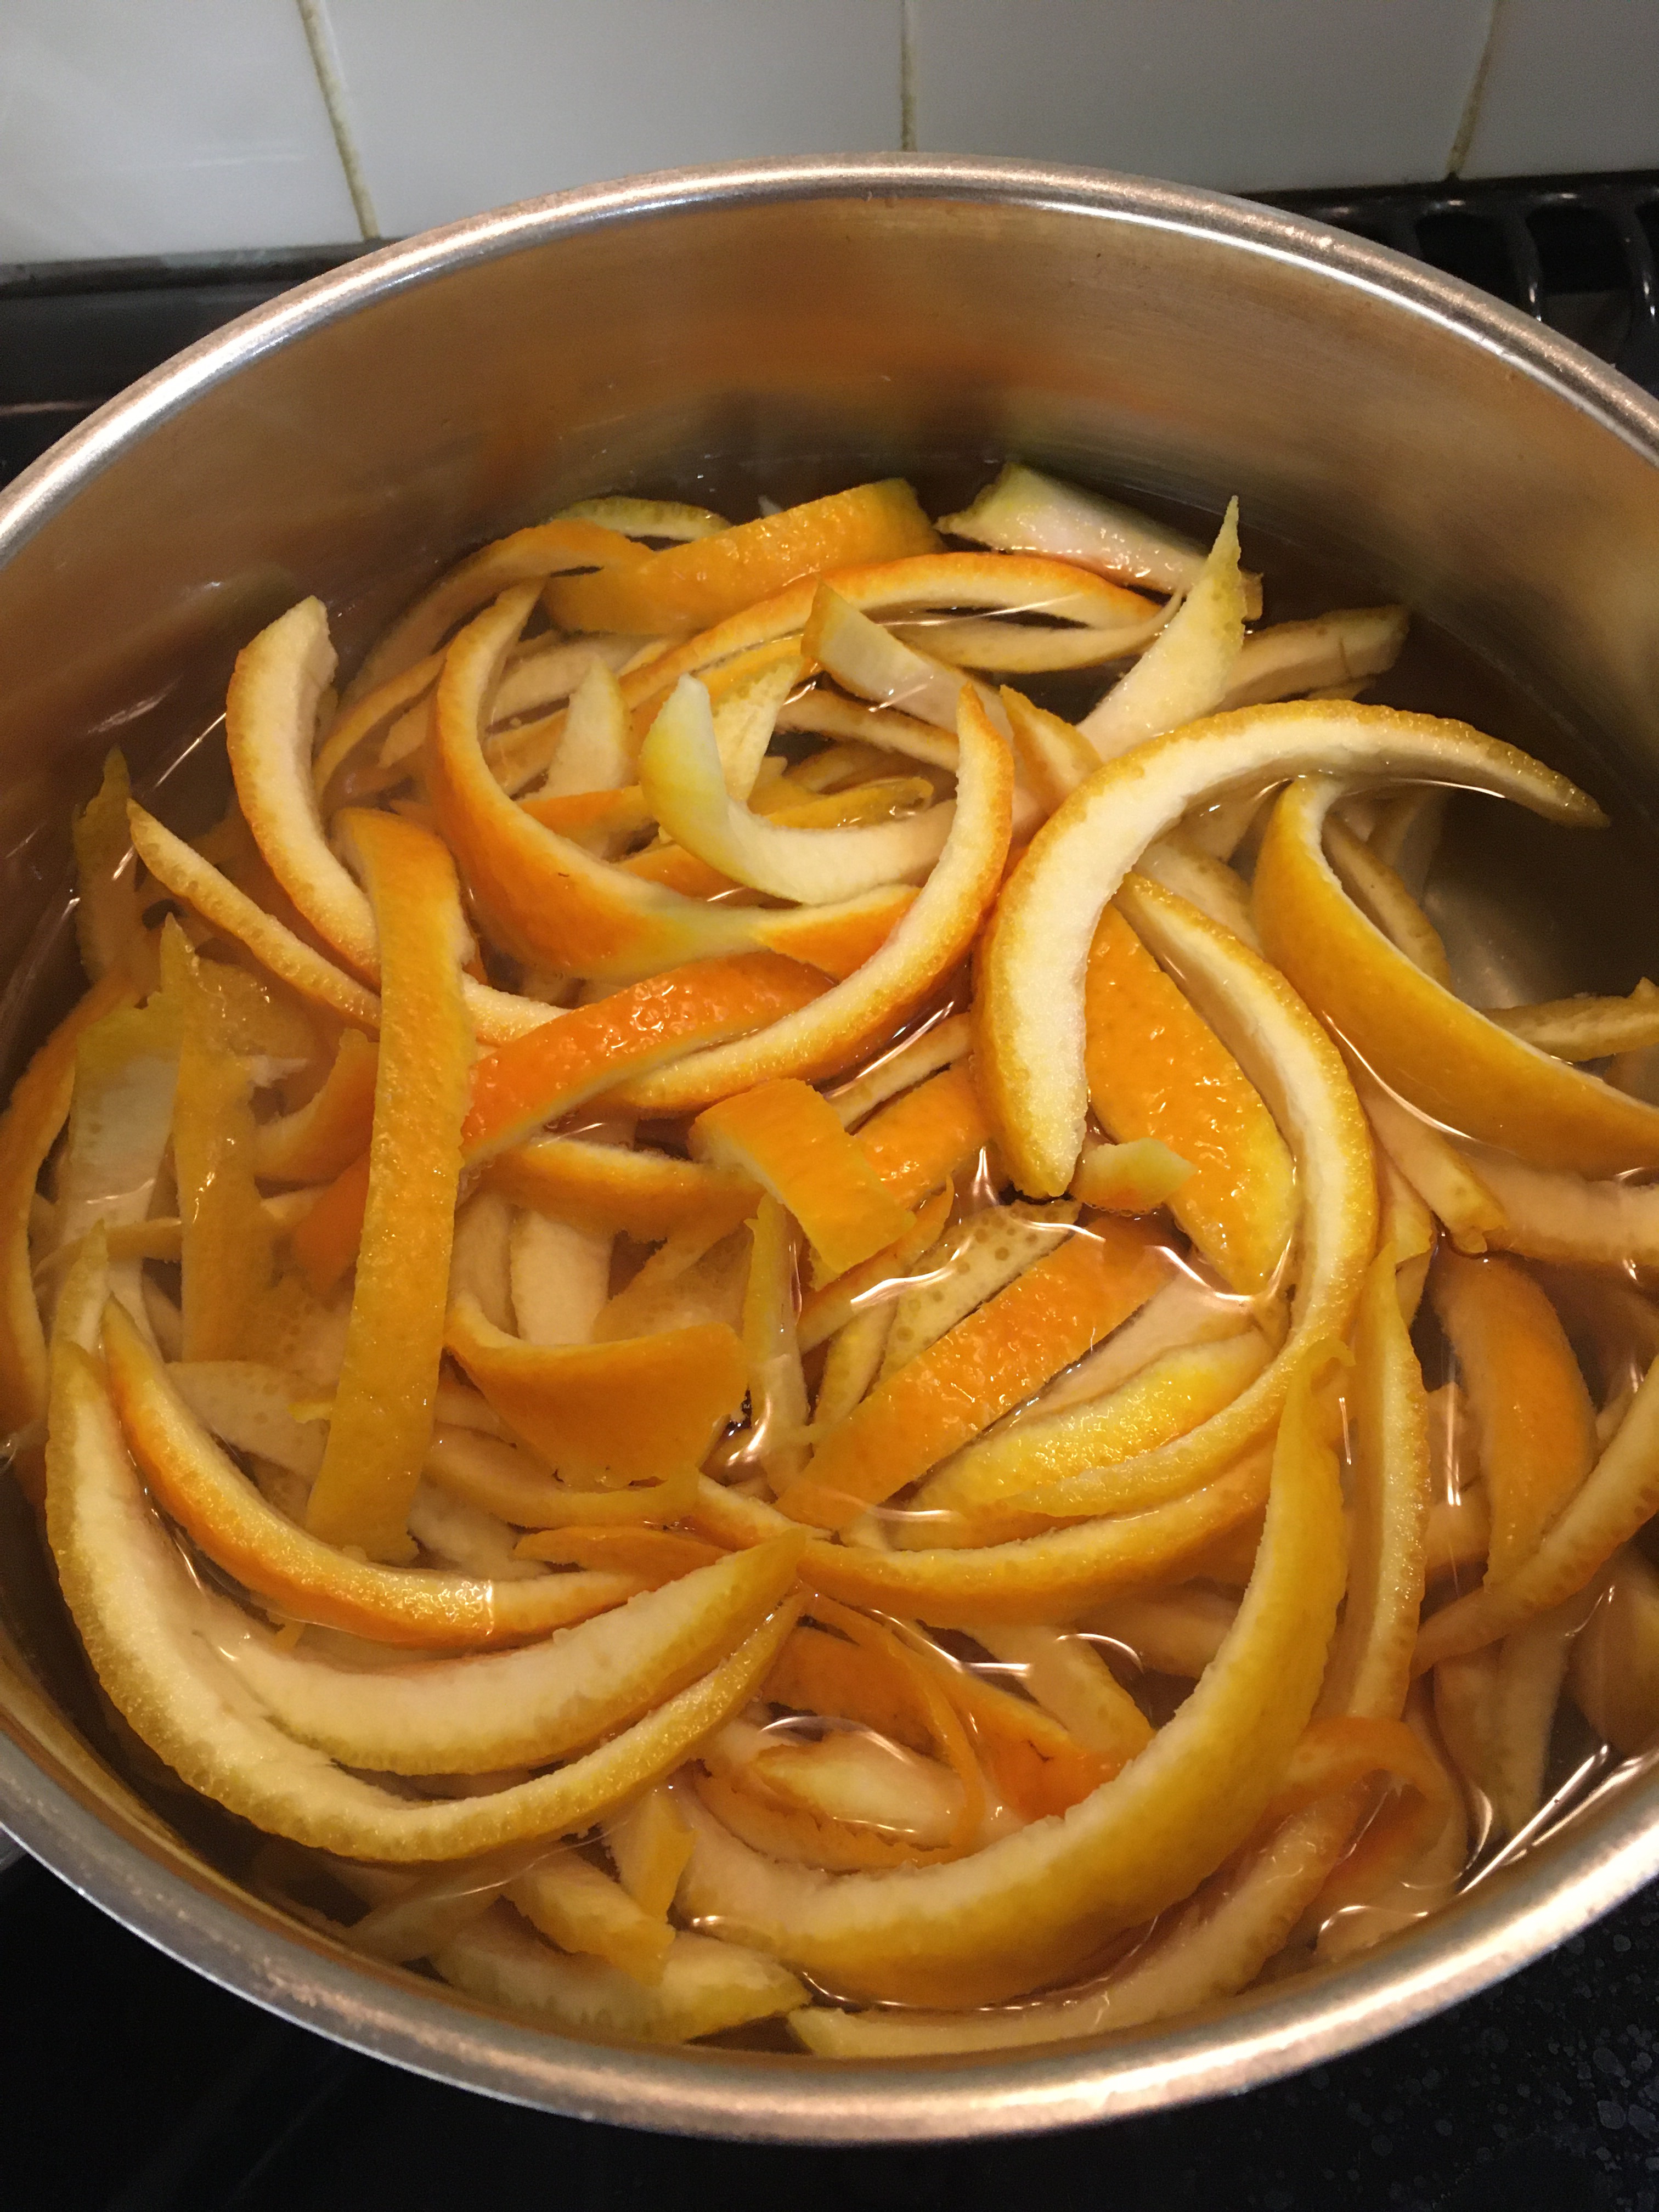
Candied orange peel is easy to make and fills the kitchen with a wonderful, comforting scent. If you need to get into the Christmas spirit, take some oranges and sugar and turn them into these irresistible treats. You can add dark chocolate and give them as little gifts to friends and family. You can’t buy anything as good. Honestly.
INGREDIENTS
4 large oranges (unwaxed if available)
300g caster sugar
Water
Granulated sugar to coat
Dark chocolate (optional)
METHOD
Scrub the oranges in hot water, especially if they have been waxed.
Peel wedges of orange skin from the top to the bottom of the fruit.
They should be 5mm thick and include the pith as well as the skin.
Lay the wedges down and flatten. Cut them into matchsticks 7mm wide.
Place peel in a saucepan and cover with water. Bring to boil and simmer for 5 minutes.
Drain and throw away the water.
Cover peel with fresh water and simmer for 30 minutes.
Drain and reserve the liquid. You’ll need about 300ml. Add 300ml of sugar and heat until dissolved.
If you have more peel, the ratio is always 100ml of water to 100g of sugar.
Return the peel to the syrup (sugar/water mix) and simmer for 30 minutes.
Drain and place the orange peel on a wire rack set above some baking paper to catch drips. Put the rack and paper in an oven on the lowest setting for approx 30 minutes to dry.
You can use the reserved syrup in orange drizzle cakes, sponges and trifles.
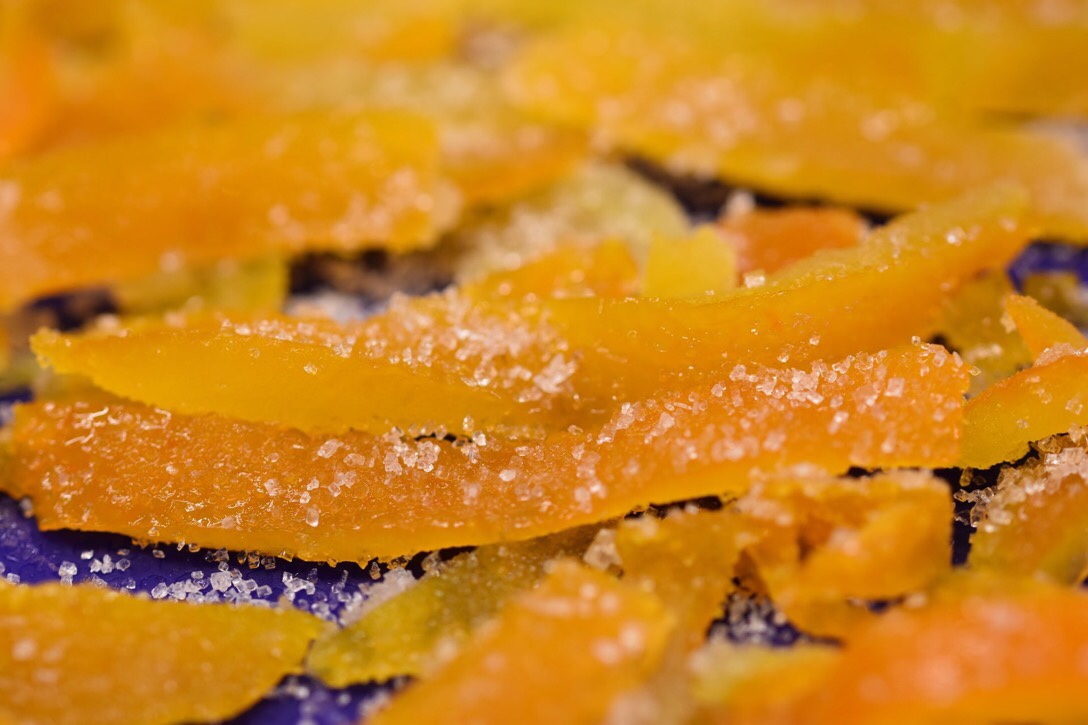
Put some granulated sugar in a basin and add a few strips of peel at a time. Use a fork to toss them in the sugar and liberally coat. Lay on a clean wire rack to dry in a warm kitchen.
Optional: after adding the sugar, you can coat half of the sticks in dark chocolate which makes a delicious treat. Wrap in little packets of foil to give as home-made presents.
Variation: use lemon. Simmer and discard the water three times to remove bitterness.
Store candied peel in an airtight container. It will keep for 6-8 weeks.
Use for Christmas cakes, or toppings for sponge cakes, muffins and biscuits. Or just on their own as a teatime treat with hot chocolate or coffee. Utterly delicious. Enjoy 😊
Let me know what family favourite recipes you are cooking this year.
We have decided not to mix the households – even though the rules say we can. We can’t risk the health of elderly relatives. Especially when there’s a vaccine on the horizon. We must just be patient for a little longer. Everyone must decide what is best for them. Visits to the care home are still currently barred as we are still in tier 3. No flowers can be sent to my darling mother-in-law, J. But we can send jars of jam and home made treats and chocolates. So I’m concentrating on making this a Christmas we will all remember- and hopefully the last one we have to spend separated from one another.
It’s going to be Christmas-with-a-difference this year. We are all going to stay at home and not mix the households. After making this sad decision, it’s full speed ahead to make this Christmas full of our usual food and special treats. We will just be enjoying them in our own homes – and not all together around the same table.
Here’s a recipe my mother-in-law Joan used to make every Christmas for as long as I can remember. The aroma of apples, spice and vinegar instantly makes me think of Christmas preparations. I feel quite tearful, standing here chopping the apples on my own. It only feels like yesterday when I was standing in Joan’s tiny kitchen chatting away, watching her cook. We were the ‘young couple’ then in our 20s, too busy to cook, with such a lot to talk about. Such busy lives. So much to say. We never stopped talking. Now I suddenly realise how silent I’ve become. Still busy lives, but somehow I have become the ‘listener’, and my children and their partners, the ‘young couples.’ I really hope it’s not too long before they can be here, standing in my kitchen, bringing the world into my home, with all their news and conversation again.
INGREDIENTS
900g eating apples
450g onions
225g sultanas
450g brown sugar
1tsp each of ground ginger, salt, cinnamon, mixed spice.
1tbsp whole pickling spice -tied in a muslin bag (optional)
450ml vinegar
METHOD
Chop the apples and onions into small 2cm pieces. Put all ingredients in a large saucepan or jam pan and bring to the boil. Gently simmer until the apples and onions are cooked ( about 35- 45 minutes). Remove the muslin bag of spices. Pour into clean sterilised jam jars.
This chutney keeps for about 1 year and is a perfect for cheese and festive meals. It’s a lovely quick-to-make present too.
For Joan and Keith, it will be Christmas at the care home for them this year, when they should be sat at the head of a very large table full of children, grandchildren, and two new great-grandchildren- born in the last few months. We are not allowed to visit, and they are not allowed out. Such a sad state of affairs for us, as it must be for many. But there’s hope on the horizon with news about a vaccine. And that’s what I’m holding on to this year. Hope.
What traditions are you keeping this Christmas? Do you have favourite recipes that make you think of Christmases past. Take care, and thank you for reading.
Joan’s favourite Christmas decoration that she’s treasured since she was a child. She’s 91 now. The little bell inside still rings.
It’s been a bumper year for fruit. There’s crates of pears in the spare room, and little piles of rosy red apples all along the windowsills. The whole house smells like pear and apple crumble! I’ve never managed to reach the top of the fruit trees before. Our old ladders were too wobbly. But this year I’ve a fabulous new addition to the garden- a Henchman tripod ladder. It’s made everything easier – and safer. All the best, tastiest fruit- always at the top of the tree- has been harvested. This year, more than ever, it feels as if nothing should be wasted. Spare fruit has been distributed to friends and family in little paper bags. Damaged, over-ripe fruit has been enjoyed by hedgehogs and blackbirds, so wildlife has not been forgotten either.
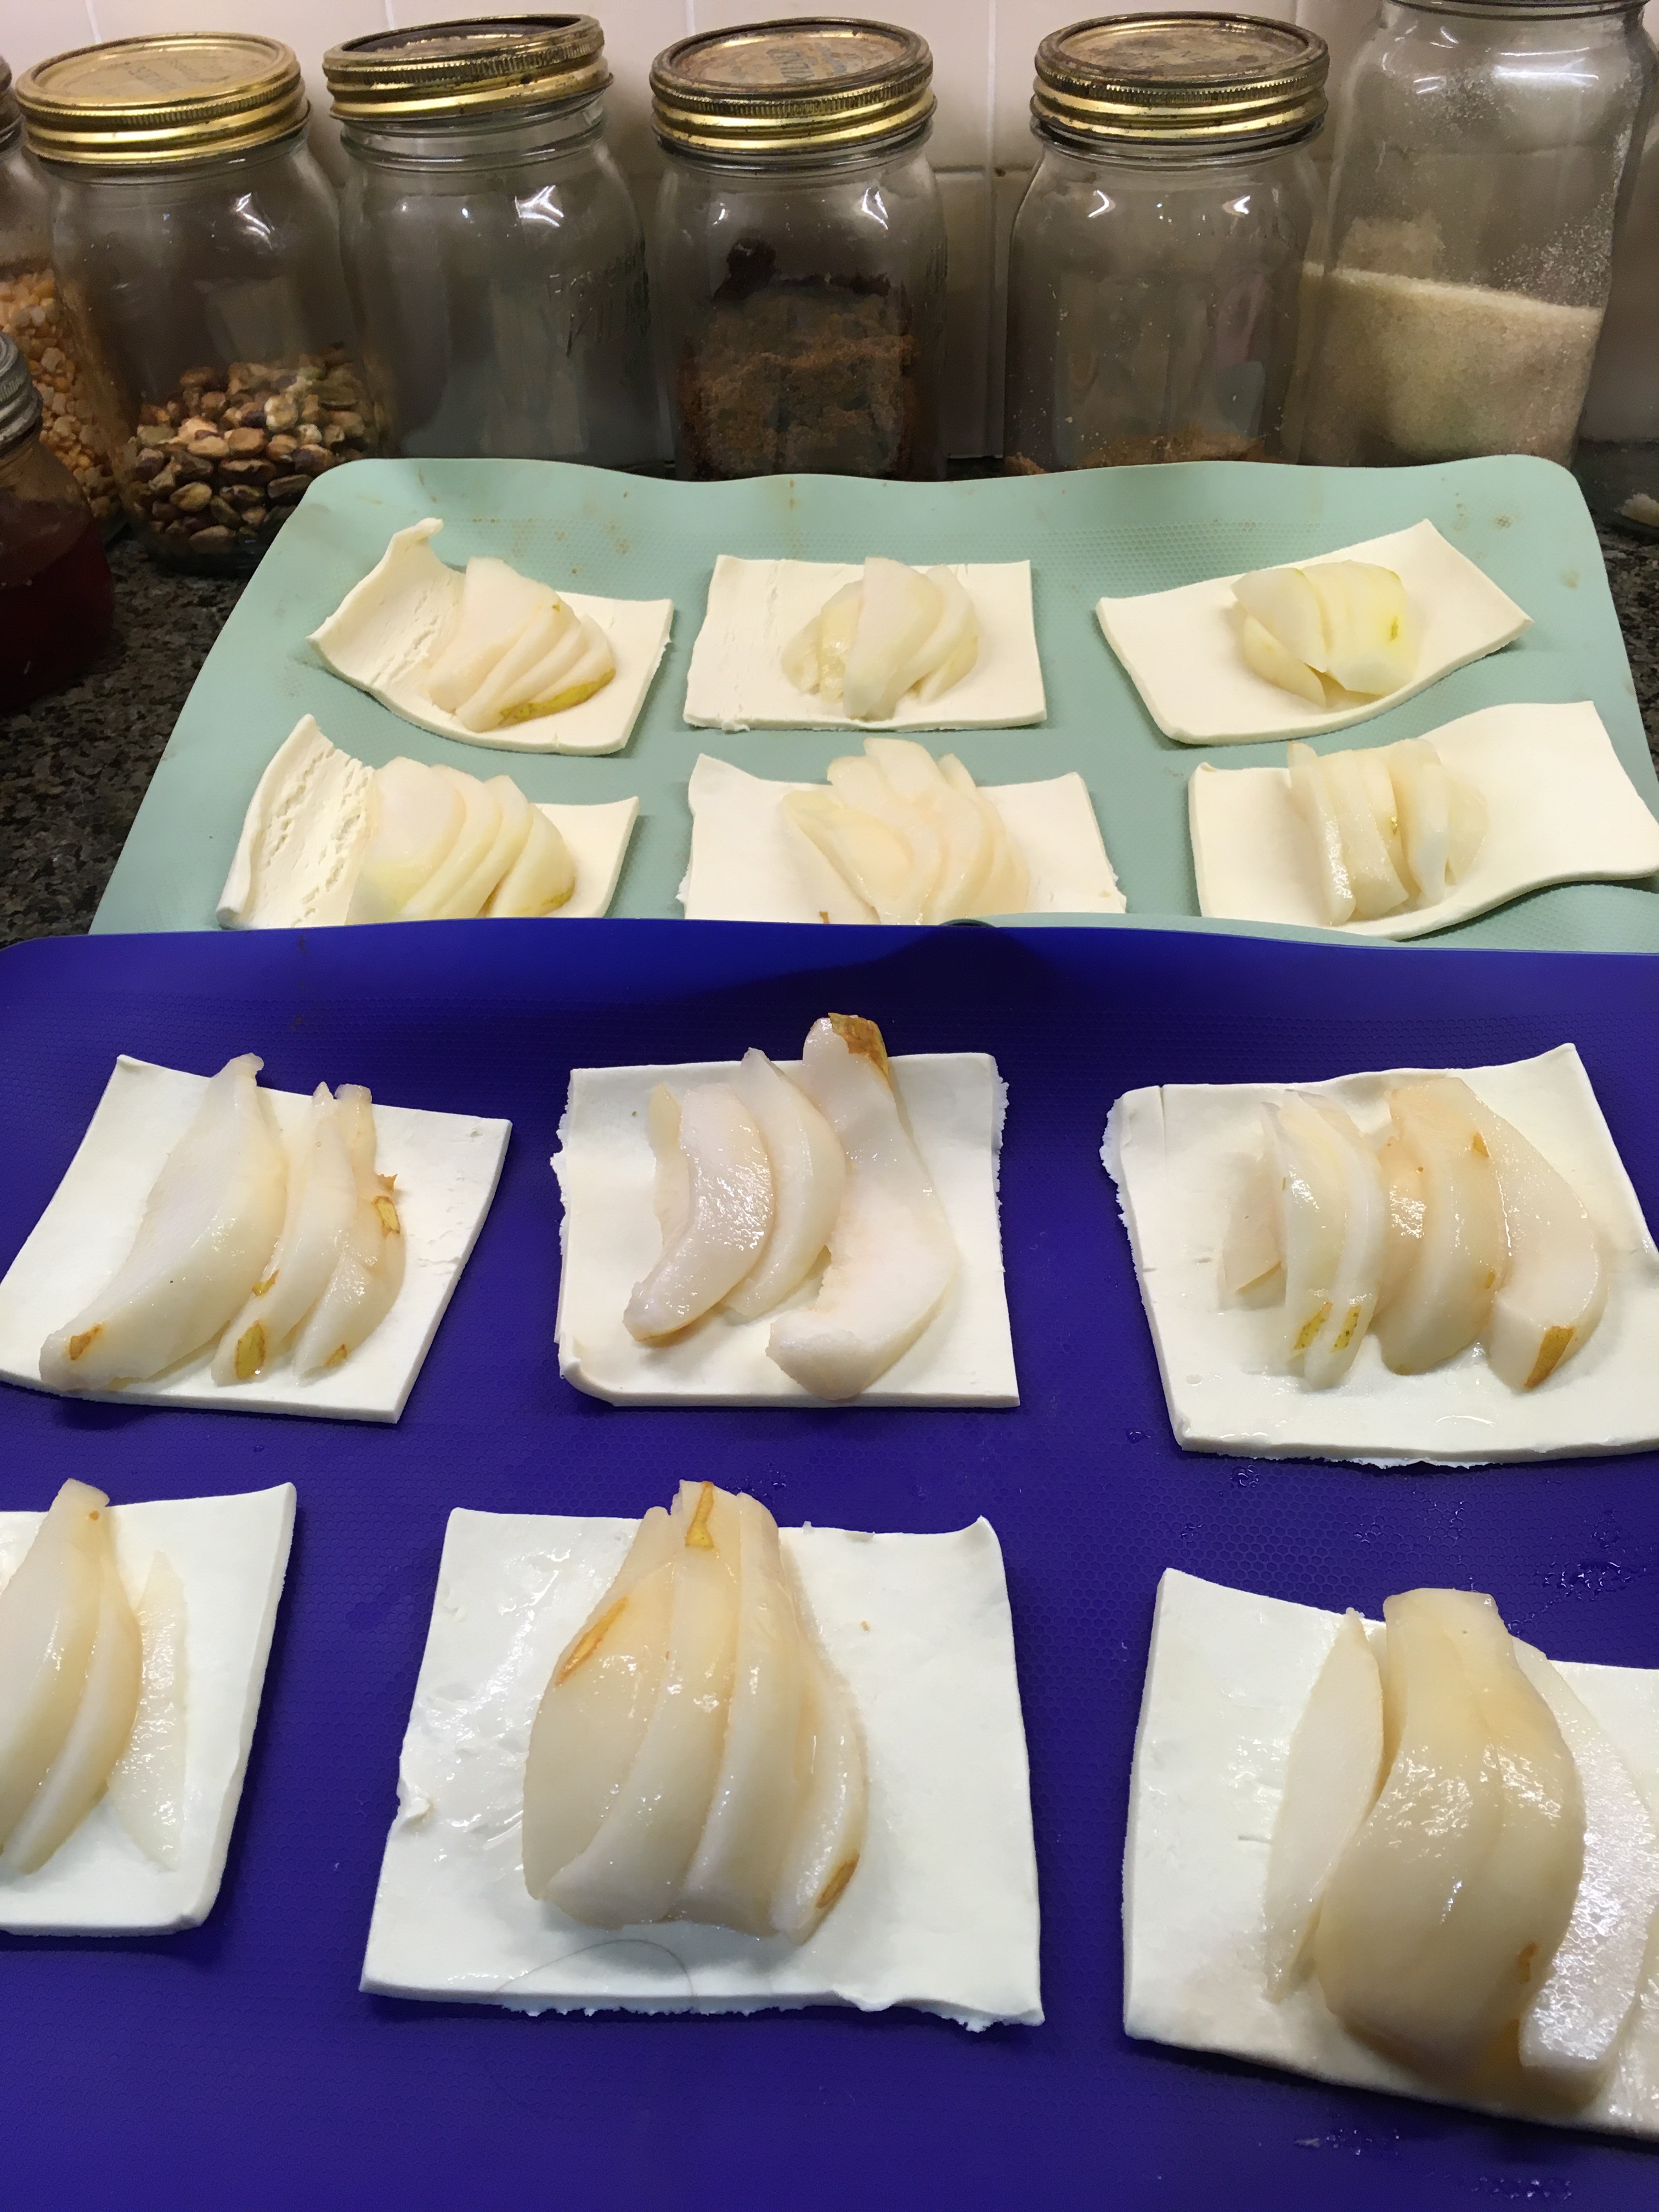
One of our favourite autumn recipes is Pear and Almond Pastries. As usual, just a few ingredients are needed, and the little parcels of tasty pears only take minutes to make. Have a go at making them, and let me know how you get on.
INGREDIENTS
1 pack of ready rolled puff pastry
3 or 4 ripe pears
1 tbsp dark brown sugar
3 tbsp ground almonds
1 tsp ground cloves
1/2 tsp cinnamon
2tbsp flaked almonds for the top
1 egg, beaten (optional- use almond milk for vegans)
Icing sugar for dusting (optional)
Baking tray with baking paper or silicone sheet.
190C oven 15-20 minutes
METHOD
Unroll the pastry and cut into squares. Lay them on the baking tray.
Peel and halve the pears. Place slices on top of the pastry squares.
In a bowl, mix the sugar, ground almonds, ground cloves, cinnamon together. Pile spoonfuls of the mixture on top of the pears.
Take the corners of the pastry and draw them together to make a rough parcel. The pastries will stretch and turn out all shapes, and it doesn’t matter. They will still taste the same.
Brush the top with beaten egg (or almond milk) and sprinkle over the flaked almonds.
Cook in a preheated oven for 15 -20 minutes. Check them after 10 minutes to see how brown they are. The pastries will be ready when they are risen and light brown. They burn easily, so keep an eye on them. 20 minutes might be too long for fast ovens. Dust with icing sugar, if you have some.
Can be eaten cold or warm. Can be frozen for 3 months. Delicious with clotted cream, or custard. We also love them with home-made vanilla icecream.
Thanks for reading. Have a great gardening week and keep in touch.
Suddenly, at this time of the year, the kitchen windowsill is covered with tomatoes. All sizes from giant heritage beefsteak Marmande to tiny cherry types such as Sweet Million and Red Robin. Some are bright sealing-wax red, soft and ready to eat. Some shine like emeralds, green and firm. They will ripen over the coming weeks.
Here’s a favourite recipe, perfect for utilising your tomato harvest. As usual, it’s a quick and simple idea. It takes 10 minutes to make, and 15 minutes to cook. Tomato and herb tarts travel well and are suitable for picnics too. Enjoy!
INGREDIENTS
1 pack ready rolled puff pastry
1 egg yolk -beaten
7oz /200g cheese ( can be Cheddar, gruyere-or whatever you have)
14oz /400g tomatoes, thickly sliced
Few sprigs of thyme – leaves only
1tbsp olive or rapeseed oil
Salt and black pepper
METHOD
Preheat the oven to 210C /190C fan/ gas mark 7
Cover two baking trays with either re-usable silicone sheets or baking parchment to prevent the tarts sticking.
Roll out the pastry. Use a 7” tea plate as a template. Lay the plate on the pastry and use a sharp knife to cut a circle.
You’ll get two 7” round tarts, or one 7” and four 4” tarts from a roll of pastry. The off-cuts of pastry can be used for cheese straws. Just add grated cheese and twist to incorporate.
Transfer the circles of pastry to the baking trays. Use a blunt knife to score an edge to each circle, 1.5cm or 1/2” wide.
Brush each border with the beaten egg. Use a fork to prick over the base of the tarts to stop them rising.
Pile grated cheese into the centre of the circles. Take care not to get any filling on the edges, or they won’t rise.
Arrange slices of tomato in concentric circles on top of the cheese.
Season with salt and pepper and scatter over the thyme leaves.
Drizzle over a few drops of olive or rapeseed oil
Bake in the oven for 12-15 minutes or until the pastry edges have risen and are golden brown and the filling is bubbling. Garnish with some fresh herbs.
Can be served warm or cold. Can be frozen.
For a vegan alternative, omit the egg and use melted vegetable margarine and use vegan cheese.
Some of the 4” tarts, fresh from the oven
My Marmande tomatoes were prolific this year. I sowed seeds in February, pricked seedlings out in March and planted them in their final 12” pots in May. I grew mine in an open-ended poly tunnel, which protected them from the worst of the weather.
Pictured above, some of the tomatoes we’ve grown here. Recommended varieties include blight -resistant Crimson Crush. Also Gardeners Delight, Tumbling Tom, Sweet Million and Golden Sunrise.
I listened to a podcast called Fresh from the Pod this week. Gardener and writer Tamsin Westhorpe was interviewing Chris Collins. Tamsin is the gardening world’s version of Michael Parkinson, in my opinion. It’s fascinating to get a real insight into the lives of our gardening personalities. Anyway, half way through the interview, Tamsin says she never turns any opportunities down. She never says no to anything. Always has a go, because you never know where it might lead. So, this gave me courage to try something new this week. As you know, I love cooking. My happiest memories are sitting around a table with my parents and grandparents and just being fed the most delicious meals. Just that feeling of being loved and cared for. It lives on in my memory like an indelible photo album. Well, it’s gradually become my turn to produce memories for other people. I’ve loved cooking for my children and the recipes here are written down for them, incase they ever need them. And today I also recorded my first “grow it, cook it, eat it” for Ben Jackson at BBC Radio Leicester. They have a ‘Food Friday’ segment which I’ve always wanted to have a go at. Remembering Tamsin’s words, I ventured forth! It was a shaky start, as we were cooking outdoors (social distancing) and the wind was blowing my bits of baking parchment about. The cat wanted to join in. He usually “helps” when we are gardening. And the neighbour’s dog started barking. Ah well, nothing is perfect in real life, is it. It was a fun thing to do and I hope you enjoy listening. It’ll make you laugh, I’m sure.
If you’re struggling to put your mind to much at the moment, here’s a fast pudding you can make with store cupboard ingredients. You don’t even need to switch the oven on. It’s cooked in the microwave and is ready in five minutes.
INGREDIENTS
3oz margarine ( we use palm-oil free Lurpack)
3oz sugar
5oz SR flour
1 tsp baking powder
1 egg
4 tbsp milk
Sprinkle of mixed dried fruit (optional)
1 apple (optional)
Sprinkle of Demerara sugar for the top.
METHOD
Use an electric hand whisk or food processor to mix the sugar, margarine, egg and milk. Add the flour, baking powder and dried fruit and whizz to incorporate.
Chop one apple and place in the bottom of a glass Pyrex deep dish. You can use any fruit you like. This is also nice with drained tinned peaches, apricots, mandarins, pears, pineapple. Or you don’t have to use any fruit at all, just the sponge mixture.
If using fruit, place the sponge mixture on top.
Cook in a microwave for five minutes. Remove promptly or the pudding will steam. The pudding will carry on cooking for a few minutes after you’ve taken it out of the microwave. Insert a knife into the centre to check that it’s cooked. The knife will be clean if cooked. If not put back for another minute. The pudding shrinks from the sides of the dish as another clue to check whether it’s cooked.
Sprinkle a tablespoon of golden or Demerara sugar over the top. Place under a hot grill for a minute to caramelise and brown the top.
Serve with ice cream, custard, fresh cream.
Serves 6 people and lasts 2 days if kept cool.
VARIATIONS
Instead of dried fruit add 1 heaped tablespoon of cocoa powder. You do not need the Demerara sugar topping as the cake will be brown. This is delicious with mandarins.
This recipe came from my mum and is a family favourite. I’m especially sharing this here for my youngest daughter who is buying a house in the middle of this corona crisis. As if life wasn’t stressful enough. And she will be cooking in her own kitchen for the first time in two weeks. Good luck Rachel xx
Fred, from the FrenchGardener blog (see comments below) suggests making caramel before adding the apples.
150g sugar and 50cl water in the dish for 2.30m to 3 minutes on 900w power. Then add the chopped apples followed by the sponge mixture, sounds delicious. Thanks for the idea.
At this time of year, my kitchen work surfaces are covered with piles of apples. Little pyramids of golden cooking apples, tiny rosy red eating apples, giant Bramleys. My family complain. There’s nowhere for anyone to put anything down. I usually store them wrapped in newspaper in the potting shed, but I’m still trying to evict the mice, making many trips back and forth to the woods with my tunnel-like humane traps baited with peanut butter. I can’t kill them. They will take their chances in the leaf litter under the trees. I’m trying to ignore the tawny owl fledglings in the branches above, still being fed by harassed parents. I feel slightly guilty. But watching the mice run when I let them out, I think they stand a fair chance of surviving.
Meanwhile, I’m steadily working my way through the apples. My mother always says, if you’ve got an apple, you’ve got a pudding. It can be an apple pie, a crumble, a cake, or if you are pressed for time, just apple purée with lashings of creamy custard, or Devon clotted cream. A special treat.
Today’s recipe is another family favourite, an apple tray bake which is quick and easy to make and tastes of autumn. As usually, I’m recording it here for my children, in case they can’t find the scraps of paper these recipes are written on. It’s so lovely to see my grandmother’s best copper plate hand writing, as she lovingly wrote these recipes for me. Food, and cooking, bring back such special memories, don’t they.
APPLE AND ALMOND SLICE:
INGREDIENTS – FOR THE TOPPING
30g butter or vegan margarine
30g SR flour
25g golden caster sugar
2 tbsp. Jumbo oats
1/2 tsp cinnamon
25g flaked almonds
METHOD
Mix the butter, flour and sugar together. Fold in the cinnamon, oats and flaked almonds to make a crumble topping. Place in the fridge while you make the base.
INGREDIENTS FOR THE BASE
150g SR flour
200g golden caster sugar
200g butter or margarine
3 eggs ( or use 6 tbsp. soya oat drink if vegan)
100g ground almonds
1/2 tsp baking powder
1/2 tsp almond extract
1/2 tsp cinnamon
2 large apples slices and tossed in lemon juice
100g any other fruit you have; blackberries, raspberries, blueberries, plums,
METHOD
Mix the flour, baking power , sugar and butter together. Whisk. Fold in the ground almonds and cinnamon. Add the beaten eggs.
Put half the mixture in the base of the tin. Put apples on top. Add the rest of the base moisture. Press the blackberries or other fruit on the top.
Cover with the crumble topping mixture.
Cook for 40-50 minutes, or until a skewer come out clean.
Gas mark 4, 180C oven, or 160C fan oven.
You’ll need a 20cm tray bake tin, at least 4cm deep, lined with baking parchment.
Put baking paper on top if it is browning too quickly. Leave to cool and slice into fingers.
Can be frozen for 3 months.
Enjoy!
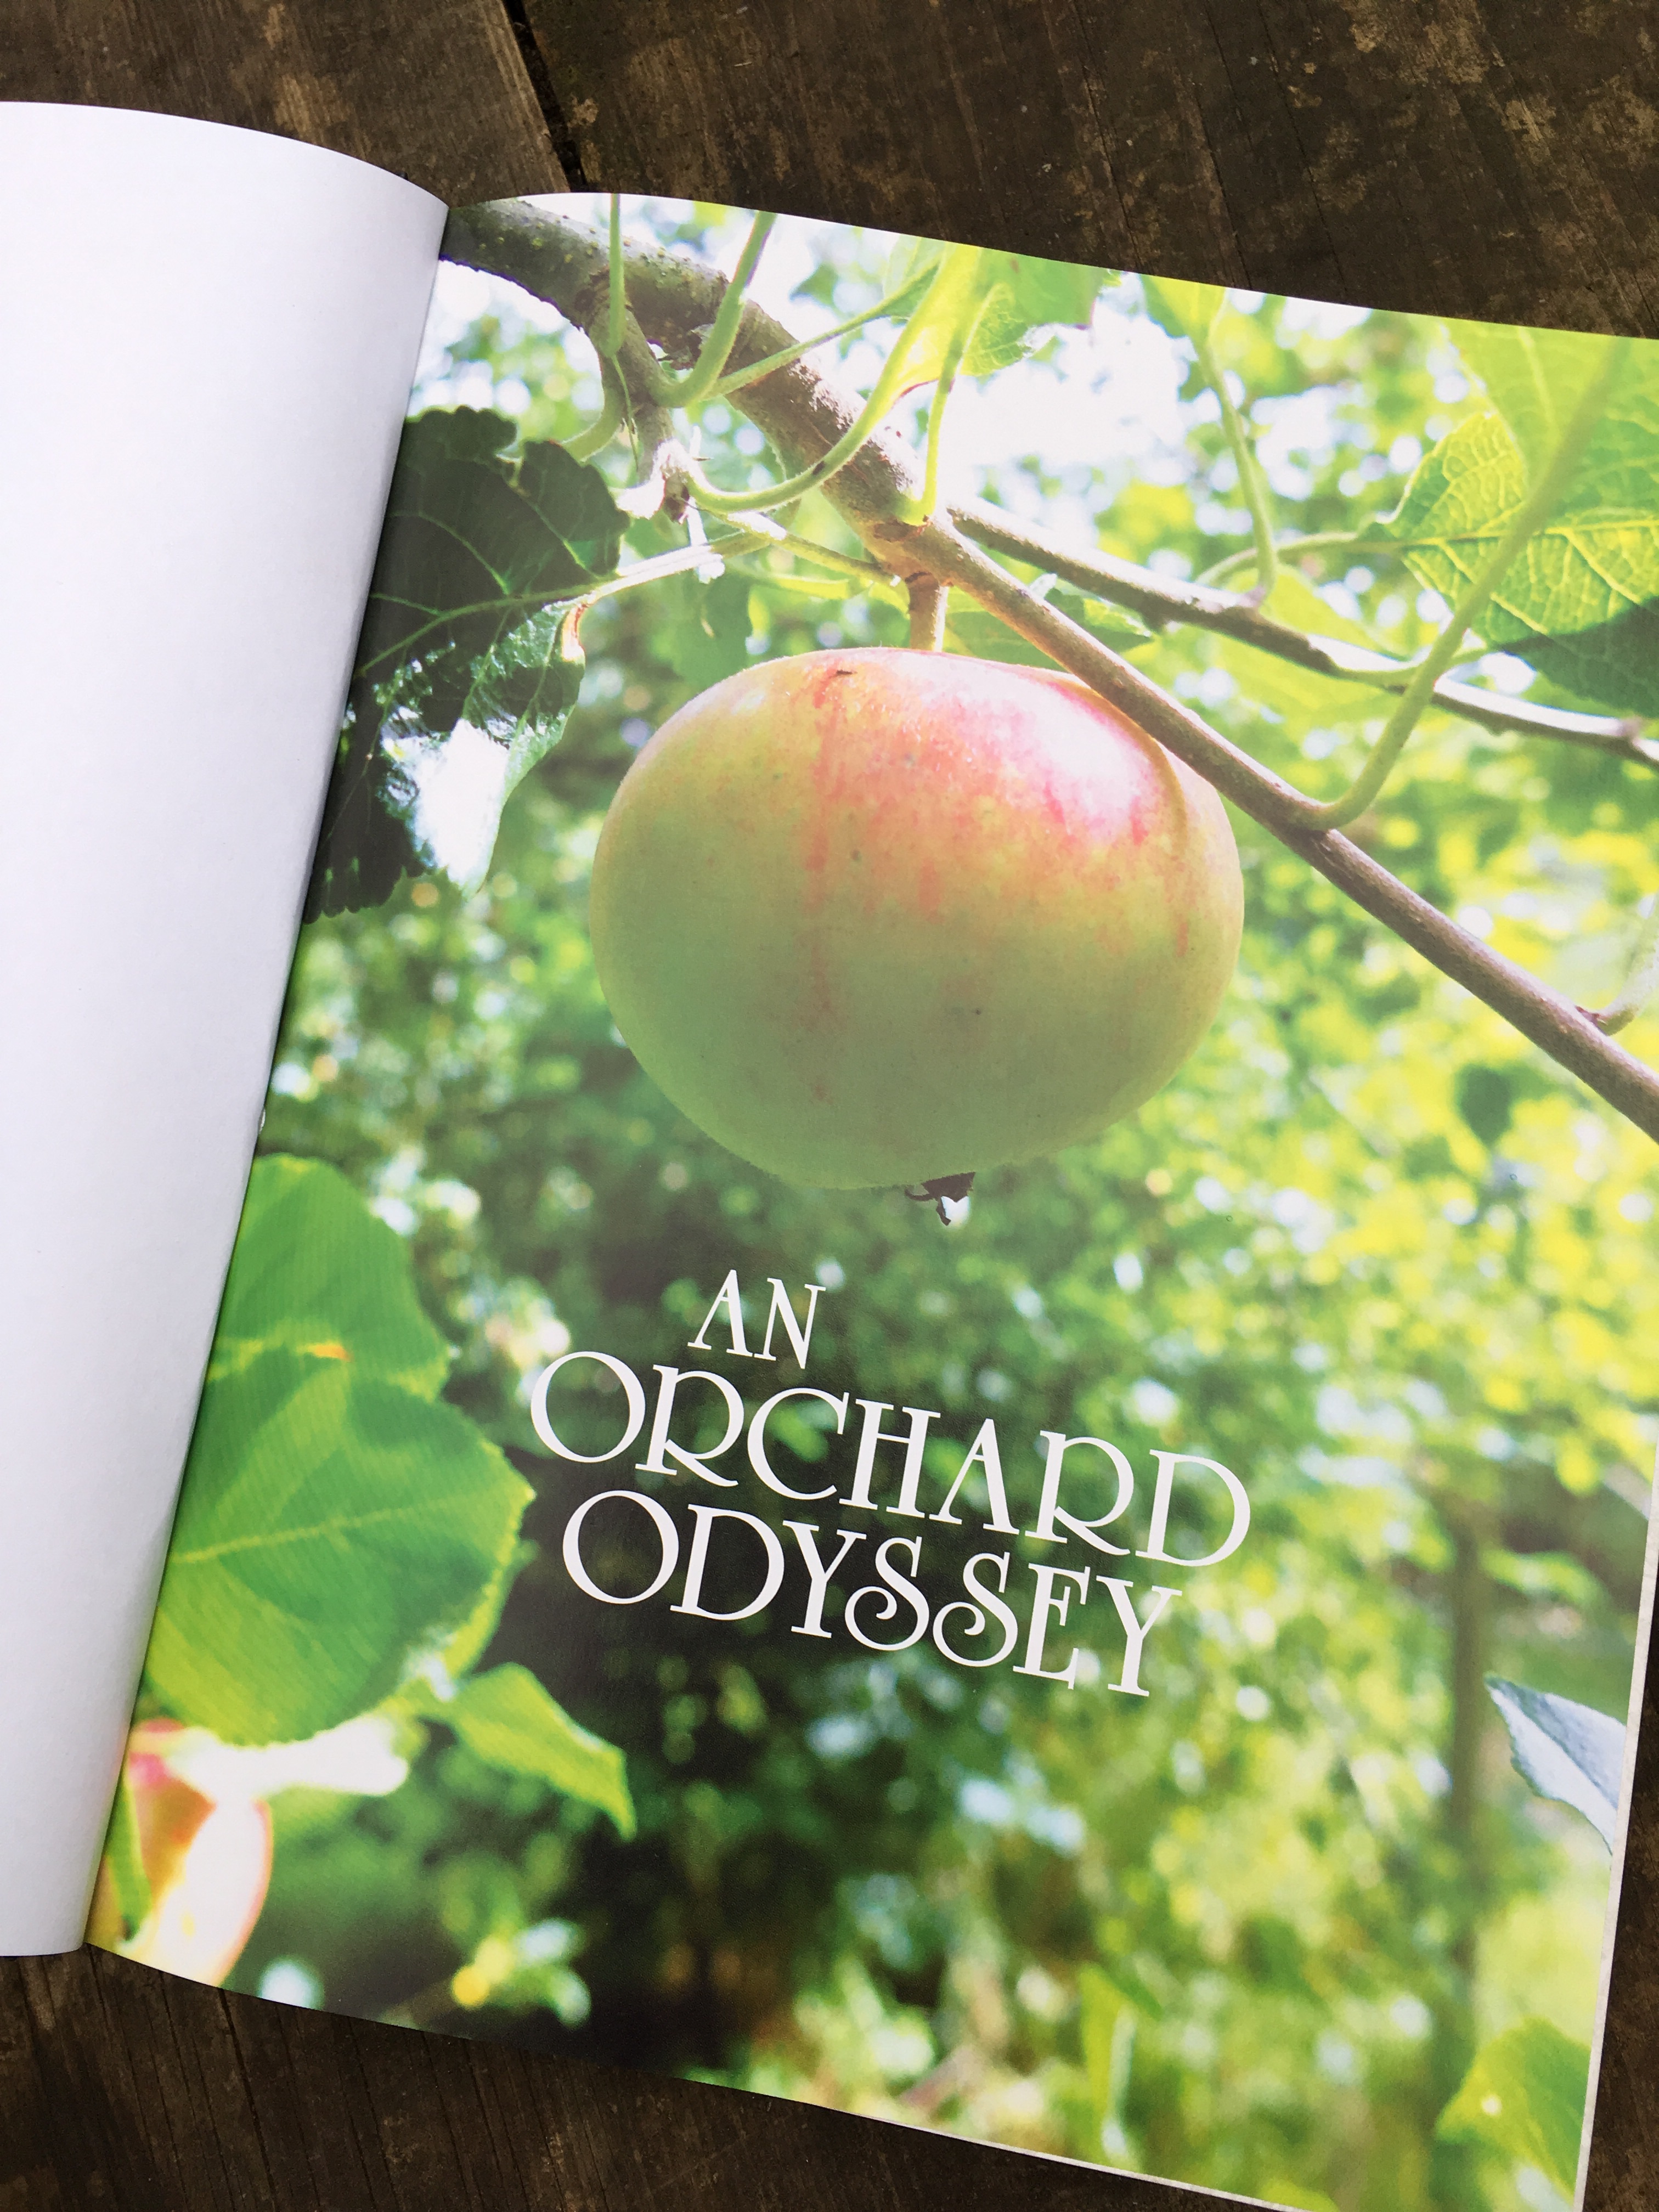
You might also like : Review of Orchard Odyssey by Naomi Slade here :
I’ll leave you with a photo of my 1930s summerhouse, looking autumnal today. There’s heaps of blankets to keep us warm when the temperatures start to dip. It’s quite cosy in here though.
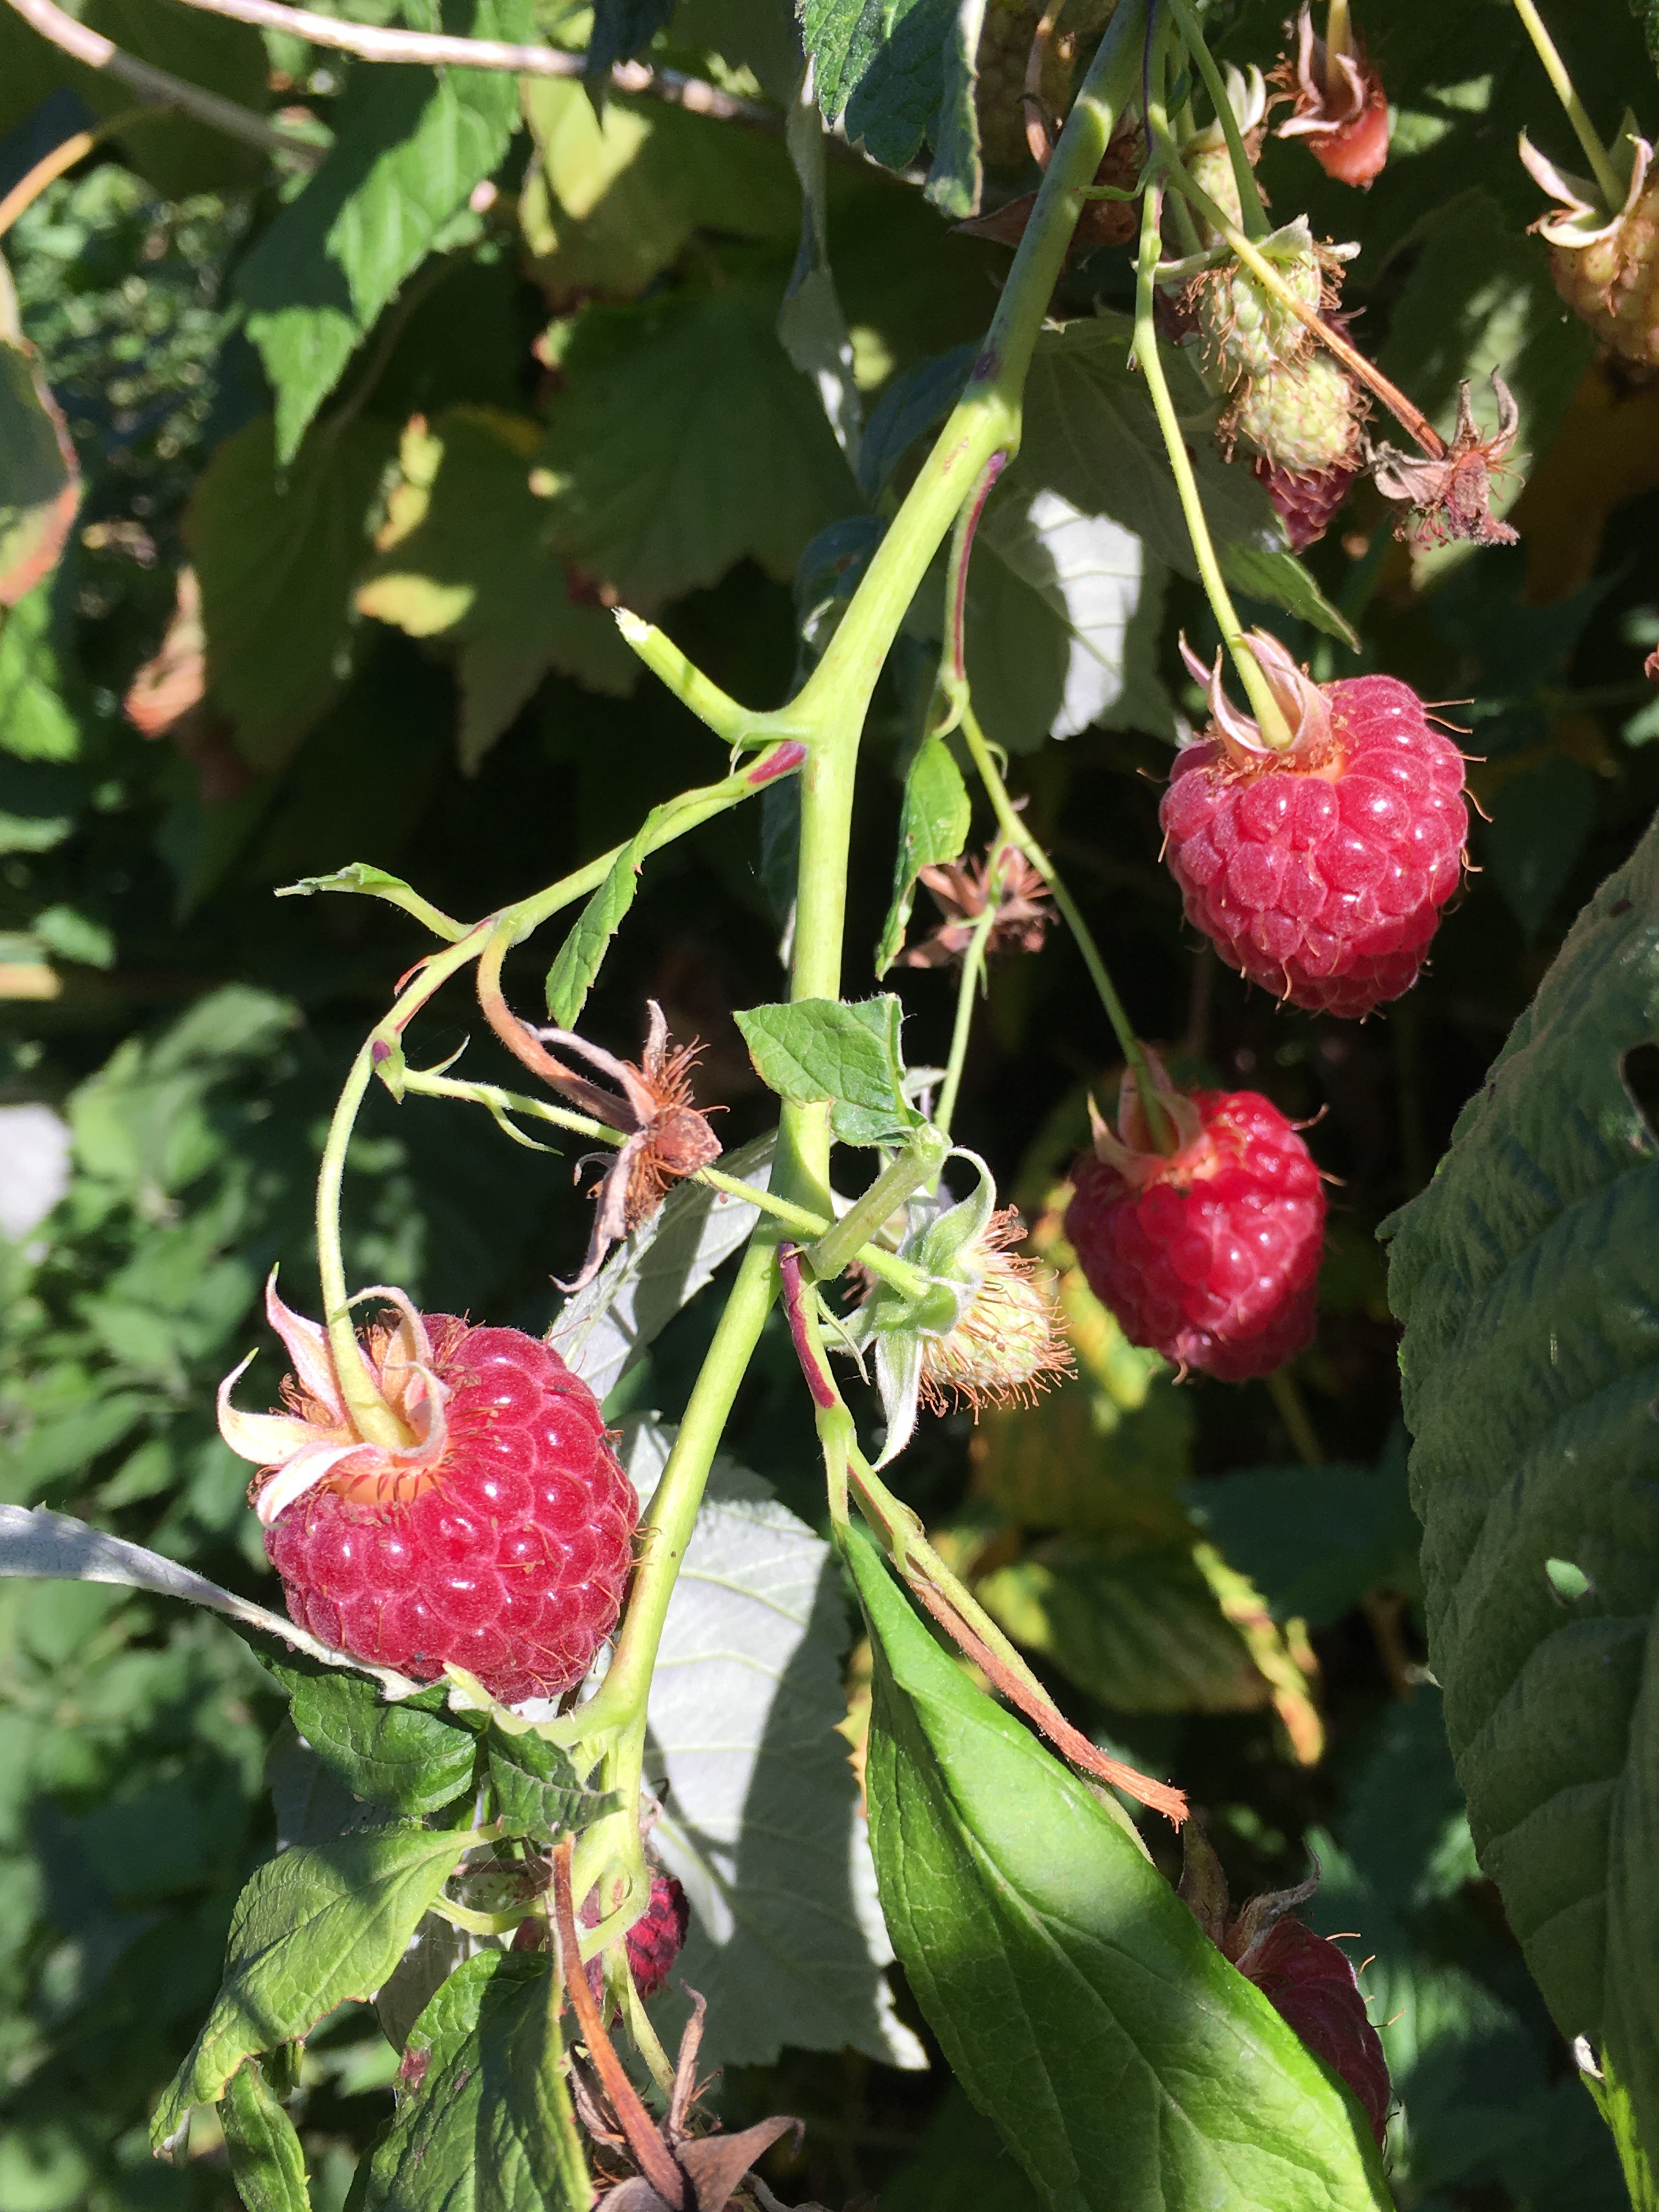
Autumn raspberries are easy to grow and so prolific. I’m growing a variety called Polka – much earlier, and larger fruiting, than Autumn Bliss. Now is the perfect time to plant raspberries. They are sold bare-rooted, mail order, or from nurseries and garden centres. They are grown in nursery fields and lifted for sale at this time of the year. In garden centres, you’ll find them bundled together and plunged into 10″ pots with some compost to keep the roots moist. Tip up the plants and separate them out. Roots are fibrous and need to be planted shallowly in well-drained soil. I plant mine no deeper than 2″ and incorporate lots of well rotted home-made compost to improve drainage. It’s possible to buy soil improvers in bags from garden centres. There’s also composted maize fertilisers which I recommend as they are easy to use and weed free. Plant Grow is the one I use most often at Bramble Garden. Choose a sunny, or semi-shaded site and plant the canes 2ft apart, with rows 6ft apart. If space is limited, it’s no problem to grow them in pots on the patio. There’s dwarf varieties bred specially for containers and small raised beds. New variety Yummy grows to 45cm and fruits on the first year’s wood. There’s also a new variety called Ruby Falls which is very compact and prolific.
Here’s a favourite recipe, quick to make and cooks in just a few minutes in the microwave. It’s great not to have to turn on the oven, saving electricity or gas. It’s ready in a flash.
INGREDIENTS
3oz SR flour
3oz caster sugar
3oz butter (or vegetable margarine for a vegan recipe)
1 egg (or 2 tbsp oat milk for vegans)
1 tsp baking powder
1 tsp vanilla extract
1 tbsp milk (or milk substitute)
1 tbsp cocoa powder
Handful of fresh or frozen raspberries
You can use small mugs, cups – or a deep glass Pyrex soufflé dish as long as they are microwaveable.
METHOD
Throw all ingredients apart from raspberries in a food processor and whizz, or use a hand whisk to incorporate.
Place some raspberries in the base of the containers and top with the sponge mixture. Reserve some raspberries for the top.
Cook for 3 minutes. Open the door promptly and let steam escape. The sponge carries on cooking for another 2 minutes. They will be cooked when the sponge shrinks slightly from the sides of the dish. Use a skewer to check the mixture has cooked. If the skewer is clean, they are ready. If the skewer comes out with some liquid mixture, pop the dishes back in the microwave for another minute.
Serve hot with custard or double cream. Or allow to cool, sprinkle with reserved raspberries and icing sugar.
Makes a wonderful recipe for picnics and parties. Easily transported. Can be dressed up for a party with chocolate leaves.
This recipe can be used for any fruit. I use blueberries, pear, apple, blackberries, mandarins, whatever you can get your hands on. If you have no fruit, the sponge on its own is wonderful, or you can add a spoon of berry jam at the base instead as a change. To change it again slightly, omit the cocoa powder and you have a plain vanilla sponge. Add golden syrup to the base, if you like. Quick, easy and affordable. Just what’s needed to get us through this difficult time and with winter on the horizon.
Thanks for reading, and let me know if you make the recipe and how it turns out.
I’m talking on BBC Radio Leicester every other Wednesday at 1.10 am just after the news. Have a listen in on BBC Sounds, or DAB.
I’m also on twitter @kgimson and karengimson1 on instagram
More reading! I also write for Garden News Magazine. Here’s my most recent column.